

Use braided sleeving on any run that flexes or rubs, and use split (flat) loom or convoluted tubing where impact and splash are the bigger threats. That single rule solves most of the decision. Doors, hinge points, and under-dash harnesses need braid because they move constantly. Engine bays, wheel wells, and undercarriage runs need split loom because rocks and standing water do more damage there than friction ever will.
The numbers back this up. PET braided sleeving typically holds up to continuous temperatures of 257 to 302°F, while standard split loom starts softening around 200 to 220°F. For wire selection itself, SAE J1128 and ISO 6722 remain the governing references for automotive-grade insulation. Wheellightexpress specifies braided protection for LED harnesses at any moving or flexing point, and recommends layering braid inside loom wherever a single run crosses more than one stress zone.
- Doors, hinges, under-dash: braided sleeving
- Engine bay, wheel wells, undercarriage: split loom or convoluted tubing
- Firewall pass-throughs and multi-zone runs: braid inside loom, sealed with heat-shrink collars
Key Takeaways
Choosing between braided and flat harness protection comes down to matching the material to the dominant stress at each specific location, not picking one style for the whole vehicle.
| Point | Details |
|---|---|
| Match location to material | Braid for flex points like doors and hinges; split loom for crush and splash zones like wheel wells. |
| Check temperature ratings | PET braid handles roughly 257 to 302°F, while split loom softens near 200 to 220°F. |
| Layer for multi-zone runs | Combine braid inside loom wherever a harness crosses abrasion and impact hazards in one run. |
| Size correctly first | Oversized loom lets wires shift internally, and undersized braid compresses insulation at bends. |
| Buy pre-assembled when possible | Wheellightexpress offers ready-made harness leads and replacement harnesses built to correct spec for LED kits. |
Table of Contents
- Braided vs Flat Harness: A Quick Comparison
- How Braided and Flat Harnesses Are Built
- Which Harness Type Fits Which Vehicle Location?
- How Do You Install and Service Each Harness Type?
- Buyer’s Checklist: What to Ask Before You Order a Harness
- Why Wheellightexpress Specifies Braided Protection for LED Harness Runs
- Does Braided or Flat Harness Design Affect Electrical Performance?
- What Safety Standards Apply to LED Wiring Harnesses?
- Braided vs Flat Harness: What Builders Need to Know
- Ready-Made Harnesses for Your Next LED Install
- Sources
Braided vs Flat Harness: A Quick Comparison
Neither material wins across the board, which is exactly why so many builders get this choice wrong. Braided sleeving wins on abrasion and flexibility. Split loom wins on impact and splash resistance. Pick based on which failure mode actually threatens the run you’re protecting.
| Dimension | Braided Sleeving | Flat / Split Loom |
|---|---|---|
| Abrasion resistance | High, wears gradually and visibly | Moderate, seam is a weak point |
| Impact / crush resistance | Moderate | High |
| Continuous heat rating | ~257–302°F (PET) | ~200–220°F before softening |
| Moisture / splash blocking | Breathable, resists condensation buildup | Better splash barrier when seam is sealed |
| Flexibility / bend fatigue | Excellent | Fair, seam can spread over time |
| Ease of adding wires later | Requires depinning or re-sleeving | Easy side-entry access |
| Noise / rattle risk | Low, snug woven fit | Can rattle if oversized |
| Cost | Slightly higher per foot | Generally lower |
Split loom resists impact and splash better while braided sleeving resists surface abrasion and frays gradually, giving you a visible warning sign before insulation gets exposed. That gradual fraying is a genuine advantage during inspection. Where a harness crosses both hazard types, running braid inside a length of loom covers both bases at once.
How Braided and Flat Harnesses Are Built
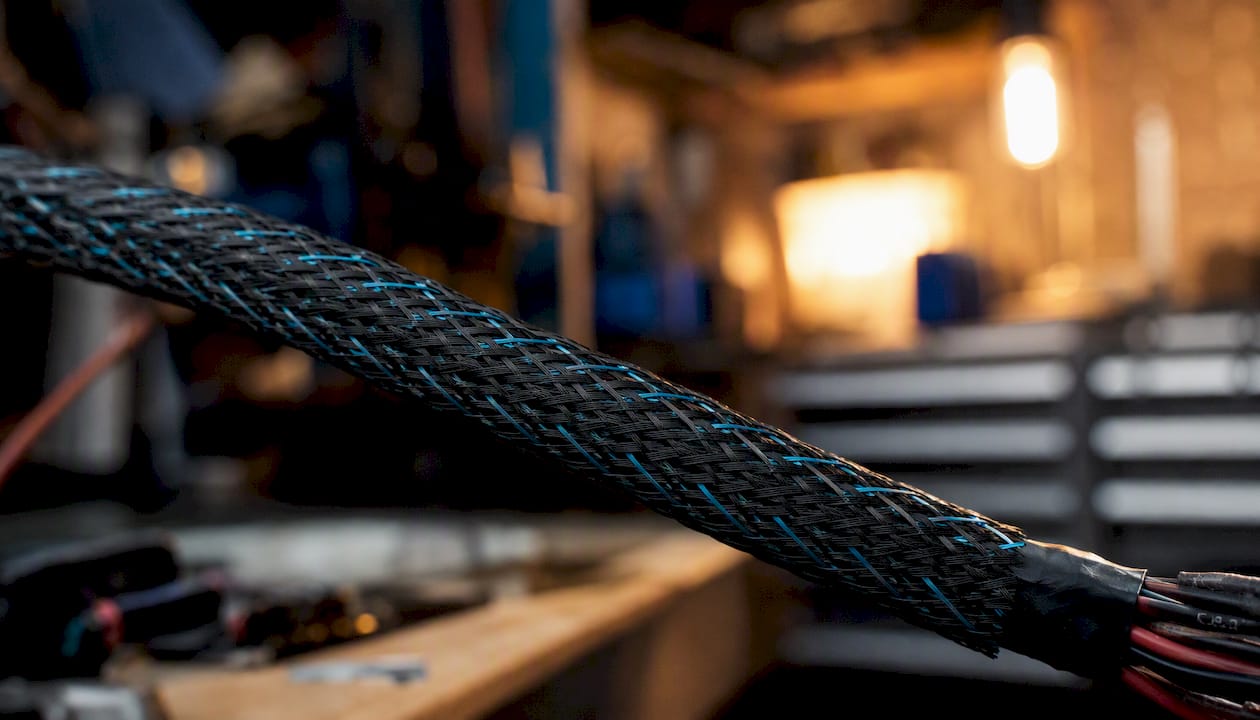
Braided sleeving is a tight, woven tube of PET, nylon, fiberglass, or metal filaments. Because the strands cross each other diagonally, the material expands and contracts to fit irregular bundles and distributes mechanical load across dozens of individual fibers instead of concentrating it in one spot. Braiding is a structural decision that prevents wire-to-wire rubbing inside the bundle and makes troubleshooting a Y-branch harness far easier, since each leg stays visually distinct.
Split loom is extruded plastic tubing with a single longitudinal slit that lets you snap wires in from the side. That seam is also its weak point. Under sustained vibration, the seam can spread, or “creep,” letting grit and moisture work their way inside. Braid doesn’t have a seam to fail. Instead, it fatigues at the fiber level, so you’ll see fraying and thinning strands well before any wire gets exposed.
Common failure modes in the field:
- Split loom seam spread from repeated flexing near a hinge
- PET braid embrittlement after prolonged heat exposure near an exhaust manifold
- Trapped moisture inside sealed loom that never got a drain point
- Localized fraying on braid where it contacts a sharp chassis edge without grommet protection
Pro Tip: Use self-closing (wrap-around) braid for retrofits since it snaps over an existing harness without disconnecting anything, and save threaded braid for factory builds where you can slide it on before terminating connectors.
Braided sleeving isn’t a hermetic seal, and that’s the point. Its breathability prevents the trapped condensation that fully sealed tubing can produce over a season of temperature swings.
Which Harness Type Fits Which Vehicle Location?
Match the material to the dominant stress, not to habit. A harness that lives at a hinge point faces a completely different threat than one buried in a wheel well, and treating them the same is how builders end up chasing intermittent shorts a year later.
- Doors and hinges: constant flex demands braided sleeving; split loom will crack at the seam within a season or two.
- Firewall pass-throughs: use a grommet plus a short length of braid on the cabin side and loom on the engine side, since the run crosses two very different environments in a few inches.
- Engine bay splash zones: split loom or convoluted tubing handles road spray and heat cycling better than open weave.
- Undercar and wheel wells: crush resistance matters most here, so split loom or heavy convoluted tubing beats braid.
- Under-dash and cabin runs: low heat, low moisture, but tight bends favor braid’s flexibility.
- Near-exhaust or turbo-adjacent runs: standard PET braid isn’t enough. Step up to fiberglass or Nomex sleeving rated well above 250°F.
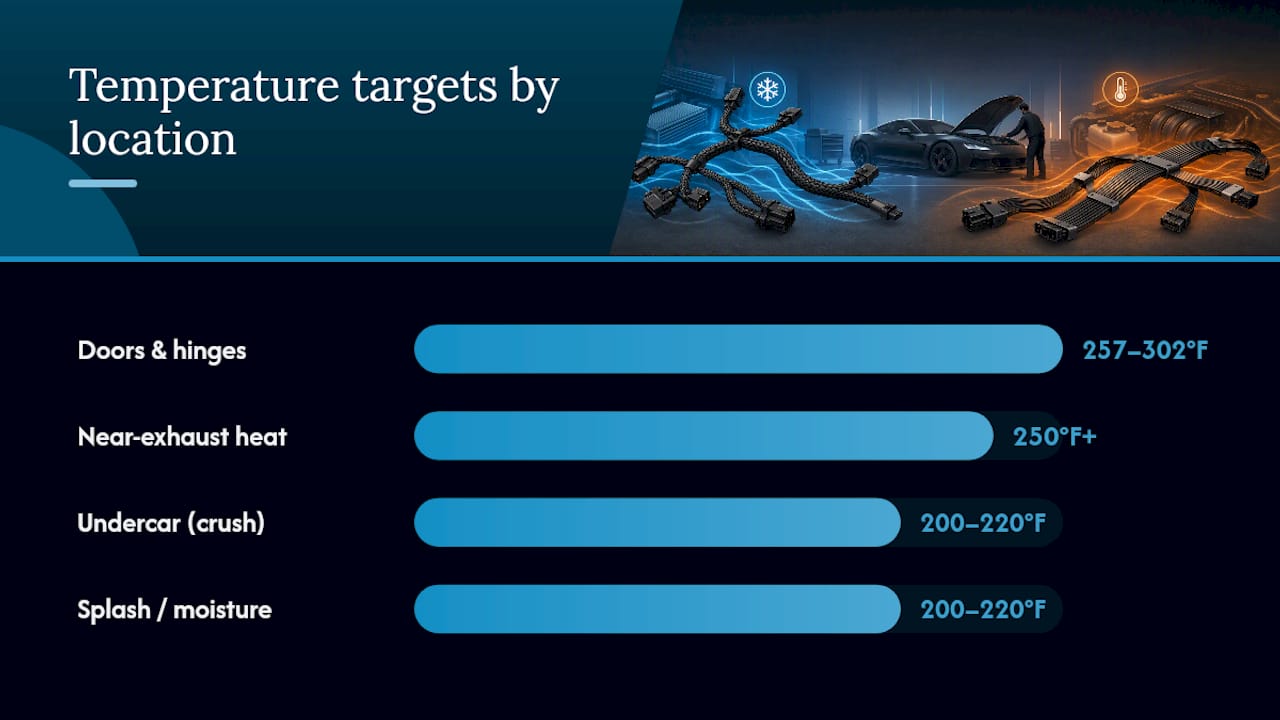
| Stress pattern | Recommended material | Temperature target |
|---|---|---|
| Repeated flex (doors, hinges) | Braided sleeving | 257–302°F (PET) |
| Crush / impact (undercar) | Split loom or convoluted tubing | 200–220°F |
| Splash / moisture | Split loom, sealed seams | 200–220°F |
| Near-exhaust heat | Fiberglass or Nomex braid | 250°F+ |
| Multi-zone routing | Braid inside loom | Match the hottest zone |
When routing crosses multiple stress zones, layering braid inside loom gets you abrasion resistance and impact protection in one pass. Sizing matters more than most builders assume: oversized loom lets wires shift and wear internally, while undersized braid compresses insulation and creates its own hot spots.
How Do You Install and Service Each Harness Type?
Getting the material right only helps if the installation holds up. A perfect harness spec ruined by sloppy termination fails just as fast as the wrong material choice.
- Anchor every run at consistent intervals, never letting slack hang near moving parts.
- Compress braid ends with heat-shrink tubing so the weave can’t unravel at the termination point.
- Seal split loom seams with electrical tape or adhesive-lined heat-shrink collars at any point where the seam faces upward or catches spray.
- Add grommets anywhere a harness passes through sheet metal, especially firewall penetrations.
- Route for future access. Split loom lets you side-load a new wire without depinning; braid usually means partial re-sleeving.
- Strain relief at every connector, not just at the harness ends
- Edge protection wherever the harness contacts a metal chassis rail
- A drip loop below any connector exposed to splash
Pro Tip: Plan harness length and connector placement before you cut sleeving. Braid goes on far easier during the build than as a retrofit, and self-closing braid is worth the small upcharge if you’re wrapping an existing harness in a finished vehicle.
Buyer’s Checklist: What to Ask Before You Order a Harness
Before you order sleeving or a pre-built harness, confirm these specs rather than assuming they match your application.
- Continuous temperature rating, stated in degrees, not just “high heat”
- Material family: PET for general use, fiberglass or Nomex for exhaust-adjacent runs
- Filament density or weave tightness, since a loose weave abrades faster
- Whether the seller pre-installs braid during assembly or ships it separate
- Whether you can add wires later without full depinning
- End-treatment supplied: heat-shrink, adhesive-lined boots, or none
Avoid oversized loom that lets wires shift internally, and avoid undersized braid that compresses insulation at bends. Both mistakes shorten harness life more than picking the “wrong” material in the first place.
Why Wheellightexpress Specifies Braided Protection for LED Harness Runs
Wheellightexpress designs its lighting kits and harness components in Louisiana, and that hands-on design process is exactly why braid gets specified on any LED run that flexes: doors, tailgates, and under-dash routing where wiring moves every time the vehicle does. Christopher, a Wheellightexpress contributor, notes that layered protection, braid inside loom, gets used whenever a single harness crosses more than one stress zone on a build.
Industry references like Coats Group and Techflex back this up at scale: braided protection commonly outlasts convoluted tubing in heavy-duty environments, with Coats citing service life estimates roughly three to five times longer for braid in comparable conditions.
- Braid reduces micro-vibration wear on insulation over thousands of flex cycles
- Layered approaches (braid inside loom) protect multi-zone runs without over-speccing the whole harness
- Wheellightexpress backs its harness components with a satisfaction guarantee and U.S.-based design oversight
Does Braided or Flat Harness Design Affect Electrical Performance?
Mechanical protection is only half the story. Braided metal sleeving, particularly copper or tinned-copper braid, also functions as a partial EMI/RFI shield, which matters more than most builders realize once you start stacking LED drivers, controllers, and amplifiers on the same electrical system.
LED drivers, especially PWM-dimmed controllers, generate switching noise across a wide frequency range. Flat or split-loom harnesses offer no shielding at all; they’re purely mechanical protection. A run of unshielded flat harness sitting parallel to an antenna cable or a sensitive sensor wire can introduce flicker or interference that’s maddening to diagnose because it comes and goes with engine RPM or dimmer position.
Metallic braid, by contrast, provides a grounded path that intercepts radiated noise before it couples into adjacent wiring. This isn’t a reason to braid every wire in the vehicle. Standard PET or nylon braid offers zero EMI shielding since it’s a non-conductive weave chosen purely for abrasion resistance. If shielding is the actual goal, you need braid made from conductive filament, not just any woven sleeve.
For most truck and off-road LED installs, EMI issues stay minor unless you’re running long parallel runs near amplifiers or aftermarket radios. When they do show up, the fix is routing LED power leads away from signal wiring first, and reaching for shielded braid second.
What Safety Standards Apply to LED Wiring Harnesses?
Automotive LED harnesses aren’t governed by a single dedicated LED standard. Instead, they inherit requirements from general vehicle wiring practice: SAE J1128 for insulation and conductor construction, and ISO 6722 for thin-wall automotive cable used widely outside North America. Both specify temperature ratings, abrasion resistance, and flame retardance thresholds that generic hardware-store wire simply doesn’t meet.
The practical safety gap shows up most often in two places. First, fuse protection: any LED harness pulling meaningful current, rock lights, light bars, wheel rings, needs an inline fuse sized to the actual draw, placed as close to the power source as possible. Second, insulation quality: low-strand-count wire work-hardens under vibration and cracks at flex points, which is exactly the failure mode braid protection is designed to slow down, not eliminate.
Compliance differences matter most at connection points. A harness that meets SAE J1128 on the wire itself can still fail inspection or cause a fire risk if the connectors aren’t rated for the current load or the ground path is undersized. Builders adding aftermarket LED kits should treat the harness, the fuse, and the ground connection as one system to verify, not three separate afterthoughts.
Braided vs Flat Harness: What Builders Need to Know
Most wiring guides treat this like a simple either/or choice, and that’s where they lead builders astray. The honest answer is that the “better” harness depends entirely on which failure mode threatens the specific inch of wire you’re protecting, and pretending one material wins everywhere ignores how differently a door hinge and a wheel well actually behave.
What’s overrated: chasing the highest possible temperature rating on every single run. Most cabin and under-dash wiring never sees conditions anywhere near a braid’s upper limit, so paying for fiberglass sleeving there wastes money that would matter more spent on proper strain relief.
What’s underrated: sizing. Builders obsess over material choice and then grab whatever diameter loom or braid is on the shelf, which causes more premature failures than picking the “wrong” material ever does. Get the fit right first. Then worry about weave type.
If you take one thing from this guide, prioritize location-driven decisions over blanket rules, and treat sizing with the same seriousness you give temperature ratings.
Ready-Made Harnesses for Your Next LED Install
If you’d rather skip cutting and sleeving your own wire, Wheellightexpress builds pre-assembled harness options designed for exactly the LED kits discussed here, so you get correctly rated wire and proper end-treatment without guessing at sleeving specs yourself.

Start with the wire harness leads and wires page if you need clean, ready-to-install leads for a new light kit, or check the replacement wire harness for all lighting listing if you’re swapping out a worn factory harness. Before ordering, measure your actual run length and note the ambient temperature at each pass-through so you can confirm the spec sheet matches your install location. If your build has an unusual routing challenge, firewall crossings, multi-zone runs, tight hinge access, reach out to Wheellightexpress support for guidance on harness customization before you buy.
Sources
The technical claims in this guide draw on established harness manufacturing and materials references, along with practical installation guidance from industry partners.
- Wire Harness Braiding: Performance & Lifespan Guide
- Split Loom vs Braided Sleeving: Which Protects Better?
- Benefits of braided wire harness assemblies | Coats Group plc
- Wiring harness materials guide
Browse wire harness leads and wires or the full Wheellightexpress catalog when you’re ready to order harness components built to these specs.