
Picking the right LED strips for your vehicle sounds straightforward until you start comparing product specs and realize every brand lists numbers differently. When you try to compare lumen output LED strips across brands, you run into total lumens, lumens per meter, watts per reel, and a dozen other figures that make apples-to-apples comparison nearly impossible. Get it wrong and you end up with strips that are either too dim to make an impact or so bright they create glare and distract other drivers. This guide cuts through the confusion and gives you a clear, practical method for reading, converting, and comparing LED strip brightness specs for any automotive application.
Table of Contents
- Key takeaways
- How to compare lumen output LED strips fairly
- Beyond raw lumens: what else affects brightness
- Step-by-step process for comparing strips
- Common mistakes when comparing LED strip brightness
- Verifying your results after installation
- My take on lumen comparisons for automotive LED strips
- Get the right LED strips from Wheellightexpress
- FAQ
Key takeaways
| Point | Details |
|---|---|
| Normalize to lm/ft first | Always convert specs to lumens per foot before comparing strips across brands or reel sizes. |
| Lumens alone aren’t enough | Beam angle, LED density, and mounting geometry all affect how bright a strip actually looks on your vehicle. |
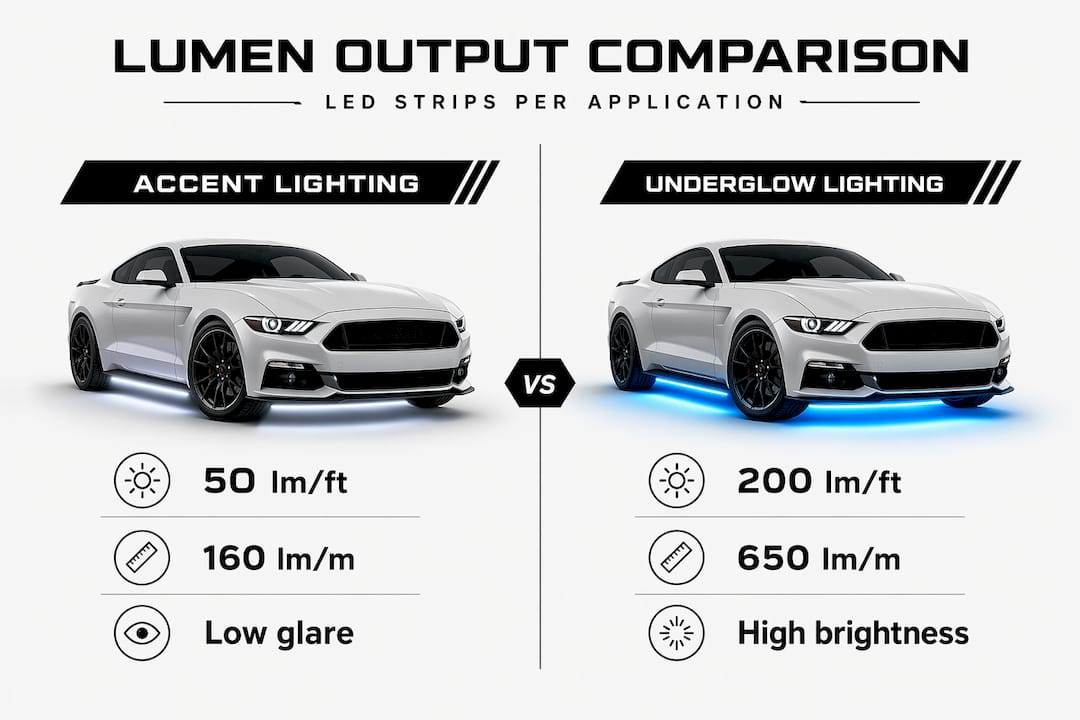
| Match brightness to application | Accent and underglow lighting needs 150 to 250 lm/ft; task lighting zones may need significantly more. |
| Efficacy matters for heat | Comparing lm/W alongside lm/ft helps you avoid strips that run hot and fail early in automotive installs. |
| Install brighter, then dim | Choose a higher-output strip with a dimmable driver so you can dial in the exact look you want. |
How to compare lumen output LED strips fairly
The single biggest mistake enthusiasts make is comparing total lumens from a reel without accounting for length. A 5-meter reel rated at 2,000 total lumens sounds impressive next to a 2-meter reel rated at 900 total lumens. But the shorter reel is actually brighter per foot. Normalizing to lumens per foot or lumens per meter is the only way to make a fair LED strip lumen comparison.
Here is how the key metrics break down:
- Lumens per meter (lm/m): The standard unit most manufacturers publish. Typical LED strips range from 200 to over 2,000 lm/m depending on LED type and density.
- Lumens per foot (lm/ft): The preferred unit for most North American enthusiasts. Convert using the formula: lm/ft = lm/m ÷ 3.28.
- Watts per meter (W/m): Tells you the power draw. Pair this with lm/m to calculate luminous efficacy.
- Luminous efficacy (lm/W): Dividing total lumens by total watts gives you lm/W for efficiency comparison. Higher lm/W means more light for less heat and power.
Here is a quick reference table to anchor your comparisons:
| Application | Typical lm/ft | Typical lm/m | Efficacy target |
|---|---|---|---|
| Subtle accent lighting | 50 to 150 | 165 to 490 | 80+ lm/W |
| Underglow / wheel arches | 150 to 250 | 490 to 820 | 90+ lm/W |
| Ground projection / puddle | 250 to 400 | 820 to 1,310 | 100+ lm/W |
| High-output architectural wash | 450 to 600 | 1,475 to 1,970 | 110+ lm/W |
Pro Tip: When you pull a spec sheet, look for the lm/m figure first, then divide by 3.28 to get lm/ft. If the brand only lists total lumens, divide by the reel length in feet to normalize it yourself before you compare LED strip specifications.
Beyond raw lumens: what else affects brightness
Raw lumen numbers get you in the right ballpark, but they don’t tell the whole story. Two strips with identical lm/ft ratings can look completely different on your vehicle depending on several photometric factors.
Beam angle is one of the most overlooked specs. A strip with a 120-degree beam angle spreads light wide and soft, which works well for underglow. A strip with a 60-degree angle concentrates light in a tighter cone, which can create hotspots and glare if mounted close to a surface. Beam angle and mounting height together determine the delivered illuminance in lux on your target surface, which is what your eye actually perceives.
LED density and technology matter just as much. COB and high-density SMD strips produce smoother, more uniform light even at the same lumen output as a lower-density strip. Fewer LEDs per meter creates visible dots and hotspots that look cheap on a finished vehicle, regardless of how bright the spec sheet says the strip is.
Correlated color temperature (CCT) affects perceived brightness too. A 6,000K cool white strip will appear brighter to the human eye than a 3,000K warm white strip at the same measured lumen output. For most automotive applications, 5,000K to 6,500K reads as crisp and modern. Warmer temperatures suit interior cabin lighting where comfort matters more than punch.
- CRI (Color Rendering Index): A CRI of 80 or above makes colors on your vehicle look accurate and vivid. Lower CRI strips can make paint and body panels look washed out even when they are technically bright.
- Mounting geometry: Strips mounted flush in a channel reflect light differently than strips mounted at an angle. Plan your mounting before you finalize your lumen target.
Pro Tip: Check whether the manufacturer provides an IES photometric file. That file tells you exactly how light distributes from the strip, which is far more useful than a single lumen number when you are planning a wheel arch or rocker panel install.
Step-by-step process for comparing strips
Follow this sequence every time you evaluate strips for a vehicle lighting project. It keeps comparisons honest and saves you from buying twice.
- Gather normalized specs. Pull the lm/m or lm/ft figure from each product’s datasheet. If only total lumens are listed, divide by reel length. Use the lm/ft conversion (lm/m ÷ 3.28) to put every strip on the same scale.
- Identify your brightness band. Decide which application category fits your project. Accent and underglow work best at 150 to 250 lm/ft to avoid glare. Ground projection and puddle lighting can go higher.
- Compare efficacy. For each strip in your brightness band, calculate lm/W. High-efficacy strips run cooler, last longer, and draw less current from your vehicle’s electrical system.
- Check LED density and beam angle. Confirm the strip has enough LEDs per meter for smooth output and a beam angle suited to your mounting geometry.
- Verify dimmability. Confirm the strip is compatible with a PWM or 0-10V dimmable driver. Dimmable LED strips give you full control over brightness and extend LED life by reducing thermal stress.
- Cross-check datasheets. Reputable brands publish full spec sheets. If a brand only lists marketing claims without lm/m, watts per meter, and CCT, that is a red flag. A well-documented strip like those rated at 1,300 to 1,450 lm/m with full power and CRI specs gives you a reliable benchmark to compare against.
You can use the wheel light sizing guide from Wheellightexpress to match lumen output recommendations to specific vehicle lighting zones.
Common mistakes when comparing LED strip brightness
Even experienced builders fall into these traps. Knowing them upfront saves time and money.
- Comparing total lumens instead of lm/ft. A 16-foot reel at 1,600 total lumens is 100 lm/ft. A 5-foot reel at 900 total lumens is 180 lm/ft. The shorter reel is brighter. Always normalize before you buy.
- Ignoring beam angle. Choosing a strip with a tight beam angle for a close-mount application creates glare that looks unprofessional and can distract other drivers.
- Skipping thermal planning. High-output strips generate real heat. Without proper aluminum channel mounting or adequate airflow, heat builds up and shortens LED life significantly on automotive installs.
- Forgetting dimming compatibility. Buying a bright strip without verifying dimmer compatibility locks you into one brightness level. That is rarely ideal once the strip is installed and you see it in different lighting conditions.
- Trusting marketing photos over specs. Promotional images are shot under controlled conditions. Always base your decision on the lm/ft figure and the datasheet, not the product photo.
“Professional installers prefer to install brighter and then dim down rather than install underpowered strips that look cheap or create safety concerns.” (source)
Verifying your results after installation
Once your strips are mounted, the real test begins. Here is how to confirm your LED strip brightness guide choices are working as intended.
Start by observing uniformity. Walk around the vehicle in a dim environment and look for hotspots, dark gaps, or uneven color. If you see dots instead of a continuous line of light, the LED density was too low for that mounting distance. You may need to reposition the strip or switch to a higher-density option.
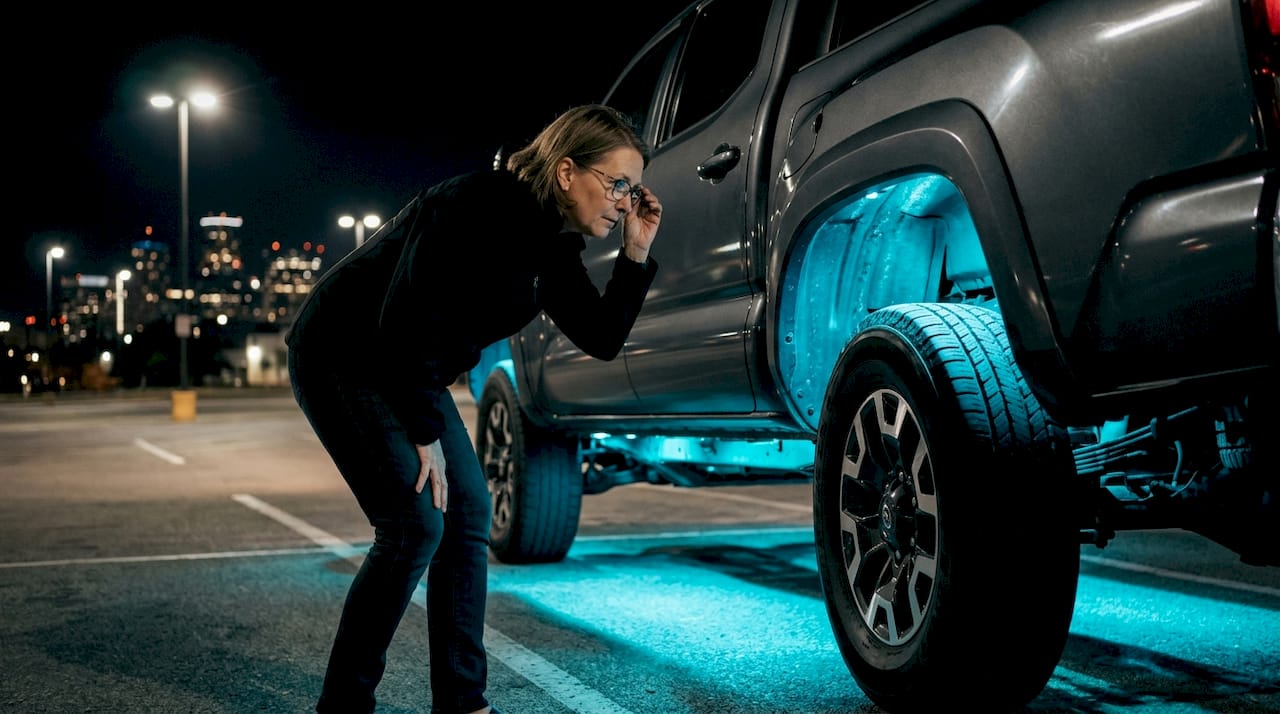
Next, assess glare. Stand at the angles where other drivers or pedestrians would view your vehicle. If the strips are uncomfortable to look at directly, you either need to recess them further or reduce brightness with a dimmer. Delivered illuminance on the target surface is what matters for function. Glare means too much light is escaping at the wrong angle.
Check your strips for heat after 30 minutes of continuous operation. If the strip or the surface it is mounted on is too hot to touch comfortably, you have a thermal problem. Either the strip is running over its rated wattage, or it needs better heat dissipation through an aluminum mounting channel.
Pro Tip: Use a simple lux meter app on your phone to measure illuminance on the ground or wheel arch surface before and after adjustments. It won’t replace a professional photometer, but it gives you a consistent reference point when you are dialing in brightness across multiple strips.
Finally, monitor the strips over the first few weeks of use. Premature dimming or color shift is an early sign of thermal stress. If you catch it early, adjusting your dimmer setting or improving mounting can extend strip life significantly.
My take on lumen comparisons for automotive LED strips
I’ve seen a lot of vehicle lighting builds go sideways because the builder focused entirely on getting the highest lumen number they could find. In my experience, that almost always leads to a glary, uncomfortable result that looks worse than a well-planned moderate-output install.
What I’ve found actually works is starting with the brightness band appropriate for the application, then selecting the most efficient strip within that band. A 200 lm/ft strip with a 110 lm/W efficacy rating will outperform a 350 lm/ft strip running at 70 lm/W in terms of longevity, heat, and power draw. The brighter strip often looks worse too, because the excess light scatters in ways that expose mounting imperfections.
The other thing I’ve learned is that dimmable installs are non-negotiable. What looks perfect in your garage at night may be overwhelming in a parking lot. Building in dimming control from the start is the single best decision you can make for long-term satisfaction.
My honest recommendation: plan your mounting geometry first, pick your brightness band second, then filter by efficacy and LED density. The lumen number is just your starting filter, not your final answer.
— Christopher
Get the right LED strips from Wheellightexpress
At Wheellightexpress, we design all of our LED strips and wire harnesses right here in Louisiana, which means you get products built specifically for automotive applications, not repurposed residential tape light. Every product we offer comes with documented specifications so you can make a real LED strip lumen comparison before you buy.
If you are ready to upgrade your vehicle’s lighting, start with our replacement wheel light strips, which are engineered with automotive-grade output and known lumen ratings. For F-150 and Super Duty owners, our XB LED puddle lights deliver precise brightness for both aesthetics and function. Pair any strip with our replacement wire harness to get clean power delivery and proper dimming support from day one. We also offer financing options so you can get the full setup you want without waiting.
FAQ
What does lm/ft mean for LED strips?
Lm/ft stands for lumens per foot, which measures how much light an LED strip produces for every foot of its length. It is the most reliable metric for comparing LED strip brightness across different brands and reel sizes.
How many lumens per foot do I need for underglow lighting?
For automotive underglow and wheel arch lighting, 150 to 250 lm/ft is the recommended range. Going higher increases glare risk and can draw more current than your vehicle’s circuit is designed to handle.
How do I convert lumens per meter to lumens per foot?
Divide the lm/m figure by 3.28 to get lm/ft. For example, a strip rated at 328 lm/m equals 100 lm/ft, making it straightforward to normalize specs from international manufacturers.
Why do two strips with the same lumens look different on my car?
Beam angle, LED density, and mounting height all affect how light distributes on the surface. Delivered illuminance in lux depends on all three factors, not just the lumen rating on the package.
Should I use a dimmable LED strip for automotive lighting?
Yes. Dimmable strips let you adjust brightness for different conditions and extend LED lifespan by reducing thermal load. Installing a brighter strip with dimming control is always better than installing a fixed-output strip that you cannot adjust later.