

If your wheel lights fail, most warranties cover manufacturing defects and electrical failures like dead LEDs, faulty wiring, or a bad connection straight out of the box, usually described with terms like “limited” or “limited lifetime.” The fastest way to a resolution is simple: document the problem, gather your proof, and contact the seller or manufacturer before you do anything else. At Wheellightexpress, we build every kit to hold up, but when something does slip through, the claims process only moves as fast as the paperwork you bring to it.
Here’s what to do in the first ten minutes after you spot a problem:
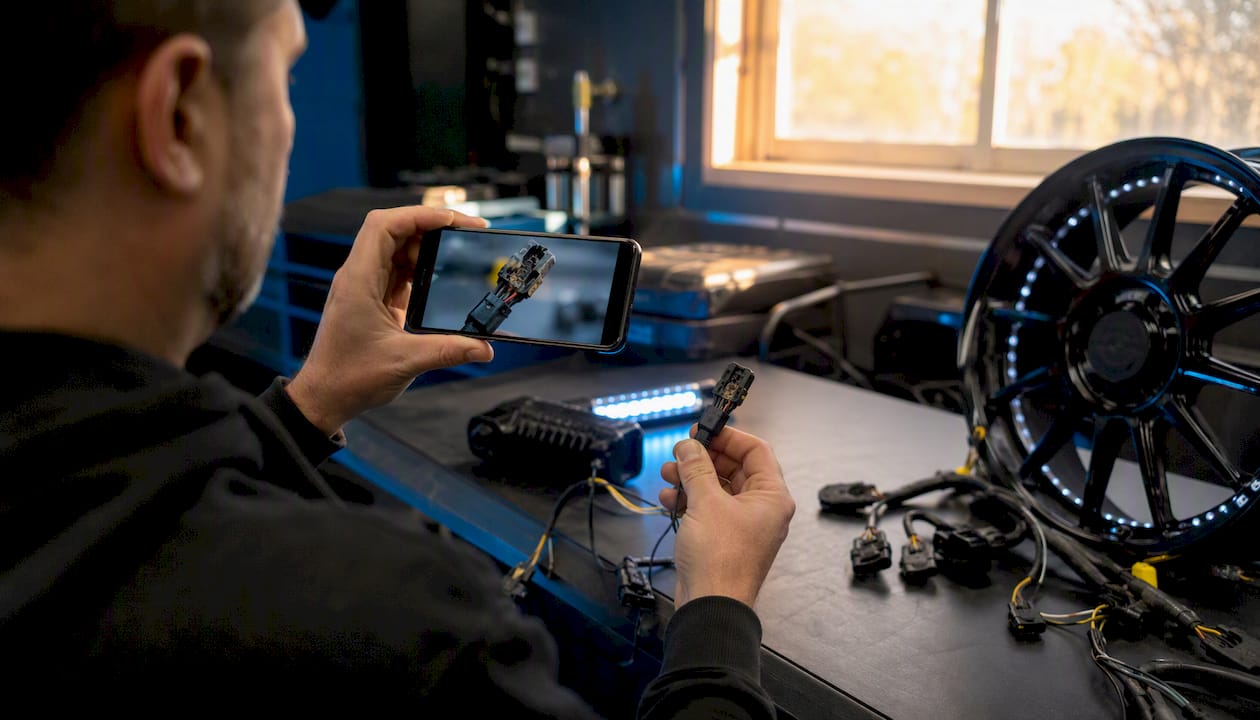
- Gather your proof. Find your order number, snap clear photos of the defect, and record a short video if the fault is intermittent (flickering, one dead segment, a remote that won’t pair).
- Contact support first. Reach out to the manufacturer or retailer, such as Wheellightexpress support, before attempting a return or a fix yourself.
- Expect one of four outcomes. Most valid claims end in repair, full replacement, refund, or store credit, depending on the product and the damage.
Take the photos now, even before you email anyone. A picture taken the moment you notice the issue is worth more than a description written from memory three days later.
Key Takeaways
A wheel lights warranty typically requires an order number, photo or video evidence, and prompt contact with support to resolve a claim through repair, replacement, refund, or store credit.
| Point | Details |
|---|---|
| Act fast with proof | Gather your order number and clear photos or video the moment you spot a defect. |
| Read the exclusion list | “Limited lifetime” coverage still excludes misuse, water damage, and installation errors. |
| Avoid the top denial triggers | Physical damage, modifications, and missing proof of purchase cause most denials. |
| Know return vs. warranty | A 30-day return window is separate from warranty coverage, which can run far longer. |
| Wheellightexpress speeds resolution | U.S.-designed kits, clear SKU tracking, and flexible outcomes make claims easier to close. |
Where to Start Your Claim or Learn More
- Begin registration or check installation specs on the Wheel Light Sizing Guide before filing anything.
- Find the exact part you need on the replacement wheel light strip page to reference the correct SKU in your claim.
- Locate compatible connectors and leads on the wire harness product page if wiring is the issue.
- Use the Wheellightexpress homepage as your fallback for support contact links and general product information.
Table of Contents
- What Does a Wheel Lights Warranty Typically Cover?
- What’s Covered and What Gets Denied
- Do You Need to Register Your Wheel Lights?
- How to File a Wheel Lights Warranty Claim
- What Happens Once a Claim Is Approved?
- Why Warranty Claims Get Denied
- Filing a Claim Without a Receipt
- Returns vs. Warranty Claims: Know the Difference
- Protecting Your Warranty Before and After Installation
- How Wheellightexpress Handles Warranty Claims
- Get Your Kit Running Right, Or Get It Replaced Fast
What Does a Wheel Lights Warranty Typically Cover?
Warranty length is the first thing to check, and it varies more than most buyers expect. Some sellers cover parts for 30 or 60 days, others extend to 6 months or a full year, and a handful advertise coverage described as “limited lifetime” on select components. None of these numbers are universal. They’re set by each manufacturer, and the fine print determines what actually counts as a covered failure.
“Limited lifetime” sounds generous, and it can be, but it almost never means unconditional. In practice, it usually covers material or workmanship defects for as long as the product is in normal service, while excluding wear items, misuse, and any damage tied to installation. One aftermarket lighting brand advertises lifetime coverage on select wheel light components while explicitly carving out installation damage and misuse. That pattern is standard across the category. Read the exclusions list as carefully as the headline coverage term.
Shorter, fixed-term warranties tend to ask for less paperwork upfront but expire fast. A one-year policy is a common middle ground. Lightwheel, for example, documents a 1-year warranty on manufacturing defects paired with a 30-day return window and prepaid shipping labels once a defect is verified. That combination, a firm deadline plus a documented process, is what most buyers should expect from a well-run policy.
| Warranty Label | Typical Duration | Common Coverage Notes |
|---|---|---|
| Short-term | 30 to 60 days | Covers dead-on-arrival units and obvious defects; fastest to claim, tightest deadline. |
| Standard | 6 months to 1 year | Covers manufacturing defects and premature LED failure under normal use. |
| Extended | 1 to 2 years | Broader window, but often requires registration or proof of installation method. |
| Limited lifetime | Life of the product | Covers workmanship on non-wear parts; excludes misuse, water damage, and modifications. |
- Shorter windows (30/60/90 days) usually apply to accessories like remotes or connectors.
- Six-month to one-year terms are typical for LED strips and wiring harnesses.
- Limited lifetime coverage almost always excludes wear-and-tear parts like connectors and fuses.
What’s Covered and What Gets Denied
The gap between “covered” and “not covered” trips up more customers than the warranty length ever does. Knowing the difference before you install anything saves you a frustrating conversation later.
Typically covered:
- Manufacturing defects present at the time of purchase
- LEDs that fail or dim significantly under normal driving conditions
- Wiring harnesses with factory soldering or connector defects
- Remotes that fail to pair or lose range shortly after purchase
Typically not covered:
- Damage from incorrect installation (reversed polarity, pinched wiring, improper grounding)
- Physical damage from road debris, collisions, or off-road impacts
- Water intrusion when the product wasn’t rated for that exposure
- Modifications made by the customer or a third-party installer
- Normal wear on connectors, fuses, and mounting hardware
Coverage also varies by component. LED strips are usually judged on brightness and color consistency, wiring harnesses on connector integrity, and remotes on pairing reliability and battery life. A dead LED segment on a strip is a different claim than a remote that won’t sync, and manufacturers frequently apply different proof requirements to each.
One more thing worth saying plainly: warranty abuse gets flagged. Manufacturers compare claim photos against installation guides, and a pattern of “defect” claims tied to obvious modification attempts gets denied fast. Honest documentation isn’t just good practice, it’s what keeps the whole system fair for everyone filing a legitimate claim.
Do You Need to Register Your Wheel Lights?
Registration requirements split roughly down the middle across the industry. Some brands require it to activate coverage at all; others treat it as optional but strongly recommended because it speeds up verification.
Here’s what typically counts as valid proof of purchase:
- Your original order number or confirmation email
- A credit card or bank statement showing the transaction
- An invoice from an authorized reseller
- Photos of the original packaging showing the SKU or serial number, when one is printed
Pro Tip: If your product doesn’t have a visible serial number, photograph the packaging and any included documentation before you throw it away. Manufacturers often use packaging photos to confirm the batch and production run when a serial isn’t available.
Registration, when a manufacturer requires it, usually happens on a dedicated page and takes a few minutes. Doing it right after installation, while your receipt and packaging are still on hand, means you won’t be digging through old email folders six months later. Registering early also tends to shorten the verification step, since the manufacturer already has your order tied to a specific product and date.
If you bought through a reseller or a used marketplace, the process gets more complicated. The manufacturer’s warranty typically follows the original buyer and the original purchase date, not the resale transaction, so a used unit purchased secondhand may already be partway through its coverage window, or outside it entirely. Always ask the seller for the original order details before assuming full coverage applies.
How to File a Wheel Lights Warranty Claim
Filing a clean claim the first time cuts weeks off the process. Follow these steps in order:
- Locate your order number and proof of purchase. Pull the confirmation email, receipt, or account order history before contacting anyone.
- Document the defect thoroughly. Take multiple high-resolution photos from different angles, plus a short video if the fault is intermittent or hard to describe in words.
- Check registration and RMA requirements. Some manufacturers issue a Return Merchandise Authorization number before accepting any shipped parts; sending something back without one can delay processing.
- Submit your claim through the correct channel. Email or open a support ticket including your order number, the SKU or part number, photos, video, a brief written description of the fault, and notes on how the product was installed.
- Follow the return instructions exactly if parts are requested. Ship only what’s asked for, to the address provided, and keep tracking information until the claim closes.
Manufacturers generally follow a similar review pattern: order number, description, and photo or video evidence come first, and some will request the defective part be shipped in for testing before issuing a replacement.
Pro Tip: A ten-second video showing an intermittent flicker, paired with a timestamped photo of the connector, does more to prove your case than three paragraphs of written explanation. Vague descriptions like “sometimes it doesn’t work” are the number one reason claims get bounced back for more information.
What Happens Once a Claim Is Approved?
Approved claims resolve in one of a handful of standard ways, and which one you get usually depends on stock availability and the nature of the defect.
- Repair. Rare for wheel lights given the low cost of parts, but possible for higher-end kits with replaceable components.
- Replacement parts. The most common outcome for a single failed LED strip or harness.
- Full replacement unit. Used when the defect affects the whole kit rather than one component.
- Refund. Typically offered when a replacement isn’t available or the customer prefers not to reorder.
- Store credit. Common for opened or installed products that can’t be resold as new.
Shipping costs follow a predictable pattern, too:
- If the manufacturer confirms a defect before you ship anything, they often provide a prepaid return label.
- If the claim requires inspection first, you may need to cover outbound shipping, which gets reimbursed if the defect is confirmed.
- Replacement units are almost always shipped to you at the manufacturer’s expense once the claim is approved.
Replacement parts are occasionally refurbished rather than brand new, particularly for older product lines. Reputable sellers disclose this in their warranty language rather than burying it, so read the specific wording before assuming every replacement ships new in box.
Why Warranty Claims Get Denied
Most denials trace back to a handful of repeat offenders, and nearly all of them are avoidable with a little extra care during installation.
- Physical damage. Cracked housings, crushed strips, or impact marks read as accidental damage, not a manufacturing flaw.
- Third-party modifications or repairs. Splicing in non-original wiring or attempting a DIY fix before contacting support can void coverage.
- Water or moisture intrusion. If a product isn’t rated for the exposure it received, this is one of the fastest denial triggers.
- Missing proof of purchase. No order number and no alternate proof makes verification nearly impossible.
- Signs of overheating or abuse. Melted connectors or scorched wiring point to an electrical issue outside the product itself, like an undersized fuse.
- Expired warranty period. A claim filed 14 months after a 12-month warranty ended is a clean denial, regardless of the actual defect.
Pro Tip: Photograph your installation the day you finish it, before you ever drive on it. If a claim comes up months later, “before” photos showing correct polarity, routing, and connections are the single strongest piece of evidence you can offer.
Manufacturers frequently request the defective part be shipped back for testing before finalizing any decision. That step exists to confirm the defect is genuine and not the result of a workaround. Keep your original packaging until the claim closes; you may need it to ship the part back safely.
Filing a Claim Without a Receipt
Losing your receipt doesn’t automatically end your claim, but it does shift the burden of proof onto you. Manufacturers generally accept alternate documentation as long as it establishes a purchase date and links you to the specific product.
Acceptable alternates typically include:
- A screenshot of your order confirmation email
- A bank or credit card statement showing the transaction
- Photos of the original packaging showing the SKU or serial number
- Proof of prior registration, if you completed it at the time of purchase
When will a no-receipt claim likely be accepted? It’s most likely accepted when you bought directly from the manufacturer and can produce a bank statement or order history tied to your account.
When might it be refused? Refusals are more common when the product came through a private resale, a seller’s separate return policy applies instead of the manufacturer’s warranty, or none of the alternate proofs can confirm a purchase date.
What should you include to strengthen a no-receipt claim? Detailed photos of the defect and packaging, any evidence of the purchase date, and, if you bought through a marketplace, a link to the order in your account history.
Returns vs. Warranty Claims: Know the Difference
Return policies and warranty coverage solve different problems, and mixing them up is one of the most common sources of frustration. A return window, often 30 days, exists for change-of-mind purchases or items that simply didn’t fit your build. A warranty exists for defects, and it can run anywhere from 30 days to a full lifetime depending on the product.
“Non-returnable” doesn’t mean “not covered.” Custom-cut LED strips or opened electrical components are frequently marked non-returnable for buyer’s remorse purposes, but a genuine manufacturing defect in that same item is still typically eligible for a warranty claim. The two policies operate on separate tracks.
Restocking fees usually apply only to standard returns, not warranty replacements, and they’re more common on opened or installed products than on unopened kits. If you’re unsure which track applies to your situation, ask directly: “Is this a return or a warranty claim?” The answer determines which policy, and which timeline, governs your case.
How Long Does a Warranty Claim Actually Take?
Realistic timelines matter here, because vague promises like “processed quickly” mean nothing when you’re waiting on a part.
| Stage | Typical Timeframe |
|---|---|
| Initial response | 72 business hours |
| Diagnostic/verification period | up to 14 business days |
| Replacement shipping | 2 to 10 business days, depending on stock |
- If you haven’t heard back within 72 business hours, follow up rather than assuming your ticket was lost.
- A diagnostic period stretching past two weeks with no update is a reasonable point to ask for a supervisor or escalation.
- Repeated missed timelines, especially past 30 days with no resolution, are worth documenting in case you need to file a formal complaint with a consumer protection agency.
Protecting Your Warranty Before and After Installation
Most claim denials trace back to something that happened during installation, months before the failure ever showed up. A little discipline upfront prevents most of the disputes below.
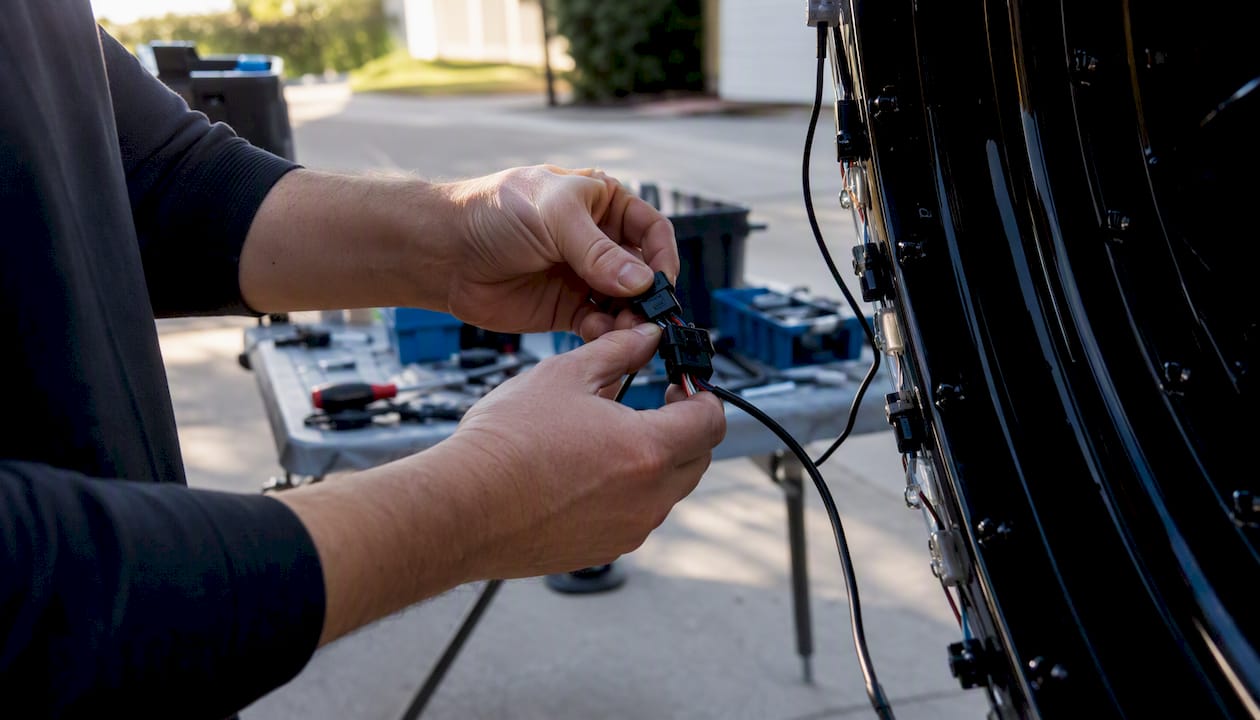
- Follow the manufacturer’s installation instructions exactly, including recommended fuse sizes and wiring routes.
- Use the manufacturer’s own harnesses and connectors rather than generic splices whenever possible.
- Avoid cutting, re-soldering, or otherwise modifying components unless the instructions explicitly allow it.
- Keep the original packaging and any printed serial numbers until you’re confident the product is working long-term.
- Photograph each installation step, especially connection points and grounding locations.
Pro Tip: A short video with a spoken audio note, “connecting the ground wire to the frame here,” recorded the day you install your kit, is far more persuasive months later than a written memory of what you think you did.
Basic maintenance matters too. Loose connections and corroded contacts cause more “failures” than actual component defects, and a quick check of your harness connections every few months can prevent a false alarm altogether. Undersized fuses are a frequent, quiet cause of intermittent failures that get mistaken for defective LEDs.
How Wheellightexpress Handles Warranty Claims
Every kit we design and assemble is built with U.S.-sourced components, and our warranty process reflects that same standard: clear coverage terms, straightforward documentation requirements, and resolutions that don’t drag on for weeks. Coverage applies to manufacturing defects in our LED strips, wiring harnesses, and control components, with the specific terms tied to the product line you purchased.
Registering your purchase isn’t a hurdle we put in your way. It’s the fastest route to verification, since it ties your order number directly to your specific kit before a claim ever comes up. If a defect does surface, the claims process resolves through repair, replacement, refund, or store credit, depending on the product and what’s available in stock.
Our approach is simple: build it right the first time in Louisiana, and when something still goes wrong, make the fix as painless as the purchase was.
To speed up your own claim, put together a packet before you contact us:
- Your order number and proof of purchase
- Clear photos and a short video of the defect
- The specific product page or SKU, referenced from our Wheel Light Sizing Guide or the relevant replacement wheel light strip listing
- A brief note on your installation method, including any wire harness components involved
Pro Tip: List the exact SKU from your original order, not just a general product name, in your first message. It skips a full round of back-and-forth and gets your claim into inspection faster.
A Note on Documentation from the Field
The single biggest difference between a fast claim and a frustrating one is how well the customer documented the problem before reaching out. Vague messages like “my lights stopped working” almost always trigger a request for more information, which adds days to a process that could have taken hours. A short video, a clear photo, and an order number up front turn a back-and-forth into a one-email resolution more often than people expect.
The pattern holds across every warranty policy examined for this piece, regardless of brand or product category. Customers who treat the claim like a small case file, evidence first, explanation second, get faster answers. Customers who lead with frustration and follow up with details later tend to wait longer, not because the manufacturer is slow, but because the file simply isn’t complete enough to act on yet.
Get Your Kit Running Right, Or Get It Replaced Fast
Wheellightexpress designs every wire harness and LED strip in Louisiana rather than sourcing overseas, which means the parts behind your warranty claim were built to a standard we control from start to finish.

If a strip fails or a harness gives out, replacement parts are a few clicks away rather than a multi-week special order. Browse the wheel light ring and strip lineup for direct replacements, or check the replacement wire harness options if a connector or lead is the culprit. Original harnesses matter more than most buyers realize. Using a manufacturer-matched part instead of a generic splice is one of the simplest ways to keep your coverage intact if something else goes wrong down the road. We also offer financing, so upgrading or replacing a kit doesn’t require paying the full cost upfront. Have your order number ready, snap a few photos of the issue, and reach out through our support channels to start your claim today.