

Automotive lighting zones are predefined areas around your vehicle, each requiring specific light types, lens patterns, and mounting positions to deliver the best visibility for that area. The system, formalized by Baja Designs, divides the space around any rig into nine distinct zones: Zone 1 through Zone 8, plus Zone 51. Each zone has a clear job, from cutting through dust and fog directly ahead to throwing a laser beam hundreds of yards down a dark desert trail. Getting the zones right matters far more than simply buying the brightest lights you can find.
Here is what the zone system covers at a glance:
- Zone 1 (Dust/Fog): Low-mounted, near-field illumination for adverse weather
- Zone 2 (Cornering): Peripheral light for turns and lateral awareness
- Zone 3 (Driving Combo): Primary driving light, the foundation of any build
- Zone 4 (Spot): First level of long-distance illumination, mounted high
- Zone 5 (Racer Edition Spot): Tighter beam for high-speed distance penetration
- Zone 6 (Rock Light): Wheel well and undercarriage visibility on technical terrain
- Zone 7 (Cargo): Downward-facing roofline light for rear work areas
- Zone 8 (Backup/Reverse): Rear-facing lights for reversing and dust visibility
- Zone 51 (Laser Series): Extreme-distance laser illumination for search, rescue, and racing
Understanding these zones lets you build a lighting package that covers every angle around your vehicle without creating glare, wasting power, or blinding yourself on the trail.
What each automotive lighting zone actually does
The zone framework is not just a marketing concept. It reflects real physics, real driving conditions, and real placement logic. Here is a detailed breakdown of every zone.
| Zone | Name | Primary Function | Typical Mount Location | Recommended Lens Pattern |
|---|---|---|---|---|
| 1 | Dust/Fog | Near-field adverse weather | Low on bumper | Wide Cornering |
| 2 | Cornering | Peripheral/lateral vision | Bumper ends or A-pillars | Wide Cornering |
| 3 | Driving Combo | Primary driving light | Center bumper or grille | Driving Combo |
| 4 | Spot | Long-distance vision | A-pillar or roofline | Spot |
| 5 | Racer Edition Spot | High-speed distance penetration | High mount, roofline | Spot (tighter) |
| 6 | Rock Light | Undercarriage and wheel well | Wheel wells, bumper corners | Work/Scene |
| 7 | Cargo | Rear work area illumination | Roofline, aimed downward | Work/Scene |
| 8 | Backup/Reverse | Rear visibility and reversing | Under/inside rear bumper or roofline | Wide |
| 51 | Laser Series | Extreme long-distance | High mount, similar to Zones 4 and 5 | Laser |
Zone 1: Dust/Fog. This zone handles the area directly in front of your vehicle in rain, snow, or dust. Lights must be mounted as low as possible on the bumper. That low position creates a physical cutoff that prevents the beam from bouncing off airborne particles and reflecting back into your eyes. Lower power is actually preferable here because fog and dust lights do not need to reach far, they need to illuminate the ground and immediate surroundings horizontally.
Zone 2: Cornering. Zone 2 fills in your peripheral vision on either side of the vehicle, which is critical when navigating turns at speed. Lights typically mount on the outer edges of the bumper or on the A-pillars. If you mount wide-pattern lights on the A-pillar, angle them outward. Pointing them straight ahead from that position creates perceived glare off the hood.
Zone 3: Driving Combo. This is the most important zone to get right first. Zone 3 serves as the foundation of your entire lighting package, positioned at the center of the vehicle on the bumper or in the grille. A general guideline from Baja Designs is to keep 80% of your lighting package below the hood line. Zone 3 should be noticeably brighter than Zones 1 and 2, but it should not overpower your Zone 4 spotlights.
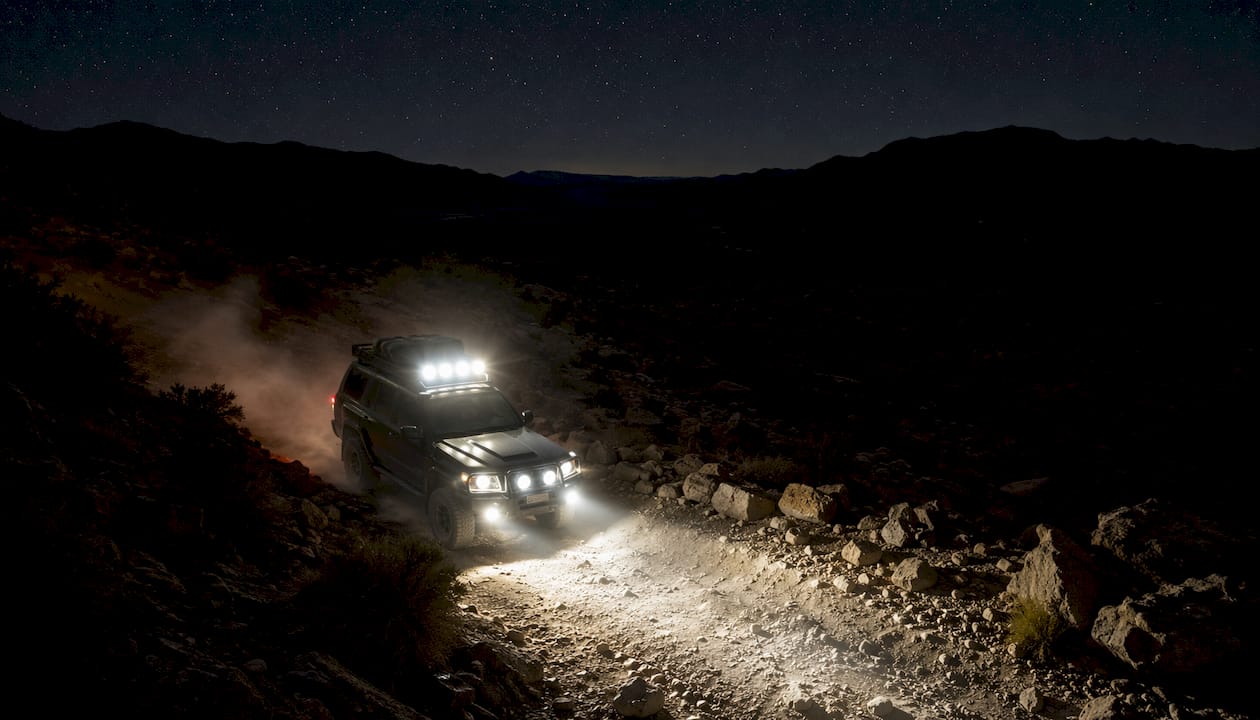
Zone 4: Spot. Zone 4 marks the transition to long-distance lighting. Unlike the lower-mounted Zones 1 through 3, Zone 4 lights go up on the A-pillar or roofline. That elevated position minimizes glare from dust and particulates. Use Zone 4 lights only when you genuinely need the distance, because they consume more power and can cause vision fatigue if left on constantly.
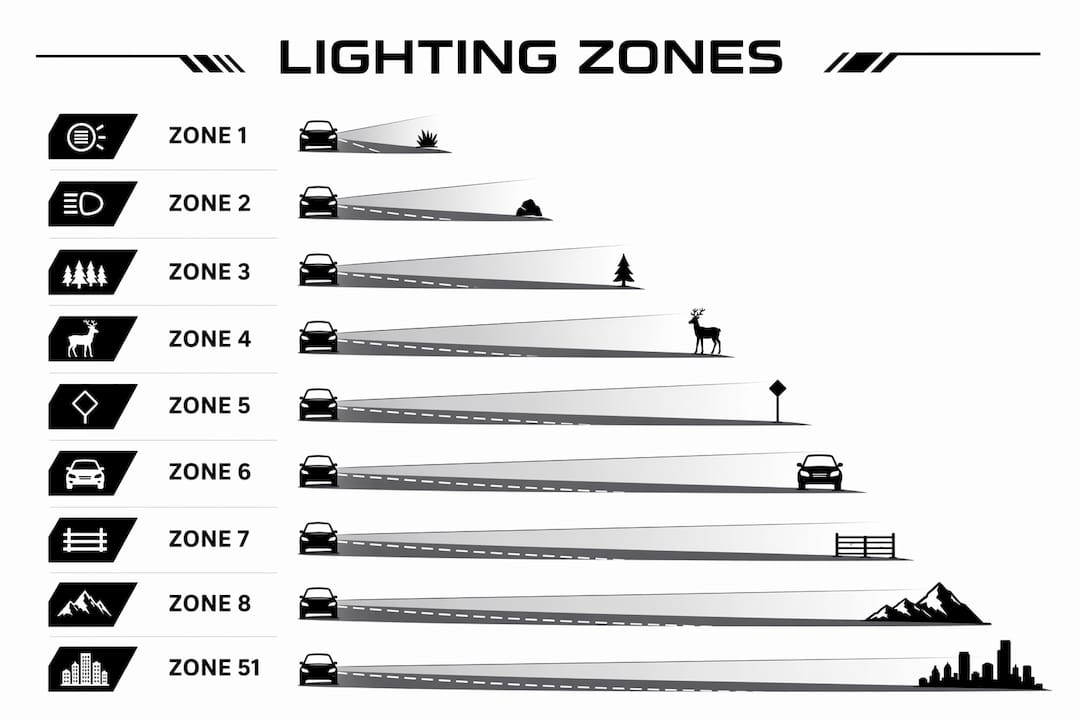
Zone 5: Racer Edition Spot. Zone 5 is purpose-built for high-speed desert running or situations where you need to see far beyond what Zone 4 provides. The beam is tighter than a standard spot, and the high mount helps prevent glare from coming back into the cab. Most overlanders will never need Zone 5, but racers and search teams rely on it.
Zone 6: Rock Light. Rock lights illuminate the wheel wells, undercarriage, and tight spaces around the vehicle. One light per corner is the standard setup, mounted inside the wheel well or on bumper corners. Dedicated rock crawlers sometimes run more. These lights are also useful at camp or during trailside repairs.
Zone 7: Cargo. Zone 7 points downward from the roofline to illuminate the bed, tailgate area, or any cargo immediately around the vehicle. Placement is largely user-driven, but roofline mounting with a downward aim gives the widest, most useful coverage.
Zone 8: Backup/Reverse. Zone 8 covers the rear of the vehicle in two configurations. Reverse lights mount low, under or inside the rear bumper. Dust lights for the rear mount high, on the roofline, to stay above the dust cloud your vehicle kicks up when moving rearward through loose terrain.
Zone 51: Laser Series. The ninth zone uses laser-based LED technology to throw light at distances that standard LEDs cannot reach. Search and rescue teams and Baja racers are the primary users. Zone 51 should be the last addition to any build, added only after all other zones are dialed in. Mount it high, similar to Zones 4 and 5, to keep it clear of rocks and brush.
How lens patterns shape your lighting zones
The lens pattern determines how light spreads from a fixture. Choosing the wrong pattern for a zone wastes output and can create dangerous glare. There are four primary patterns used across the zone system.
- Wide Cornering: A flattened horizontal beam, roughly 42 degrees wide, with minimal vertical spread. This pattern is ideal for Zones 1 and 2 because it pushes light out to the sides and along the ground without throwing it upward into airborne particles. The horizontal spread is what gives you peripheral awareness without blinding yourself.
- Driving Combo: This pattern blends a wide 42-degree element with a tighter 9-degree spot element in a single lens. Zone 3 uses this pattern because it covers both near-field and mid-distance in one fixture, giving you smooth, continuous illumination without a dark gap between close and far.
- Spot: A narrow 9-degree beam designed for distance. Zones 4 and 5 rely on spot patterns to push light far down the trail or road. Because the beam is tight, it concentrates intensity at range rather than spreading it wide. Always pair spot lights with wide or combo lights so you do not create a tunnel-vision effect.
- Work/Scene: A broad 120-degree circle that projects roughly 40 feet. This pattern is not suitable for driving. It works well for Zone 6 rock lights and Zone 7 cargo lights, where you need wide, even illumination of a close area rather than any kind of distance reach.
Matching the lens pattern to the zone is not optional if you want a functional setup. A spot lens in Zone 1 will reflect particulates directly back at you. A wide cornering lens in Zone 4 will wash out your long-distance vision with scattered light. The pattern-to-zone match is what separates a well-built lighting package from a collection of expensive fixtures that fight each other.
How lens color affects performance across zones
Lens color is not purely aesthetic. It changes how light interacts with the environment, and the wrong color in the wrong zone reduces visibility rather than improving it.
- Amber lenses penetrate fog, dust, and rain more effectively than white light. Amber’s longer wavelength scatters less when it hits airborne particles, which is why it belongs in Zone 1. Baja Designs specifically recommends amber fog lights for Zone 1 to reduce glare and minimize reflections in challenging conditions.
- White lenses deliver neutral, high-contrast illumination suited to general driving zones. Zones 3, 4, and 5 typically use white light because contrast and distance clarity matter more than particle penetration at those ranges.
- Daylight or bluish-white tones mimic natural daylight and can reduce eye fatigue on long runs. Halogen bulbs with a blue finish produce light up to 4000 K, closer to daylight color, which appears brighter and more contrasting to the eye.
Regulations add another layer to color choices. On public roads in the United States, 49 CFR 393.11 specifies that headlamps must be white and rear lamps must be red. Amber is required for turn signals and clearance lamps. Off-road performance lighting operates under different rules, and using high-intensity colored lights on public roads can create legal and safety problems. For a deeper look at how US regulations shape color and placement decisions, the Wheellightexpress guide on US-designed lighting covers the key distinctions.
A visual reference for zone placement and coverage
The chart below maps each zone to its mounting position, coverage direction, and typical height on the vehicle. Use it as a quick reference when planning your build.
| Zone | Mount Height | Coverage Direction | Typical Placement |
|---|---|---|---|
| 1 | Very low (bumper) | Forward, horizontal | Front bumper, low |
| 2 | Low to mid | Forward and lateral | Bumper ends, A-pillars |
| 3 | Low to mid (below hood line) | Forward, near to mid | Center bumper or grille |
| 4 | High (A-pillar or roofline) | Forward, long distance | A-pillar or roof rack |
| 5 | High (roofline) | Forward, extreme distance | Roofline, high mount |
| 6 | Low (wheel well) | Downward and lateral | Wheel wells, bumper corners |
| 7 | High (roofline) | Downward, rearward | Roofline, aimed at cargo area |
| 8 | Low (reverse) or high (dust) | Rearward | Rear bumper or roofline |
| 51 | High (roofline) | Forward, extreme distance | Roofline, similar to Zone 4/5 |
“It’s not just about having the brightest lights, but using the right lights in the right way. A high-quality and well-thought-out lighting package will allow you to be safer and give you the edge in the dark.” — Baja Designs
The pattern that emerges from this chart is consistent: lights that need to penetrate particles or illuminate close terrain mount low, while lights that need distance mount high. That physical logic is what the zone system is built on, and it holds whether you are running a prerunner truck or a fully loaded overlander.
How to layer lighting zones for a balanced build
Layering means building your lighting package zone by zone, starting with the most critical and adding outward from there. The goal is comprehensive coverage, not maximum brightness in a single area. Piling all your power into one zone creates glare, burns through your electrical system, and leaves other areas dark.
- Start with Zone 3. The driving combo is your foundation. Get this right before adding anything else. It covers the primary forward field and sets the brightness baseline for every other zone.
- Add Zones 1 and 2 next. These fill in the near-field and peripheral areas that Zone 3 does not cover. Together, Zones 1, 2, and 3 give you complete near-to-mid-field coverage.
- Layer in Zone 4 for distance. Once your near and mid-field are solid, add long-distance spotlights. Zone 4 power should exceed Zone 3 output, but only use it when the trail demands it.
- Zone 6 and Zone 7 are situational. Add rock lights and cargo lights based on your actual use case. Rock crawlers need Zone 6. Overlanders who work out of their rigs at night need Zone 7.
- Zone 5 and Zone 51 come last. These are specialized additions for high-speed or extreme-distance needs. Adding them before your foundational zones are dialed in creates spotlight separation and uneven coverage.
Pro Tip: Zone 1 lights must be mounted as low as possible on the bumper. The physics are straightforward: a low mount creates a sharp cutoff that physically blocks the beam from angling upward into dust or moisture. Even a few inches too high can push enough light into the particulate layer to reflect directly back at you.
LEDs dominate off-road lighting for good reason. They deliver superior brightness, long service life, and better efficiency compared to halogen or HID alternatives. LED pods, bars, and strips each suit different zones: bars work well for Zone 3 across the bumper, pods handle Zones 4 and 5 on the roofline, and strips or small pods cover Zone 6 in the wheel wells. For a full breakdown of LED types and their zone applications, the Wheellightexpress LED lighting guide is a practical starting point. Proper wiring matters just as much as the fixtures themselves. A dedicated wire harness for each zone keeps your electrical system clean and prevents voltage drop that degrades light output. The lighting layering technique guide from Wheellightexpress walks through the installation sequence in detail.
Key Takeaways
Automotive lighting zones work because they match specific light types, lens patterns, and mounting positions to the exact area of the vehicle each zone covers, giving you complete visibility without glare or wasted power.
| Point | Details |
|---|---|
| Zone 3 is your foundation | Build your entire lighting package around the driving combo before adding any other zone. |
| Mount height follows zone function | Low mounts for Zones 1 and 2 prevent glare; high mounts for Zones 4, 5, and 51 maximize distance. |
| Lens pattern must match the zone | Wide cornering for near-field, driving combo for mid-field, spot for distance, work/scene for undercarriage. |
| Amber beats white in particles | Use amber lenses in Zone 1 for fog, dust, and rain; white lenses for Zones 3 through 5 where contrast matters. |
| Zone 51 comes last | Add laser-series lights only after all foundational zones are optimized and balanced. |
Why most off-road lighting builds get the zones wrong
The most common mistake is treating the zone system as a brightness competition. Drivers add the most powerful spotlights they can find, mount them wherever there is space, and wonder why visibility is actually worse than with a simpler setup. The glare coming back from dust and moisture is the answer every time.
The physics behind Zone 1 placement are worth taking seriously. A fog or dust light mounted even a few inches too high pushes part of its beam into the particulate layer in front of the vehicle. That layer acts as a mirror, sending light straight back at the driver. No amount of output power fixes a mounting position problem. This is why off-road lighting manufacturers are specific about bumper-level mounting for Zone 1, and it is the kind of detail that separates a functional build from an expensive one that makes conditions worse.
There is also a legal dimension that gets overlooked. Off-road performance lighting and DOT-compliant street lighting are fundamentally different systems. Using high-intensity spotlights designed for off-road use on public roads often violates regulations and creates real hazards for other drivers. The zone system itself is an off-road framework. When you return to pavement, the rules change, and understanding that distinction keeps you on the right side of both safety and the law. Off-road calibrations and performance setups carry their own set of risks and considerations that are worth reviewing before committing to a full build.
The best approach is methodical. Start with Zone 3, verify it works well on its own, then add zones outward based on your actual driving conditions. A driver who spends most nights on forest trails needs strong Zones 1, 2, and 3 with solid Zone 6 rock lights. A desert racer needs Zones 4 and 5 dialed in above everything else. Zone 51 is a tool for a specific niche, and adding it before the foundational zones are right is a waste of money and a source of visual confusion on the trail.
Build your lighting package with Wheellightexpress

Wheellightexpress designs all of its lighting solutions in Louisiana, which means every product is built with American roads, trails, and regulations in mind. Whether you are starting with a Zone 3 driving combo or filling out a complete nine-zone build, the Wheellightexpress lineup covers the full range. The wire harness leads are engineered specifically for automotive lighting systems, keeping your electrical setup clean and reliable across every zone. For wheel-level lighting, the wheel light rings and strips bring Zone 6-style visibility with original designs you will not find sourced overseas. Every product comes with a satisfaction guarantee, and financing options are available so you can build the package you actually need without waiting.