
Connecting a lighting kit to your truck fuse box is defined as routing power from the fuse panel to your lights through a relay and inline fuse, giving you ignition-controlled operation that protects your truck’s electrical system. Done correctly, this method keeps your battery safe, prevents dashboard switch damage, and gives you clean, reliable control over every light you add. Simple bed light kits take 30–60 minutes, while full LED bar setups can run 2–4 hours depending on wire routing. Whether you are adding LED strips, wheel lights, or auxiliary driving lights, the wiring process follows the same core principles every time.
What tools and materials do you need to connect a lighting kit to a truck fuse box?
The right tools make the difference between a clean install and a fire hazard. Gather everything before you touch a wire.
Tools you need:
- Multimeter (for testing fuse slots and verifying ground)
- Wire strippers and crimpers
- Flathead and Phillips screwdrivers
- Test light
- Heat gun (for heat-shrink tubing)
- Electrical tape
Parts you need:
- Wiring harness with relay (4-pin or 5-pin, 30-amp rated)
- Inline fuse holder with appropriate fuse
- Add-a-fuse adapter (mini, standard, or micro, matching your fuse box type)
- Butt connectors and ring terminals
- Heat-shrink tubing
- Weatherproof connectors (if lights are exposed to the elements)
Selecting the right wire gauge and fuse rating is not optional. Fuse rating must match wire gauge, not just the fixture’s current draw. A fuse that is too large lets the wire melt before it trips. The table below shows standard pairings.
| Wire gauge | Max amperage | Recommended fuse size |
|---|---|---|
| 18 AWG | 10 amps | 10-amp |
| 16 AWG | 13 amps | 15-amp |
| 14 AWG | 17 amps | 20-amp |
| 12 AWG | 23 amps | 25-amp |
| 10 AWG | 30 amps | 30-amp |
Pro Tip: Check your LED kit’s spec sheet for its actual amperage draw. Size your wire one gauge heavier than the minimum to give yourself a safety margin on long runs.
How to safely prepare your truck and lighting kit for wiring
Preparation prevents the most costly mistakes in any truck lighting installation. Follow these steps before connecting a single wire.
- Disconnect the negative battery terminal. One accidental short can fry the ECU or other electronic modules in modern trucks. This step is non-negotiable.
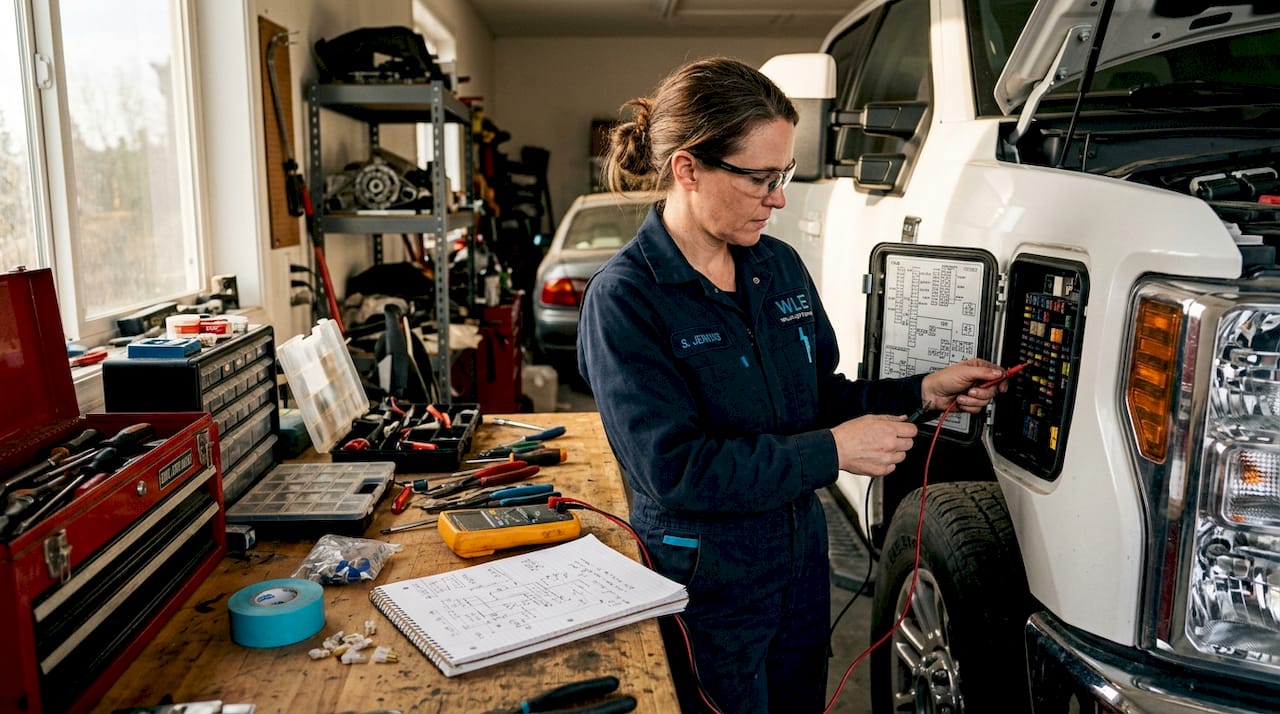
- Locate your fuse box. Most trucks have an underhood fuse box and a cabin fuse box. Your ignition-switched slots are almost always in the underhood box.
- Identify ignition-switched fuse slots. Use a test light or multimeter with the key in the “on” position. Slots that show power only with the key on are your target. Avoid constant-power slots, which will drain your battery when the truck is off.
- Test in multiple vehicle states. Test with engine off, doors locked, and engine running to confirm the slot is truly ignition-switched and not a delayed shutoff circuit.
- Prepare your ground point. Find a chassis bolt near your lights or relay. Sand the painted surface down to bare metal. A clean metal-to-metal contact is the only reliable ground.
- Position your relay. Mount the relay within 12 inches of the battery positive terminal. This placement keeps the unprotected wire length short, so a chafing short trips the fuse before it can start a fire.
Safety note: Never skip the battery disconnect step to save time. Modern trucks carry live voltage to multiple modules even with the key out. A single slip of a wire can cause permanent damage that costs hundreds of dollars to repair.
Pro Tip: Take a photo of your fuse box layout before inserting the add-a-fuse adapter. You will thank yourself during troubleshooting six months later.
Step-by-step wiring process to connect your lighting kit to the fuse box
This is the core of your truck accessory wiring project. Work through each step in order and do not skip ahead.
- Wire relay pin 30 to battery positive through your inline fuse. This is the main power input to the relay. Keep this wire as short as possible and route it away from heat sources.
- Wire relay pin 87 to your lights. This is the switched output. When the relay energizes, pin 87 delivers full battery voltage to your lights.
- Wire relay pin 85 to chassis ground. Use a ring terminal on a clean, sanded chassis bolt.
- Wire relay pin 86 to your trigger circuit. This is where the add-a-fuse adapter connects. Insert the adapter into your chosen ignition-switched fuse slot. A 5-amp mini fuse is standard for trigger circuits. Verify fuse orientation so the new circuit draws from the correct blade.
- Wire your cabin switch in line with pin 86 if you want manual on/off control. The switch carries only the low-current trigger signal, not the full load. Forcing high current through dashboard switches damages them. The relay handles the heavy current so your switch never has to.
- Ground your lights directly to bare metal chassis. Do not daisy-chain grounds through other accessories.
- Seal every connection. Slide heat-shrink tubing over butt connectors before crimping, then apply heat. Use weatherproof connectors at any junction exposed to rain, mud, or road spray.
- Reconnect the negative battery terminal and test. Turn the key to “on” and verify the lights respond to your switch. Check that lights go off when the key is removed.
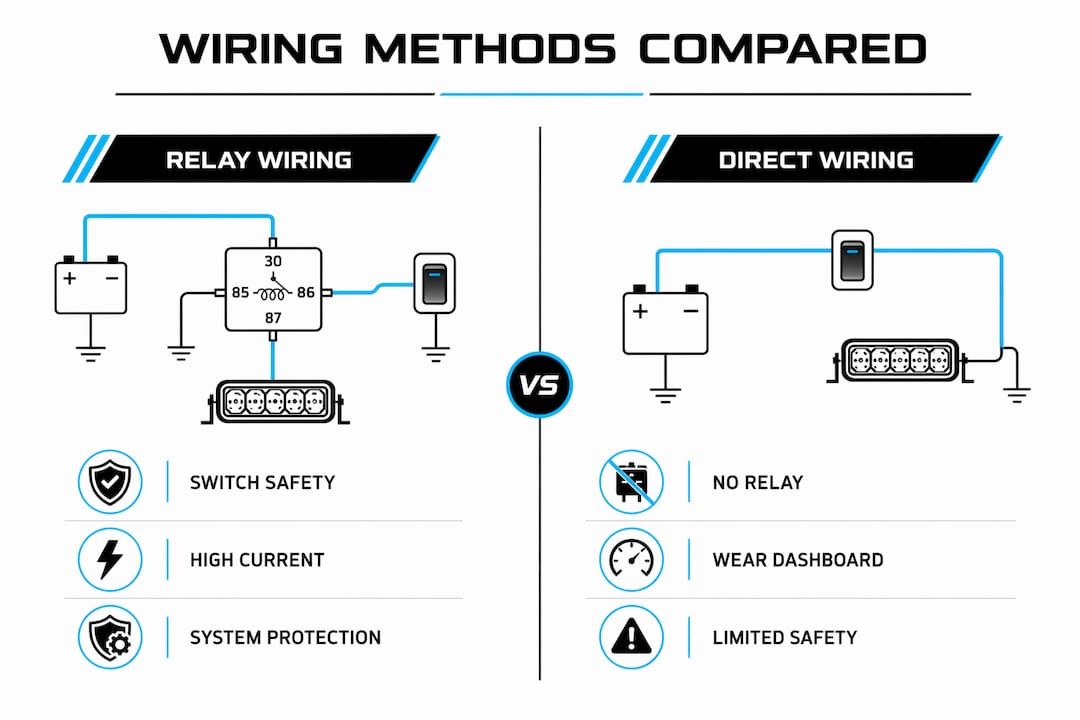
The table below compares relay harness wiring against direct wiring so you can see why the relay method is the correct choice for any truck lighting installation.
| Feature | Relay harness wiring | Direct wiring |
|---|---|---|
| Switch safety | Switch carries trigger signal only | Switch carries full load current |
| Fire risk | Low (inline fuse near battery) | High (no short-circuit protection) |
| Battery drain | None (ignition-controlled) | Risk if wired to constant power |
| Wiring complexity | Moderate | Simple but unsafe |
| Recommended for LED kits over 10 amps | Yes | No |
Pro Tip: Label each wire with a small piece of tape and a marker before routing it through the firewall or under trim. Tracing unlabeled wires later is one of the most frustrating parts of any DIY electrical job.
How do you troubleshoot common lighting kit fuse box connection issues?
Most problems with fuse box wiring come down to three causes: bad ground, wrong fuse slot, or a loose connection. Work through this list before pulling everything apart.
- Lights do not turn on at all. Check for power at the add-a-fuse tap with a test light. If no power, the fuse slot may be constant-off or the adapter is oriented wrong. Flip the adapter and retest.
- Lights stay on after the key is removed. You tapped a constant-power slot. Move the add-a-fuse adapter to a verified ignition-switched slot. Testing in multiple vehicle states before final installation prevents this entirely.
- Fuse keeps blowing. The fuse rating is too low for the load, or there is a short circuit in the wiring. Verify your wire gauge and fuse pairing against the table in the tools section. Inspect every connection for bare wire touching metal.
- Lights flicker or dim. Poor grounding is the leading cause of electrical problems in DIY lighting installs. Return to your ground point, sand it to fresh bare metal, and retighten the ring terminal.
- Relay clicks but lights do not come on. Power is reaching the relay but not passing through to the lights. Check pin 87 output with a multimeter and inspect the wire running to the lights for breaks or loose crimps.
Safety reminder: Never run high-current wiring directly through a dashboard switch to save a relay. The switch will eventually fail, and in the worst case it can arc and start a fire inside your cab.
Pro Tip: Inspect your inline fuse every six months. Fuses can develop hairline cracks that cause intermittent failures without fully blowing. A fresh fuse costs less than a dollar and takes thirty seconds to swap.
For professional-grade lighting repair and wiring support, automotive lighting specialists in your area can verify your install meets safety standards if you run into issues beyond basic troubleshooting.
Key takeaways
Connecting a lighting kit to your truck fuse box safely requires a relay, an inline fuse near the battery, a verified ignition-switched tap, and a clean bare-metal ground at every connection point.
| Point | Details |
|---|---|
| Always use a relay | Relays protect dashboard switches and handle high current safely for any LED kit over 10 amps. |
| Inline fuse placement matters | Mount the fuse within 12 inches of the battery positive to protect the full wire run from shorts. |
| Verify ignition-switched slots | Test fuse slots with a multimeter in multiple vehicle states to prevent battery drain. |
| Ground to bare metal | Sand painted surfaces to bare metal before attaching ring terminals for a reliable ground. |
| Match fuse to wire gauge | Size your fuse to the wire, not just the fixture, so the fuse trips before the wire overheats. |
What I have learned from wiring truck lighting kits the hard way
I have seen truck owners skip the relay because it looked like extra work. Every single one of them regretted it. One enthusiast I know wired a 30-amp LED bar directly through a rocker switch on his dash. Six months later the switch melted during a trail run. He got lucky. The damage stopped at the switch. It does not always stop there.
The relay and inline fuse are not optional upgrades. They are the minimum standard for any lighting kit that draws meaningful current. The wiring best practices that experienced builders follow exist because someone learned the hard way before you did.
The other mistake I see constantly is skipping the multimeter test on fuse slots. Truck fuse boxes have slots that look identical but behave completely differently. Some are ignition-switched. Some are constant power. Some are delayed shutoff circuits that stay live for several minutes after the key comes out. Tapping the wrong one means your lights run all night and you wake up to a dead battery. Testing takes two minutes. A jump start and a new battery cost a lot more.
Wiring neatness is not just about looks. Tidy wire routing with proper clips and grommets through the firewall means you can trace a problem in ten minutes instead of two hours. Future you will appreciate the effort.
Take the safety steps seriously. A well-wired lighting kit lasts for years and never causes problems. A rushed one can cost you your truck.
— Christopher
Wheellightexpress has the wiring components your truck needs
Wheellightexpress designs all of its lighting products in Louisiana, and that includes the wiring components that make a clean, safe install possible.
The wire harness leads and wires from Wheellightexpress are built specifically for automotive lighting applications, with the correct gauge and connector quality for reliable fuse box connections. The self-tappers and fuses are sized for real-world truck installs, not generic kits. Every product comes with a satisfaction guarantee, and financing options mean you can get your build done without waiting. Visit Wheellightexpress to find the right components for your truck lighting project.
FAQ
What fuse size should I use for an LED lighting kit?
Fuse size must match your wire gauge, not just your light’s amperage. A 12 AWG wire typically pairs with a 25-amp fuse; always verify against your specific wire rating.
Can I wire a lighting kit directly to the fuse box without a relay?
For LED kits drawing over 10 amps, a relay is required. Running high current through a dashboard switch will damage or melt the switch over time.
How do I know if a fuse slot is ignition-switched?
Use a multimeter or test light and check the slot with the key off, key on, and engine running. A slot that shows power only with the key on is ignition-switched and safe to use for your trigger wire.
Why do my lights stay on after I turn off the truck?
You tapped a constant-power fuse slot. Move your add-a-fuse adapter to a verified ignition-switched slot to prevent battery drain overnight.
How long does a truck lighting kit installation take?
Simple kits take 30–60 minutes. Full LED bar installs that require routing wires under interior trim can take 2–4 hours.
Recommended
- Truck Lighting Kit Components Explained for Enthusiasts – Wheel Light Express
- Ford F150 Parking Lights Adapter for LED Headlights (2018-2020) – Wheel Light Express
- Ford Superduty Parking Lights Adapter for LED Headlights (2020-2022) – Wheel Light Express
- Ford F150 Parking Lights Adapter for LED Headlights (2021-2023) – Wheel Light Express