
Knowing how to install LED strips under car chassis has never been more accessible, yet plenty of enthusiasts still end up with flickering lights, exposed wiring, and code violations. Automotive underglow, the industry term for underbody accent lighting, has made a serious comeback thanks to modern kits with IP68 waterproofing, app-enabled controllers, and modular designs built for real driving conditions. This guide walks you through every stage, from gathering the right tools to making your first test run, so you can get a clean, reliable result the first time.
Table of Contents
- Key Takeaways
- How to install LED strips under a car: tools and prep
- Step-by-step installation for under-car LED lighting
- Troubleshooting and extending LED strip lifespan
- Choosing the right LED strips and controllers
- My honest take after doing this many times
- Get your LED underglow kit from Wheellightexpress
- FAQ
Key Takeaways
| Point | Details |
|---|---|
| Prep before you mount | Clean mounting surfaces and plan wiring routes before applying any strips to avoid rework. |
| Fuse every circuit | Use an inline fuse sized with a 20-30% safety margin to protect against electrical fires. |
| Ground properly | Scrape paint from the chassis contact point and use 12 AWG wire minimum for a solid ground. |
| Check your local laws | Flashing red or blue underglow is prohibited in most states, so verify colors before you buy. |
| Test before sealing | Power the strips fully before final mounting to catch any wiring faults early. |
How to install LED strips under a car: tools and prep
Before you touch a single wire, you need the right materials on hand. Missing one item mid-install usually means pulling everything apart. Here is what a proper LED car underglow installation requires.
Materials checklist:
- Automotive-grade RGB or RGBIC LED strips rated for 12V DC
- LED controller compatible with your strip type (PWM or digital signal)
- Inline fuse holder and 10A fuses
- Add-a-fuse tap for ignition-switched power
- 12 AWG ground wire and ring terminals
- Corrugated wire loom and heat-shrink tubing
- Zip ties and self-tapping screws or mounting clips
- Multimeter for verifying voltage
- Isopropyl alcohol and a clean rag for surface prep
Surface preparation is not optional. Adhesive backing on LED strips fails fast on dirty, oily underbody surfaces. Wipe every mounting area with isopropyl alcohol and let it dry completely. On older vehicles, sand off any surface rust where you plan to attach strips or run wiring.
Plan your layout on paper first. Measure each side of your vehicle’s underside, note where the exhaust runs, and identify any suspension components that move. Route wiring away from heat sources and moving parts before you commit to any path.
Pro Tip: When selecting the best LED strips for cars, always check the IP rating. IP67 handles splashes, but IP68 is what you want for underbody placement where the strip will face road spray and puddles regularly.
Confirm your vehicle’s battery output is stable with a multimeter. You want to see 12.6V or higher with the engine off. Weak batteries cause voltage drop that shows up as dim or uneven lighting after installation.
| Spec | Minimum standard | Recommended |
|---|---|---|
| IP Rating | IP67 | IP68 |
| Voltage | 12V DC | 12V DC regulated |
| Wire gauge (ground) | 14 AWG | 12 AWG |
| Fuse size | 10A | Sized at 20-30% above load |
| Strip connection | Screw terminal | Solder + heat shrink |
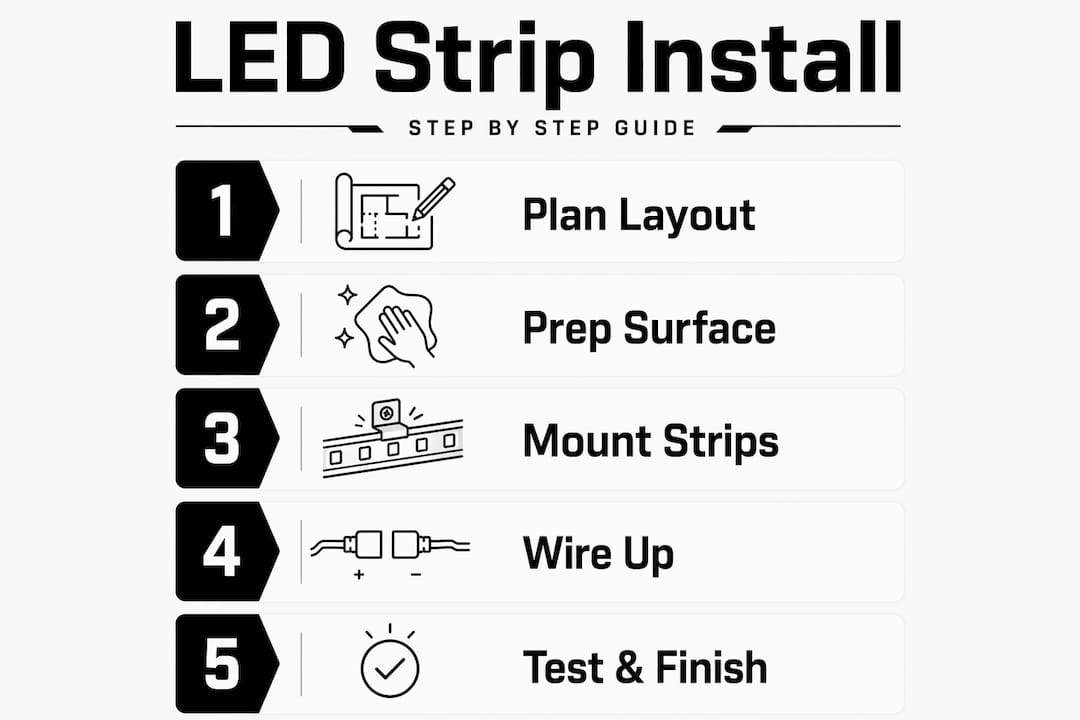
Step-by-step installation for under-car LED lighting
Most installs take 1 to 3 hours depending on wiring complexity and vehicle design. Work through each step in order and do not skip the test phase.
-
Measure and cut strips. Lay a tape measure along each underbody panel and cut strips only at the marked cutting points printed on the strip itself. Cutting between marks destroys the last LED segment.
-
Dry-fit before sticking. Hold each strip in position with painter’s tape before removing the adhesive backing. This lets you confirm the layout, check wiring reach, and adjust positions without waste.
-
Connect power using an add-a-fuse tap. An add-a-fuse tap lets you pull ignition-switched power directly from the fuse box without cutting any factory wiring. Your lights will turn off automatically with the key, which prevents battery drain.
-
Add an inline fuse near the battery positive terminal. Place the fuse holder within 18 inches of the battery. Inline fuse sizing should be 20-30% above your strip’s total current draw. For most four-strip kits, a 10A fuse works well.
-
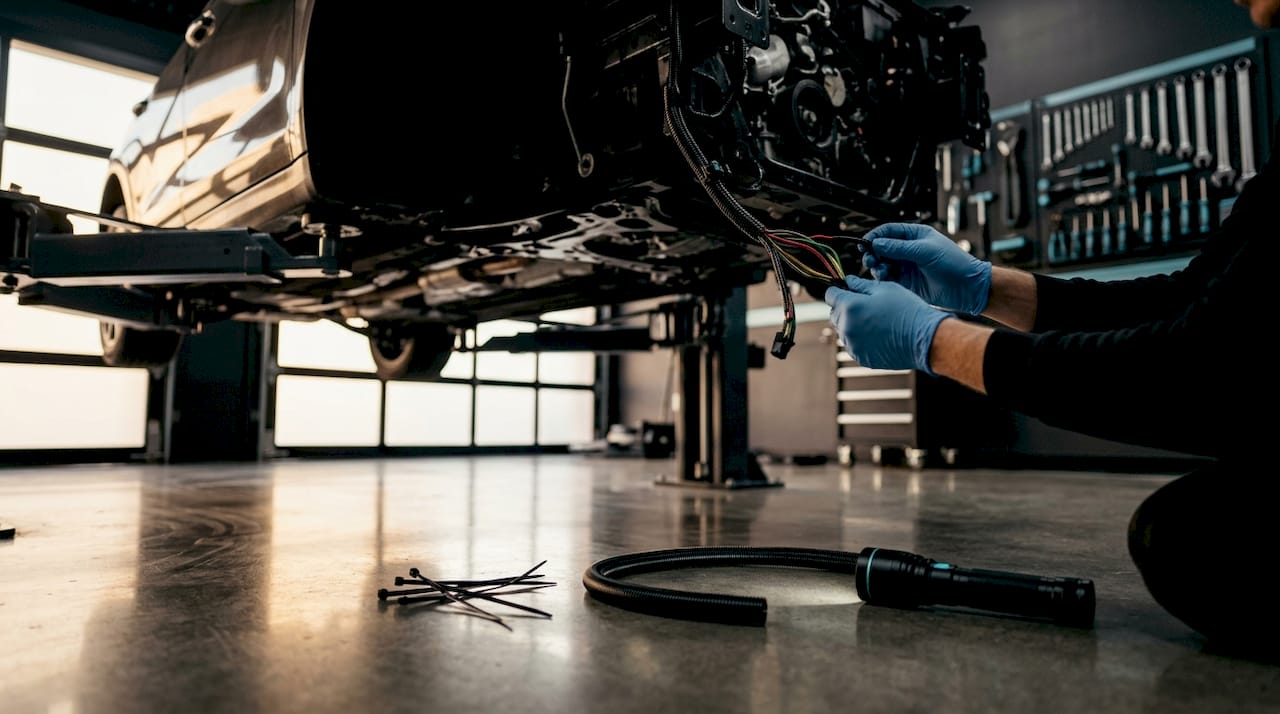
Ground to bare metal. Find a chassis bolt or drill a self-tapping screw into a body panel away from painted surfaces. Proper grounding requires 12 AWG wire minimum and a scraped, paint-free contact point. A poor ground is the number one cause of flickering after install.
-
Run and protect the wiring. Feed all wire runs through corrugated loom before routing them along the frame. Secure every 6 to 8 inches with zip ties. Keep LED wiring separated from antenna cables and engine management wiring to avoid ECU interference.
-
Test the full system before final mounting. Connect everything temporarily and power on. Walk around the vehicle and check for dark spots, color errors, or flickering. Fix any issues now, not after the adhesive has set.
-
Peel, stick, and secure permanently. Remove the adhesive backing and press each strip firmly into place for 30 seconds per section. Add zip ties or mounting clips at both ends of each strip for backup retention. On rough road vehicles, consider flexible strip designs that hold up to vibration without cracking.
-
Seal all electrical connections. Apply heat-shrink tubing to every bare wire joint and use self-amalgamating tape over any connector that sits in an exposed underbody location.
Pro Tip: Never rely on adhesive alone underneath a vehicle. Road vibration, heat cycles, and water loosen even the strongest tape over time. Always back up adhesive mounting with at least two zip ties per strip section.
Troubleshooting and extending LED strip lifespan
Even clean installs develop problems. The good news is that most issues trace back to two causes: poor grounding and inadequate wire protection.
Common problems and their fixes:
- Flickering or dim strips: Almost always a ground issue. Grounding to painted metal creates resistance that worsens with heat and moisture. Re-do the ground connection at bare metal.
- Voltage drop on long runs: On vehicles where strips run more than 10 feet total, you may need power injection at intervals to maintain consistent brightness end-to-end.
- Strips falling off: Sand the surface, clean with alcohol again, and use both adhesive and physical fasteners. Silicone adhesive tape bonds better than foam tape on curved or textured underbody plastic.
- Controller errors or ECU warnings: Keep LED wiring away from CAN bus data lines and high-frequency signals. Reroute if needed and add ferrite beads to power leads as a quick fix.
- Burnt or failed LEDs: Thermal stress from voltage mismatch kills strips faster than anything else. Confirm your controller output matches your strip’s rated voltage exactly.
Legal compliance is not something to ignore. Flashing red or blue underglow is prohibited in most states because it mimics emergency vehicles. Static white or amber is generally legal while driving, but specific rules vary by state. Check with your local DMV before choosing colors.
Always treat underglow wiring as you would any safety-critical electrical system. One poorly protected wire near an exhaust pipe or spinning driveshaft can cause a failure that goes well beyond a blown fuse.
If you want to keep your install looking sharp long-term, inspect the wiring every six months. Look for chafed loom, loose zip ties, and any connectors showing corrosion. A 30-minute check twice a year is far easier than a full reinstall.
Choosing the right LED strips and controllers
Not all LED strips are the same, and mismatching your strips with the wrong controller is one of the most common DIY mistakes.
Strip types compared:
| Type | Best for | Controller needed |
|---|---|---|
| 12V RGB | Standard color effects | RGB PWM controller |
| 12V RGBIC | Independent zone color | Digital IC controller |
| Addressable (WS2812B) | Advanced animations | 5V step-down + data controller |
| Single-color 12V | Clean accent lighting | Simple PWM dimmer |
Addressable strips like WS2812B run on 5V, not 12V. Running them on automotive 12V power without a step-down converter will burn them out immediately. Stick to 12V-rated strips unless you have a dedicated converter in your setup.
For strip length, modular kits with plug-and-play systems let you fit sections precisely to your vehicle’s contours without dead zones. Fixed-length kits are cheaper but often require trimming and re-terminating ends, which adds time and the risk of connection failures.
Match your wire gauge to your current load. For most 12V RGB kits under 5A total, 16 AWG handles it. For longer runs or higher-output kits, move to 14 AWG to reduce voltage drop on long runs. When in doubt, go heavier. Thicker wire never causes problems. Undersized wire can melt its insulation.
You can also review a breakdown of automotive LED types for 2026 to help you choose between strip formats before you order anything.
My honest take after doing this many times
I’ve helped with more LED car underglow installations than I can count, and the pattern is always the same. The people who rush prep and skip the ground wire prep end up pulling everything out two weeks later. The people who spend an extra 20 minutes scraping metal and routing wiring properly never have to touch it again.
The one piece of advice I give every first-timer: do not rely on the adhesive backing alone. I have seen strips from reputable brands fall off within a season because someone trusted the tape on a rough plastic underbody panel. Two zip ties per section costs you nothing and saves the entire install.
My other honest opinion is that modular, plug-and-play kits have made DIY LED strip installation genuinely reliable now. The old stigma around underglow looking cheap came from systems that weren’t built for outdoor, underbody conditions. Today’s kits with IP68 ratings and proper wire harnesses are a completely different product category.
That said, I still see people buy cheap RGB controllers that interfere with their vehicle’s CAN bus. Spend a few more dollars on a quality controller. Your check engine light will thank you.
Respect the legal side too. Flashing or colored lights that mimic emergency vehicles are not just a ticket risk. They create genuine confusion on the road. Static colors in permitted wavelengths look just as good and keep you compliant wherever you drive. If you are also modifying your vehicle’s exterior appearance, pairing your lighting with color change wraps can tie the whole build together visually.
— Christopher
Get your LED underglow kit from Wheellightexpress
You’ve got the knowledge. Now you need parts you can trust.
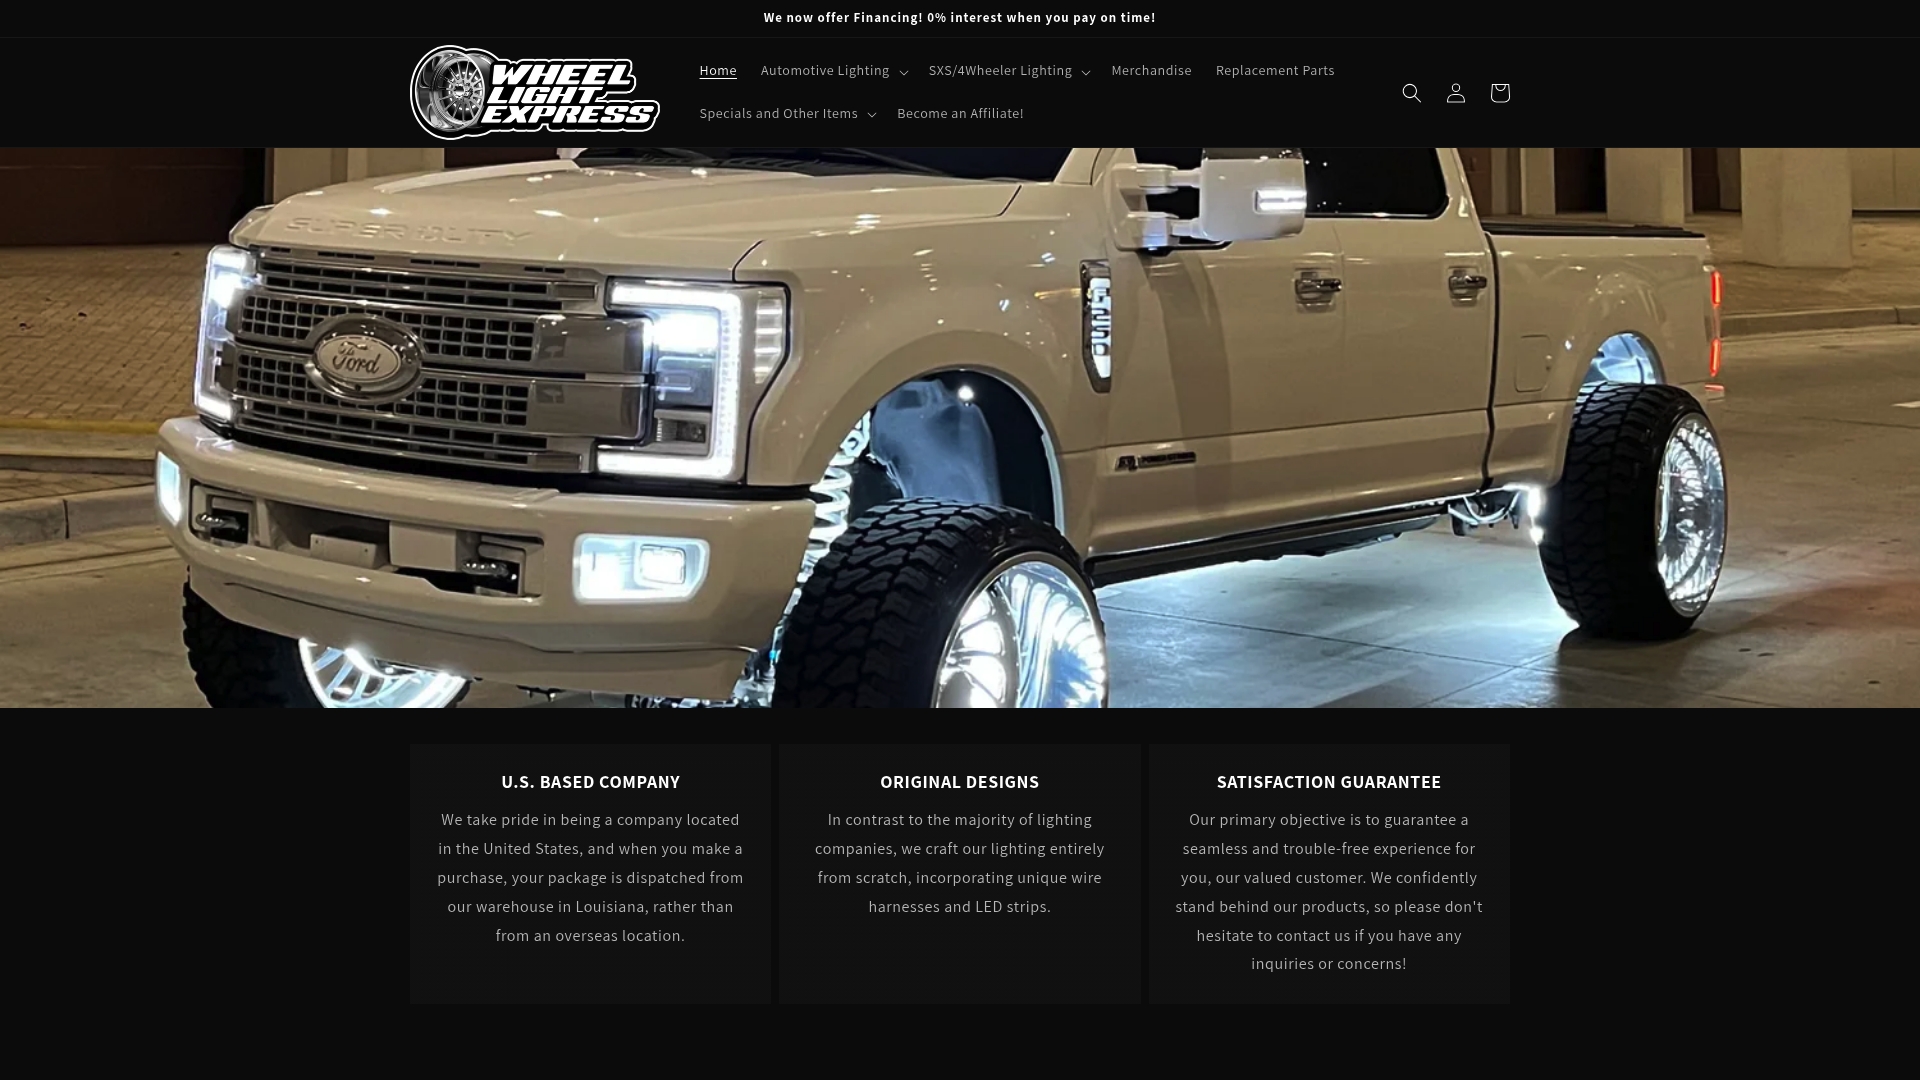
At Wheellightexpress, we design all of our automotive LED lighting products in Louisiana, with quality built specifically for enthusiasts who want results that last. Our catalog includes complete LED strip kits, replacement wire harnesses built for underbody installations, and the mounting hardware that makes a clean install possible. Every kit comes with our satisfaction guarantee, so you are not taking a risk on quality. Browse our full selection of automotive lighting kits to find the right strips, controllers, and accessories for your vehicle. We also offer self-tappers and fuses so you have everything in one place before you start.
FAQ
How long does it take to install LED strips under a car?
Most underglow installations take 1 to 3 hours depending on vehicle size and wiring complexity. Planning your layout and preparing surfaces before starting reduces total time significantly.
What fuse size should I use for under-car LED strips?
Size your inline fuse at 20-30% above your strip’s total current draw, typically 10A for most four-strip kits. Place the fuse holder within 18 inches of the battery positive terminal for proper circuit protection.
Why are my LED strips flickering after installation?
Flickering almost always points to a poor ground connection. Scrape paint from the chassis contact point, use 12 AWG wire, and confirm the connection is tight with a multimeter before assuming a strip or controller fault.
Is underglow lighting legal?
Legality depends on your state and the colors you use. Flashing red or blue underglow is prohibited in most states. Static white, green, or amber is permitted in many regions, but always verify local laws before driving on public roads.
Can I use any RGB LED strip for automotive underglow?
Use only 12V DC strips rated for automotive or outdoor use with a minimum IP67 waterproof rating. Standard 5V addressable strips will burn out on vehicle power unless you add a dedicated step-down voltage converter to your setup.