

Yes, you can install portal lights yourself with basic tools and an afternoon in the garage. The safest, most reliable approach uses a purpose-built harness wired to a fused relay and a dedicated dash switch, not a direct tap off your battery. Get your checklist together first, measure your portal size, and follow a step-by-step sequence so you don’t end up chasing a short in the dark.
TL;DR:
- Waterproof rating should be at least IP67, with IP68 preferred for frequent water crossings; higher ratings ensure better protection in wet environments.
- Use a purpose-built harness with correct row density and size to match your portal dimensions, reducing wiring errors and improving durability.
- Mount the LED strips with both adhesive and mechanical fasteners, leaving slack for suspension travel and sealing all connectors with silicone to prevent water ingress.
- Run all wiring through split loom tubing near moving parts, connect the relay and fuse as close to the battery as possible, and test the system under suspension travel for flicker or pinch points.
- Most wiring failures stem from poor grounds or incorrect fuse ratings; thorough pre-install vehicle inspection and proper grounding are critical for reliable operation.
Table of Contents
- Portal Lights Install Checklist: Parts and Prep
- How Do You Choose the Right LED Strips and Harness?
- Step-by-Step Sequence for a Portal Light Install
- Wiring and Power Management That Actually Holds Up
- Why Won’t Your Portal Lights Turn On? Fast Fixes
- Prepping Your Rig Before You Start Cutting Wire
- Detailed Wiring Diagrams or Schematics
- Choosing the Right Type and Color of Portal Lights
- Cleanup and Post-Install Inspection
- Why DIY Installers Underestimate the Wiring, Not the Mounting
- Simplify Your Portal Light Install With the Right Parts
- Sources
- FAQ
Portal Lights Install Checklist: Parts and Prep
Before you touch a wrench, lay out everything you need on the workbench. Missing one part halfway through the job is how a two-hour install turns into a weekend project.
- LED portal strips (rated for the diameter of your specific portals)
- Wiring harness, either plug-and-play or a replacement harness you wire yourself
- Relay, inline fuse, and a rocker switch or fused distribution block
- Waterproof connectors, heat-shrink tubing, and marine-grade silicone sealant
- Zip ties, split loom tubing, and mounting hardware
Measure your portal housing before ordering strips. Most 4 to 6 inch portals run well with a strip matched to their size, while 8-inch portals and dual-idler setups usually require longer strips to cover the full housing. Disconnect the battery, clear your workspace, and pick a switch location on the dash you can reach without taking your eyes off the trail. Safety glasses and gloves are worth the thirty seconds it takes to put them on, especially when you’re cutting loom or crimping near sharp portal edges.
How Do You Choose the Right LED Strips and Harness?
Not every portal light kit is built the same, and the difference shows up the first time you hit a water crossing. Look for a waterproof rating for protection in wet conditions; higher ratings are better if you regularly wade through mud or creeks. Row density matters too: double-row strips throw a clean, even glow for most builds, while quad-row configurations push more lumens for dual-idler portals or riders who want serious ground lighting.
- Waterproof rating: IP67 minimum, IP68 preferred for creek crossings
- Row density: double-row for standard portals, quad-row for maximum brightness
- Color: single-color strips are simpler to wire; RGBW strips need a compatible controller
- Harness: plug-and-play harnesses cut down on wiring mistakes versus building one from raw wire
Most vendor kits include the LED strips, a harness, and a switch, but some leave out the relay and fuse combo entirely, expecting you to add your own protection. That gap is worth catching before you’re halfway into the install. On the electrical side, match relay amperage to your strip’s actual current draw, not a guess, and size your fuse slightly below the wire’s rating so it blows before the insulation melts. A double-row high density portal light kit built specifically for 6 and 8 inch housings saves you from eyeballing fitment. For mounting, use a combination of adhesive backing and a mechanical fastener, then seal every exposed connector with silicone. Off-road vibration loosens adhesive-only mounts faster than most people expect.
Step-by-Step Sequence for a Portal Light Install
Work through these steps in order. Skipping the dry-fit stage is the single most common reason installers end up redoing their cable routing.
- Dry-fit the strips first. Hold them against the portal housing and mark mounting points before committing to adhesive. Keep clips well clear of tie rods, CV boots, and anything that moves with the suspension.
- Mount the strips. Combine adhesive backing with a mechanical fastener like a zip tie or small bracket for vibration resistance. Leave a few inches of slack in the strip lead so full suspension travel doesn’t yank the wire.
- Route the harness. Run it along the frame rail or control arm, securing it with zip ties every few inches. Slide split loom over any section that crosses near moving parts or sharp edges.
- Wire it up. Run a fused feed from the battery positive terminal to the relay. Connect a switched ignition source or your dash switch to the relay’s control coil. Run the relay’s output to the strip harness, and ground the negative lead close to where the strip is mounted, not at some far corner of the frame.
- Seal and test. Wrap every splice in heat-shrink, coat exposed connectors in silicone sealant, and reconnect the battery. Test the strips on the bench first if you built a custom harness, then test again with everything mounted in the vehicle.
- Verify under load. Cycle the suspension through its travel while watching the harness for pinch points. Check for flicker, feel the strip and relay for unusual heat, and confirm the switch cuts power cleanly.
That last step catches problems most installers miss on the first pass. A strip that looks perfect sitting still can flicker the moment the suspension compresses if a wire is pinched against a control arm.
Wiring and Power Management That Actually Holds Up
A relay exists for one reason: to keep the full current load off your dash switch and off thin factory wiring. The switch only carries a few milliamps to trigger the relay coil, while the relay itself handles the heavy current straight from the battery. Place your fuse as close to the battery terminal as possible, since that’s the point where a chafed wire against the frame could otherwise short out unprotected.
- Wire gauge is a starting point, not a fixed rule. A common example is 16 gauge for lighter LED strip runs, 14 gauge for higher-draw quad-row setups, but always check your specific kit’s actual current draw rather than assuming.
- Ground wires should take the shortest path to bare metal on the chassis. Sand the contact point down to clean metal and use a ring terminal with a star washer to bite through any residual coating.
- If you’re adding more than one lighting accessory, run everything through a fused distribution block instead of daisy-chaining connections off one relay output.
Pro Tip: Test your relay’s click with your ear before you ever connect the strips. If you don’t hear a solid click when the switch triggers, you’ve got a wiring or ground issue to chase down before you waste time troubleshooting the lights themselves.
Why Won’t Your Portal Lights Turn On? Fast Fixes
Most portal light failures trace back to one of four issues, and you can usually isolate the problem in under fifteen minutes.
- No power at all. Check the main fuse first, then listen for the relay click when you flip the switch. If the relay clicks but nothing lights up, test for voltage right at the strip’s connector.
- Intermittent flicker. This is almost always a ground problem. Recheck the ground point for corrosion, tighten every connector, and inspect the harness run for chafed insulation against frame edges.
- Dimming or overheating. Confirm you installed the correct fuse rating for the strip’s draw. A shorted or overloaded circuit will run hot and dim before it eventually blows.
- Water intrusion. Pull apart any connector near a recent water crossing and check for green corrosion or moisture inside the housing. Reseal with fresh silicone, or replace the connector outright if corrosion has already set in.
Prepping Your Rig Before You Start Cutting Wire
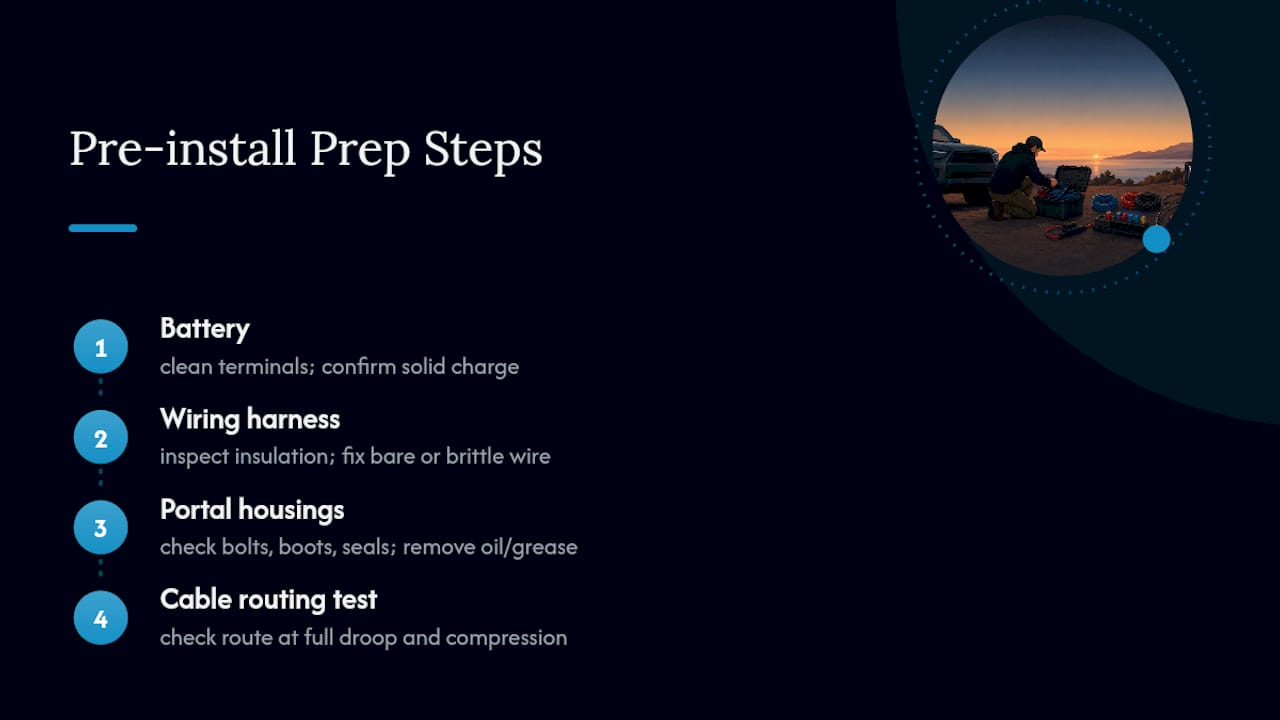
A rushed prep stage is where most wiring headaches start. Give your vehicle a real once-over before you pick up a wire stripper.
Start with the battery. A weak or corroded terminal can mimic a wiring fault later, so clean the posts and confirm a solid charge before you begin. Inspect your existing wiring harness for cracked insulation, especially near the portal housings where rocks and brush make constant contact. If you spot bare copper or brittle insulation on factory wiring, address it now rather than building a new circuit next to a failing one.
Check your portal housings themselves for loose bolts, worn boots, or leaking seals. Mounting a $40 LED strip to a portal that’s already leaking gear oil is a losing proposition, since oil residue will eventually degrade adhesive backing and connector seals. Clear away mud, grease, and loose debris from the mounting surface so your adhesive actually bonds.
Finally, walk through your planned cable route with the suspension at full droop and full compression. A route that looks clean with the vehicle sitting still can pull tight or pinch the moment you hit a big hole on the trail. Take five minutes here, and you’ll skip a return trip under the vehicle later.
Detailed Wiring Diagrams or Schematics
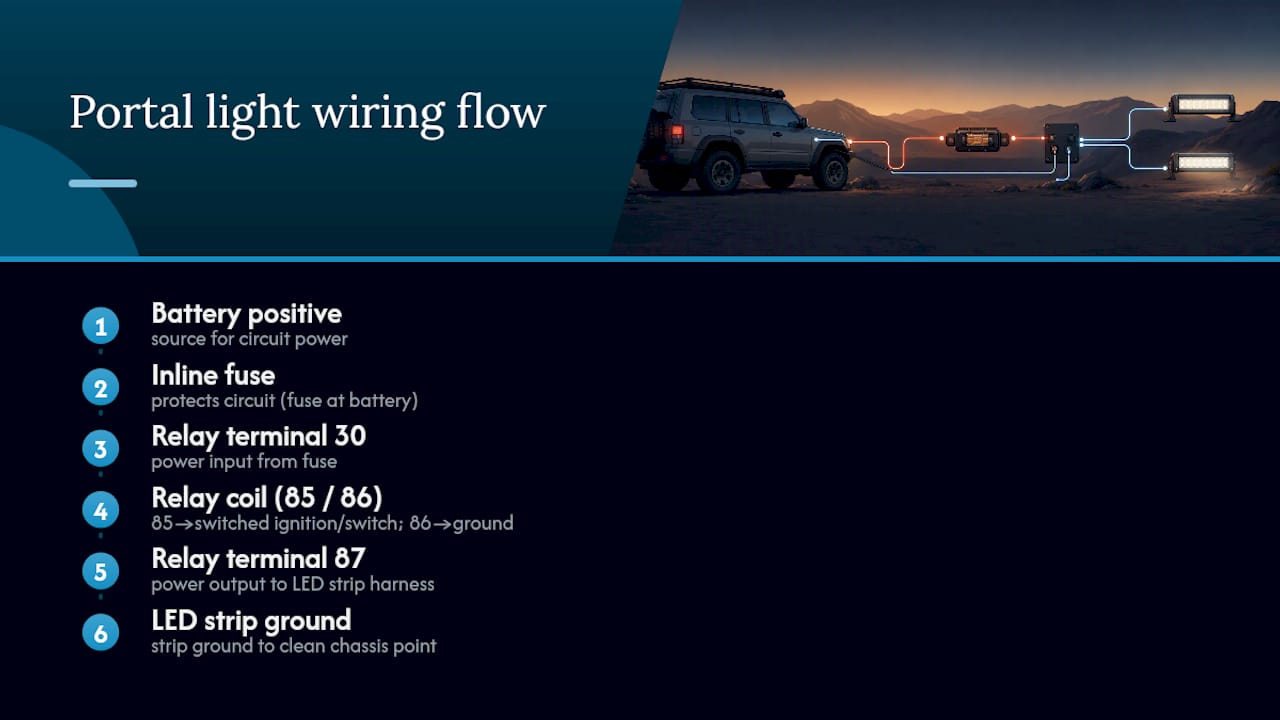
A basic portal light circuit follows a simple, repeatable path: battery positive to inline fuse, fuse to relay terminal 30, relay terminal 85 to your switched ignition or dash switch, relay terminal 86 to ground, and relay terminal 87 out to the LED strip harness. The strip’s ground lead runs to a clean chassis point near the mount.
If you’re running a multi-accessory setup with rock lights and portal lights on separate switches, wire each circuit through its own relay and fuse rather than sharing one relay across multiple loads. This keeps a failure on one circuit from taking down the other, and it makes troubleshooting far simpler since you can isolate each strip independently. Label each wire at both ends with tape or a marker as you build the harness. It sounds unnecessary until you’re six months down the road trying to remember which wire feeds which strip.
Choosing the Right Type and Color of Portal Lights
White strips are the standard choice for actual visibility, since they mimic daylight and show terrain detail better than any colored option. If your goal is genuinely seeing rocks, ruts, and water depth at night, stick with a bright white strip in the 6000K range.
RGBW strips add flexibility for show use, letting you switch between white for trail visibility and color modes for parking lot looks, but they require a compatible controller and add a layer of wiring complexity most first-time installers don’t need. A white-only double row strip keeps the wiring simpler while still delivering strong ground coverage. Row density is really a color decision too, in the sense that a quad-row strip in white throws noticeably more usable light than a single-row strip in any color. If off-road visibility is your priority, prioritize row density and white output over color features.
Cleanup and Post-Install Inspection
Before you call the job finished, walk the entire harness run one more time. Confirm every zip tie is snug, every section near a pivot point has slack, and split loom covers any wire within a few inches of moving suspension parts.
Wipe down excess silicone around connectors so it doesn’t collect trail dust, and double check that no tools or loose hardware got left near the portal housing. Cycle your headlights, rock lights, and new portal strips together to confirm nothing is drawing more current than expected or tripping a shared fuse. Take the vehicle for a short drive with some rough terrain if you have access to it, then recheck every connector and mount point once you’re back in the garage. Vibration during that first drive tends to reveal any loose fastener immediately.
Why DIY Installers Underestimate the Wiring, Not the Mounting
Most guides to installing portal lights focus almost entirely on mounting the strips, and that’s the part readers worry about least. In practice, the wiring is where installs actually fail. A strip that’s slightly off-center on the portal housing still lights up fine. A relay wired without a proper fuse, or a ground run to a corroded bolt, will cause problems that show up weeks later on the trail, usually at the worst possible moment.
Some companies design LED lighting and wire harnesses to match specific wiring patterns rather than offering generic universal kits. That matters because a harness built for a specific strip configuration, matched connector to connector, eliminates a lot of the guesswork that leads to a bad ground or an underrated fuse. Using a purpose-built harness instead of splicing together generic wire cuts real time off the install and removes most of the common failure points covered above.
— Christopher
Simplify Your Portal Light Install With the Right Parts
Half the headaches in a DIY portal light install come from mismatched parts, not bad wiring skills. Some companies design LED strips and harnesses to fit together in ways that match specific plug and row configurations, reducing guesswork compared to generic harnesses.

If your build calls for maximum ground coverage, the quad row ultra high density portal lights pair with a replacement wire harness built for the job, cutting out the wiring guesswork covered above. Every kit ships with a satisfaction guarantee, and financing options mean you’re not stuck paying the full cost upfront just to upgrade your night visibility. Browse the wheel light ring and strip lineup to match a kit to your exact portal size, or reach out to the support team before you order if you’re unsure which harness fits your setup.
Sources
FAQ
Why Won’t My Portal Lights Turn On?
Check the main fuse and listen for the relay click first, since a blown fuse or a dead relay accounts for most no-power complaints. If the relay clicks but the strip stays dark, test for voltage directly at the strip’s connector to isolate a bad ground or a broken harness lead.
Can You Put LED Lights on a Golf Cart?
Yes, LED strips work on golf carts using the same relay-and-fuse wiring principles covered in this guide, tapped off the cart’s voltage system through a step-down converter if needed. Ground the strip to the cart’s chassis and protect the feed wire with an inline fuse just as you would on a UTV.
How Do You Hook Up Lights to a Golf Cart?
Run a fused positive feed from the battery to a relay, wire a dash-mounted switch to trigger the relay coil, and connect the relay output to your light strip’s harness. Ground the strip’s negative lead to a clean metal point on the cart’s frame.
What Size Portal Light Strip Do I Need?
A 40 inch strip typically fits 4 to 6 inch portal housings, while 8 inch portals and dual-idler setups generally need the 60 inch option to wrap the housing fully. Measure your portal’s diameter before ordering to avoid a strip that’s too short to cover the full housing.
Do Portal Lights Need a Relay?
A relay is strongly recommended because it keeps the full current draw off your dash switch and off factory wiring rated for lighter loads. Skipping the relay is one of the most common reasons DIY portal light installs develop wiring problems down the line.