

For most low-voltage LED runs, 18 AWG handles short jumps under 10 feet, 16 AWG covers moderate 10 to 25 foot runs, and 14 AWG or thicker is the right call for long 12V runs or higher-wattage loads. The deciding factors are always the same three: system voltage, total amps drawn, and one-way run length. Once you know those numbers, the chart and calculation steps below will get you to an exact answer.
TL;DR:
- Choosing the right wire gauge depends on voltage, current, and run length, with longer or higher-current runs requiring thicker wire.
- Using 18 AWG is suitable for short, low-wattage LED runs under 10 feet, but longer or higher-load setups need at least 14 AWG or thicker.
- Voltage drop at low voltages like 12V significantly impacts brightness, making thicker wire or higher voltage systems preferable for long runs.
- For proper sizing, calculate load in amps, consider round-trip length, and ensure voltage drop stays below 3 percent for most LED applications.
- Upgrading to 24V or higher systems and using multiple power injection points can reduce voltage drop without increasing wire thickness everywhere.
Table of Contents
- What Wire Gauge Do You Need for 12V and 24V LED Lights?
- How Do You Calculate the Right Wire Gauge for an LED Setup?
- Why Does Voltage Drop Matter So Much at Low Voltage?
- Which Wire Gauge Fits Your LED Setup?
- How Can You Reduce Voltage Drop Without Running Heavier Wire Everywhere?
- What Are the Safety Rules for Wire Gauge and Ampacity?
- How Does Wheellightexpress Apply These Wiring Standards?
- Where Can You Verify These Wire Gauge Recommendations?
- Why the Standard Wire Gauge Advice Undersells Distance
- Sources
What Wire Gauge Do You Need for 12V and 24V LED Lights?
Wire gauge selection comes down to matching conductor size to current draw over a given distance, and the numbers get less forgiving the lower your voltage runs. A 12V system pushes twice the current of a 24V system for the same wattage, which means 12V setups need thicker copper to stay within safe voltage-drop limits over the same distance.
The table below reflects the standard 3% voltage-drop threshold that most DC wiring guides design around, matched against common one-way run lengths.
Note: Exact amp values depend on wire quality, voltage drop limits, and load specifics; consult a reliable wire gauge calculator or manufacturer’s chart for precise ratings.
These figures come from GridWright’s sizing charts and align closely with the amp-rating tables published by Solamp for DC solar and low-voltage systems. If you’re running 24V instead of 12V, you can typically drop one AWG size thinner for the same wattage and distance, since the current is roughly half.
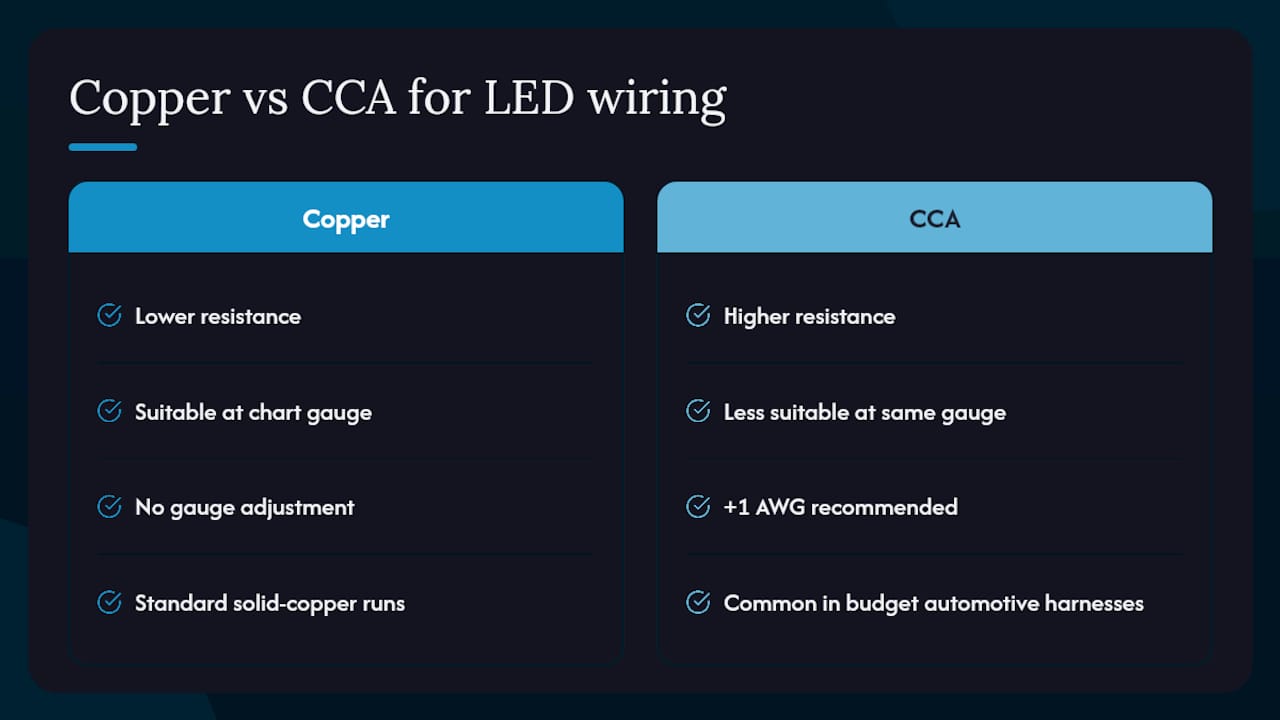
One catch that trips up a lot of installers: these numbers assume solid copper conductors. If your wire is copper-clad aluminum (CCA), which shows up in a lot of budget automotive harnesses, go up one full gauge size from what the chart recommends. CCA has noticeably higher resistance than pure copper, and the chart math simply doesn’t hold for it.
How Do You Calculate the Right Wire Gauge for an LED Setup?
Sizing wire correctly isn’t guesswork once you know two formulas. The first converts your LED load into amps. The second tells you how much voltage you’ll lose over distance with a given gauge.
- Find your current draw. Use A = W ÷ V. A 60W LED strip on a 12V system draws 60 ÷ 12 = 5 amps.
- Account for round-trip distance. If your strip sits 20 feet from the power source, you’re running 40 feet of total conductor, since both the positive and negative legs carry current.
- Estimate voltage drop for each candidate gauge. Using resistance values per foot for copper wire, an 18 AWG run at 5 amps over 40 feet drops roughly 1.6V, an unacceptable 13% of a 12V supply. Stepping up to 16 AWG cuts that to about 1.0V (8.3%), still too high. At 14 AWG, the drop falls to around 0.65V, just above 5%. You’d need 12 AWG to land near the 3% target (0.36V) at this distance and amperage.
- Choose the gauge that keeps drop under 3%, or accept a higher tolerance only if the application allows it (more on that below).
- Double check with an online LED wire size calculator if you want exact decimal precision rather than the rounded estimates above. Manual math gets you close, but a calculator accounts for temperature and exact resistance coefficients.
This example illustrates why a 60W strip at 20 feet one-way is a genuinely borderline case. It’s exactly the kind of run where installers using 18 AWG report visible dimming at the far end, then have to redo the wiring with heavier gauge.
Why Does Voltage Drop Matter So Much at Low Voltage?
Voltage drop happens because every foot of wire has a small amount of resistance, and resistance eats voltage as current passes through it. The effect is proportionally much larger at 12V than at 120V, because you’re losing the same absolute voltage against a much smaller starting number.
- On a 12V system, that’s a maximum drop of 0.36V.
- On a 24V system, that ceiling rises to 0.72V, which is one reason 24V kits tolerate longer runs on the same gauge.
- Some general-purpose lighting can tolerate up to 5% drop without a noticeable difference.
- Sensitive electronics, dimmers, or color-critical RGB setups should stay at 2% or less to avoid flicker or inconsistent color temperature.
If your install falls into that sensitive category, don’t split the difference.
Which Wire Gauge Fits Your LED Setup?
Different LED applications call for different starting points, and matching your project to a known scenario saves a lot of back-and-forth with a calculator.
- Under-cabinet strips (under 10 ft, low wattage): 18 AWG is fine for a single run feeding directly from a nearby driver.
- 5-meter LED strip rolls chained together: Once you connect two or more reels, cumulative current climbs fast. Size the home-run wire to the combined amp draw of every reel, not just the first one, and step up to 16 or 14 AWG accordingly.
- Light bars and off-road auxiliary lights: These often draw 3 to 8 amps each and run 15 to 30 feet to the cab. 14 AWG is the practical minimum for most single-bar installs; dual-bar setups often need 12 AWG on the home run.
- Interior cab lighting and accent strips: Short runs under 15 feet with modest wattage usually work fine on 16 AWG.
- Wheel wells and rock lights: These runs snake through the chassis and often exceed 15 feet one-way once you account for routing around suspension components. Treat them like a long run and size up, even if the strip itself only draws 1 to 2 amps, because bend paths add unaccounted length. Wheellightexpress covers vehicle-specific sizing in more detail in its guide to off-road light wire gauge selection.
The pattern across all of these is simple: distance and cumulative load push you up in gauge faster than most people expect. A single reel might be fine on 18 AWG, but three reels chained end to end on the same wire almost never are.
How Can You Reduce Voltage Drop Without Running Heavier Wire Everywhere?
You don’t have to oversize every foot of wire in a system to solve voltage drop. A few structural changes do more work than brute-force upsizing.
- Move to 24V or 48V kits where the install allows it. Doubling voltage halves current for the same wattage, which is why 24V systems tolerate roughly double the amperage of a 12V system on the same gauge.
- Use multiple power injection points on long LED strip runs instead of feeding the whole thing from one end. This splits the current path and shortens the effective distance each segment has to carry.
- Home-run one thick wire to a terminal block, then branch out with short pigtails. This keeps the heavy gauge only where it’s needed, on the long feed, while the fragile strip pads connect through lighter, more flexible pigtail wire that won’t tear the copper tape.
- Shorten the physical run wherever routing allows it. Sometimes the simplest fix is running the wire along a shorter path rather than following the longest available channel.
Pro Tip: When you home-run heavy gauge wire to a terminal block, solder the pigtail-to-strip connection rather than relying on clip connectors alone, then add heat-shrink tubing over the joint for strain relief. Clip connectors are convenient but they’re also the first point of failure on a vehicle that vibrates constantly.
What Are the Safety Rules for Wire Gauge and Ampacity?
Ampacity is the maximum current a wire can carry continuously without overheating, and it’s a separate consideration from voltage drop. A wire can be too thin for ampacity even on a short run where voltage drop wouldn’t be an issue.
- Match wire ampacity to your actual continuous amp draw, then fuse below that rating. If your 14 AWG wire carries an ampacity of 15 amps, fuse the circuit at 10 to 12 amps to leave a safety margin.
- Undersized wire doesn’t just dim your lights, it heats up. Enough sustained overcurrent can soften or melt wire insulation, and in the worst cases that’s a fire risk, which is why matching gauge to circuit amperage is a core electrical safety principle, not just a performance tweak.
- Choose connectors rated for your gauge. Butt connectors and spade terminals sized for 18 to 16 AWG won’t grip 12 AWG wire properly, and oversized connectors on thin wire create loose, high-resistance joints.
- If you’re using CCA wire, upsize both the gauge and the fuse rating expectations, since CCA’s higher resistance and lower tensile strength change how it behaves under load compared to solid copper.
- Check fuse sizing specifics in Wheellightexpress’s guide to fuse size for LED lights if you’re unsure how to match a breaker or fuse to your calculated amp draw.
How Does Wheellightexpress Apply These Wiring Standards?
Every wire harness Wheellightexpress designs starts from the same math covered above: amp draw, run length, and voltage drop, sized with margin rather than to the bare minimum. Because the company designs and assembles its lighting kits in Louisiana rather than sourcing generic harnesses overseas, it can control conductor gauge and connector quality on a per-kit basis instead of settling for whatever a supplier happens to ship.
For wheel and rock light installs, the practical approach mirrors the pigtail method described earlier: a properly sized home-run harness feeds a terminal point near the wheel well, with shorter leads carrying current the final stretch to the light itself. That keeps the long, vibration-prone run on heavier, more durable wire while the connection points near the light stay flexible. Readers building a full custom lighting setup can find matched wire harness leads and wires built to these same standards, along with guidance on lighting best practices for custom automotive builds.

Where Can You Verify These Wire Gauge Recommendations?
The AWG-to-amp figures in this guide draw from GridWright’s 12V/24V/48V sizing charts, Solamp’s DC wire size reference, and practical LED-specific recommendations from Lielectro’s wiring guide. For general ampacity and safety context beyond low-voltage lighting, The Spruce’s circuit amperage guide is a solid plain-language reference. If your setup falls outside the ranges covered in the quick chart, run your numbers through a dedicated LED wire size calculator rather than extrapolating by eye.
Why the Standard Wire Gauge Advice Undersells Distance
Most wire gauge charts get the amps-to-AWG math right and still lead people astray, because they present distance as a footnote instead of the variable that actually breaks installs. In practice, the gap between “technically adequate” and “looks dim by month three” almost always comes down to someone measuring the strip length instead of the full round-trip run to the power source.
What the research here actually supports is a bias toward the next gauge up whenever a run is borderline, cumulative, or routed through anything that adds real-world length, like a wheel well or a chassis channel. If you’re chaining LED reels or feeding a light bar at the end of a long harness, prioritize the home-run wire first. Everything downstream of a solid heavy-gauge feed is easy to fix. A thin feed carrying too much current for too far is not something a better connector or a brighter strip will ever correct.
— Christopher
Sources
- DC Wire Gauge Sizing Guide — 12V/24V/48V Systems Explained | GridWright
- What Gauge Wire for LED Lights? (12V, Strip Lights & Wiring Guide)
- DC Wire Size Chart - Amp Ratings & AWG Reference for Solar | Solamp
- Matching wire size to circuit amperage | The Spruce