

Aim for a minimum gap of 1/4 inch between your wheel light ring and the brake caliper. That’s the baseline most installation manuals call for, but it is a floor, not a finish line. Your actual required clearance depends on kit diameter, rotor size, and how your specific caliper is shaped, so measurement always beats guessing.
Before you order anything, do three things:
- Measure through the wheel (or pull it) to record rotor diameter, caliper reach, and dust shield position.
- Mock-fit the ring against the dust shield to confirm it clears the caliper body at every point of rotation.
- Bench-test the lights on 12 volts before you drill a single hole or commit to permanent mounting.
Skip any of these and you risk a ring that rubs, a harness that chafes, or a return you didn’t need to make.
Key Takeaways
Confirming a minimum 1/4 inch wheel light caliper clearance through direct measurement, not assumption, prevents the rubbing, wiring damage, and returns that come from guessing at fitment.
| Point | Details |
|---|---|
| Baseline clearance target | Treat the 1/4 inch minimum gap as a floor, and add margin for large calipers or heat exposure. |
| Measure before you buy | Record rotor diameter, caliper outermost point, and dust shield position, then compare to kit sizing rules. |
| Mount with at least three brackets | Use M4 hardware and a 4mm pilot bit on the dust shield, and mock-fit before drilling anything permanent. |
| Route wiring upward and separated | Face wire toward forward wheel travel and keep power wiring apart from data or sensor cables to limit EMI. |
| Re-measure after any brake upgrade | Aftermarket calipers and larger rotors change your clearance math and require a fresh fitment check. |
| Use Wheellightexpress resources first | The Wheel Light Sizing Guide and ring bracket kits help confirm fit before you order a full ring and strip kit. |
Table of Contents
- How to Measure Rotor, Caliper, and Wheel for Fitment
- Mounting Brackets and Drilling the Dust Shield
- Routing Wire Harnesses Without Interference
- Verifying Clearance and Fixing Common Problems
- How Wheel Offset and Width Change Your Clearance
- Wheel Design Styles That Affect Clearance
- Caliper Material and Heat: Why They Affect Your Margin
- What Happens When You Upgrade Your Calipers
- Fixing Insufficient Clearance: Spacers, Shims, and Repositioning
- Get Your Fitment Right Before You Buy
- Frequently Asked Questions
- Sources
How to Measure Rotor, Caliper, and Wheel for Fitment
Grab a tape measure, a digital caliper, and a straightedge before you start. If you’re pulling the wheel or caliper for a clearer look, block the vehicle securely and support the caliper with a bungee or wire rather than letting it hang from the brake line.
Four numbers matter here:
- Rotor diameter — measure edge to edge across the face.
- Wheel inner diameter — the barrel opening where the ring will actually sit.
- Caliper’s outermost point — the farthest the caliper body extends toward the wheel face, since this is what your ring has to clear.
- Dust shield to rotor face distance, and separately, dust shield to wheel inner lip — both determine how much depth you have to work with.
Kit manuals translate these numbers into simple rules. A 14 inch ring kit commonly requires a rotor no larger than 11 inches and a wheel diameter of at least 17 inches, while a 15.5 inch kit typically needs a rotor under 13 inches paired with a wheel of 19 inches or more, according to fitment charts in the wheel ring installation manual. Run your own numbers against the Wheel Light Sizing Guide before you buy, since matching rotor and wheel size to kit size up front avoids most clearance surprises later.
Pro Tip: Once you’ve mocked up the ring, spin the wheel slowly by hand through a full rotation. Watch every point of the caliper and any brake hardware. A gap that looks fine at 12 o’clock can close up entirely at 3 o’clock on some caliper designs.
Mounting Brackets and Drilling the Dust Shield
Most wheel light kits mount behind the brake dust shield using a minimum of three brackets, spaced to distribute load evenly and keep the ring from flexing under vibration. Kit manuals typically call for M4 hardware and a 4mm pilot drill bit through the dust shield and into the bracket, a detail worth confirming against your specific ring bracket kit before you buy a bit.
The sequence that avoids costly mistakes:
- Mock up bracket placement without drilling anything.
- Mark hole locations with a paint pen once you’re satisfied with clearance.
- Test-rotate the wheel again with brackets held in place to catch interference before it’s permanent.
- Drill the dust shield only after that check passes.
- Install brackets and torque hardware to spec, then recheck rotation one more time.
Hold that 1/4 inch minimum gap as your floor, and add extra allowance if you’re running large truck calipers or oversized rotors, since bigger components leave less margin for error. Never disconnect a brake line to gain clearance, and always support a removed caliper rather than letting it dangle. Inspect the dust shield for rust or thinning metal before you drill; a shield that’s already compromised won’t hold hardware securely.
Pro Tip: If your dust shield shows surface rust, wire-brush the mounting area first. A clean surface helps the bracket seat flat and keeps the M4 screws from working loose over time.
Routing Wire Harnesses Without Interference
Route the ring’s wire so it faces upward and toward the front of the wheel’s forward travel, a detail specified directly in installation guidance to keep wiring clear of the caliper and away from suspension movement. Properly routing wire so it avoids contact with moving parts and hot surfaces helps prevent snags and damage.
A few wiring habits separate a clean install from a recurring headache:
- Keep power wiring and data/control wiring physically separated wherever possible, and cross them at roughly 90 degrees if a crossing is unavoidable.
- Run a dedicated relay harness or direct battery feed for the lighting circuit rather than tapping an existing accessory line.
- Ground to bare metal with a short, thick lead. Long, thin ground wires are a common source of flicker.
- Size an inline fuse to the kit’s actual current draw, not a generic value pulled from another project.
- Use protective loom and sealed connectors at every joint, and secure ties away from moving suspension parts to prevent chafing.
Long parallel runs between lighting power cables and communication or sensor wiring are a documented source of electromagnetic interference, and NEC-informed guidance recommends physical separation and clear cable labeling as the first line of defense. When separation alone doesn’t solve it, ferrite chokes and inline noise filters are standard fixes for lighting-induced noise, and they pair well with the improved grounding and dedicated relay feeds described in upfitting guidance on electrical noise. Dedicated feeds matter even more on higher-output kits, since shared circuits are where most flicker and controller reset complaints originate.
Verifying Clearance and Fixing Common Problems
Before you mount anything permanently, run the ring on 12 volts off the vehicle to confirm every segment lights correctly. Once it’s bolted up, spin the wheel slowly by hand and listen and watch for any rub against the caliper or brake hardware.
If something isn’t right, work through this sequence:
- Disconnect the lights to isolate whether a controller reset or flicker is coming from the lighting circuit or somewhere else in the vehicle’s electrical system.
- Check seals and connectors for moisture intrusion, especially after the first wash or rain exposure, since a damp connector is a frequent cause of intermittent flicker.
- Address EMI or radio static by separating power and data runs further, adding a ferrite choke, improving the ground connection, or moving a high-output load onto its own dedicated feed.
- Recheck rotation clearance with the wheel back on the vehicle, since ride height and suspension travel can change the gap slightly from your static mock-fit.
- Inspect after the first drive: retorque bracket hardware, confirm connector seals are intact, and verify nothing has shifted enough to close up your clearance margin.
Pro Tip: If you’re chasing an EMI issue that touches your brakes, ABS sensors, or anything safety-critical, that’s the point to bring in a professional rather than keep troubleshooting solo.
How Wheel Offset and Width Change Your Clearance
Offset determines how far your wheel’s mounting face sits relative to its centerline, and it directly changes how much room exists between the wheel barrel and the caliper. A wheel with more positive offset pushes the barrel outward, often opening up additional clearance behind the wheel face where a ring typically sits. Negative offset pulls the wheel and its inner barrel closer to the caliper, which can tighten that same gap even if the wheel diameter is identical to your old setup.
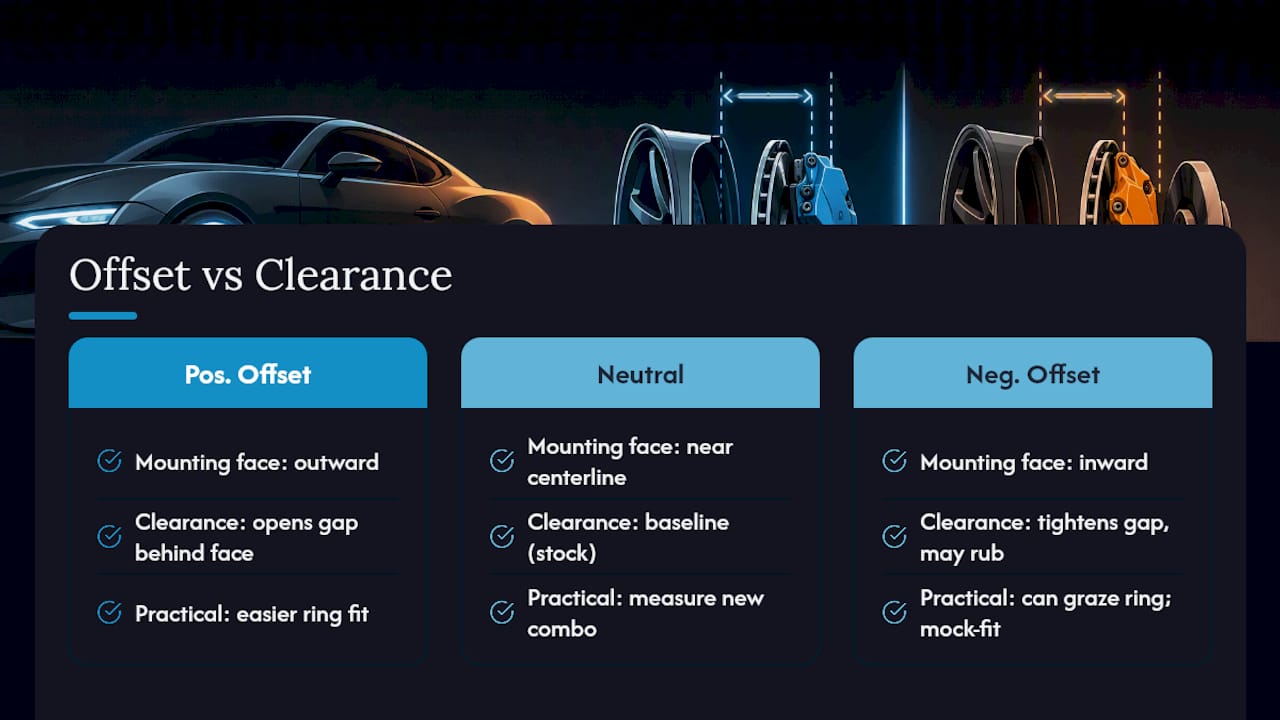
Width matters too, though less directly. A wider wheel usually comes with a deeper barrel, and a deeper barrel changes both how far your ring sits from the caliper and how much wire slack you need to route cleanly. Swapping to a wider, more aggressive wheel without checking offset is one of the most common reasons a wheel light kit that fit perfectly on a stock wheel suddenly rubs on an upgraded one.
If you’re planning a wheel upgrade alongside a lighting install, measure clearance on the new wheel and tire combination specifically, not on your old setup. Offset changes of even 5 to 10 millimeters can be the difference between a comfortable 1/2 inch of clearance and a caliper that’s grazing your ring on every rotation. When in doubt, mock-fit the ring on the actual wheel you’ll be running, not a similar-looking one from a different model year.
Wheel Design Styles That Affect Clearance
Not every wheel gives you the same working room, even at an identical diameter and offset. Spoked wheels with open, narrow spokes generally offer the most visibility and access to the barrel area, making both measurement and installation more straightforward. Mesh wheels pack in more material and tighter openings, which can restrict your line of sight to the caliper during mock-fitting and sometimes limit how a ring’s wiring can be routed without crossing a spoke.
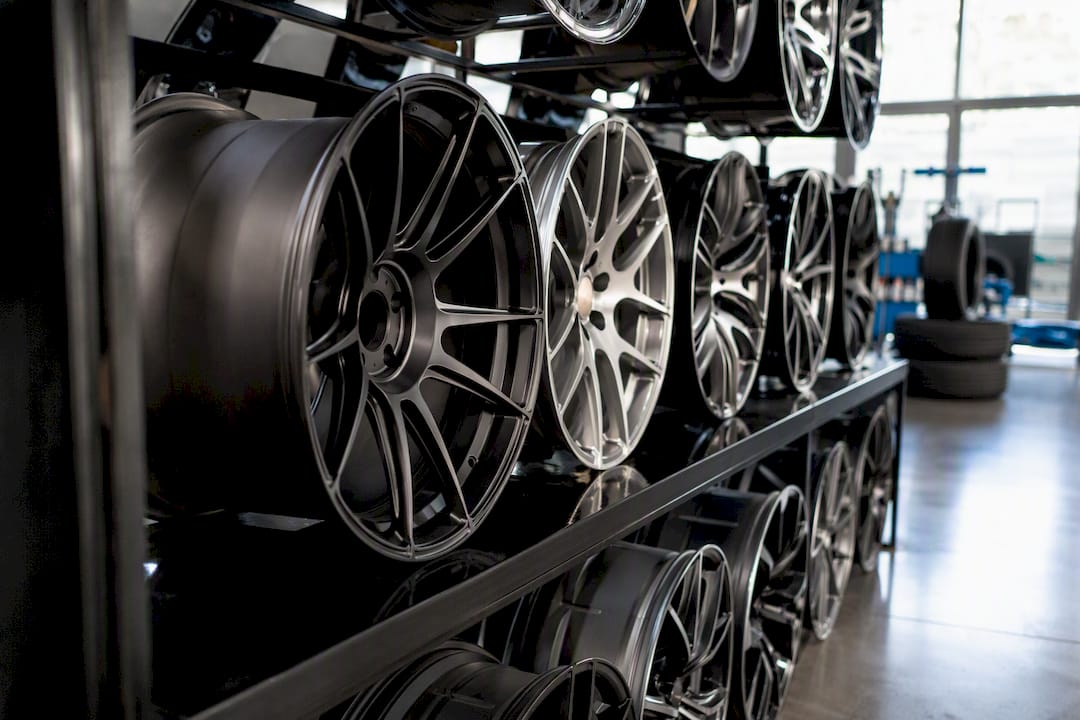
Deep dish wheels deserve the most attention. Their extended barrel depth often pushes the wheel face further from the hub, which can either help or hurt your clearance depending on how the caliper and rotor sit relative to that new barrel position. Some deep dish setups gain generous room for a ring and its harness; others tuck the barrel in a way that leaves surprisingly little space once you account for lug nuts, wheel weights, and valve stems competing for the same real estate.
Whatever the wheel style, the practical rule stays consistent: mock-fit the actual ring on the actual wheel before you drill anything. A mesh design that looks tight in photos might clear fine once you see it in person, and a deep dish wheel that looks roomy can surprise you with a caliper that sits closer than expected. Photos and spec sheets are a starting point, not a substitute for the tape measure.
Caliper Material and Heat: Why They Affect Your Margin
Calipers aren’t all the same size for the same reason, and heat is a big part of why. Larger, multi-piston calipers, common on trucks and performance-oriented trims, are physically bigger than the single-piston calipers found on most economy vehicles, and that extra size eats directly into the space available for your wheel light ring.
Heat matters too, even though it’s less visible on a spec sheet. Calipers run hot under braking, and aluminum calipers dissipate that heat differently than cast iron ones. The practical takeaway for your install isn’t about the light kit’s own heat tolerance so much as leaving enough physical air gap that the ring and its wiring never sit close enough to a hot caliper surface to matter. That’s part of why the 1/4 inch minimum exists in the first place. It’s a working margin against a component that changes temperature significantly every time you brake.
If your vehicle runs larger factory calipers, or if you already know they run hot on long descents or during towing, treat that 1/4 inch figure as a true minimum rather than a target. Building in extra margin, even a half inch or more where the wheel design allows it, gives your ring and harness a buffer against both mechanical rubbing and prolonged heat exposure.
What Happens When You Upgrade Your Calipers
Swapping to a big brake kit or an aftermarket performance caliper changes the clearance math you already worked out for your stock setup. Aftermarket calipers are frequently larger than factory units, sometimes considerably so, since more piston area and larger pad surfaces are usually the entire point of the upgrade.
That means a wheel light ring that fit comfortably before a brake upgrade may no longer clear afterward. The rotor diameter often increases alongside the caliper upgrade too, which changes both numbers in your fitment equation at once. If you’re planning both an aftermarket caliper upgrade and a wheel light install, sequence matters: finalize your brake components first, then measure and mock-fit the ring against that finished setup rather than your old baseline numbers.
Re-measuring after any caliper swap isn’t optional. Treat it the same as a first-time install, running through rotor diameter, caliper outermost point, and dust shield position again from scratch, because reusing your old measurements against new hardware is one of the more common ways installers end up with a ring that rubs.
Fixing Insufficient Clearance: Spacers, Shims, and Repositioning
If your measurements come back tight, you have a few practical options before giving up on a kit entirely. Wheel spacers push the entire wheel outward slightly, which can open up room between the barrel and the caliper, though they also change your effective offset and should be sized carefully to avoid bearing or fender clearance issues elsewhere.
Shimming the ring bracket itself is a smaller, more targeted fix. Adding a thin shim behind a mounting bracket can angle the ring a fraction of a degree away from the caliper’s tightest point, which is sometimes all it takes to clear a single problem spot rather than the whole rotation.
Caliper repositioning is the most involved option and one best left to a qualified shop, since it touches your braking system directly. In most cases, though, the simpler fix is choosing a slightly smaller ring diameter or a different bracket configuration that respects the clearance you actually have, rather than forcing a kit that was borderline from the first measurement.
Author perspective and client resources that simplify fitment
Most clearance complaints trace back to skipped measurements, not bad kits. The Wheel Light Sizing Guide and ring brackets exist to catch that gap early, while proper harness selection solves most of the routing headaches covered above.
Get Your Fitment Right Before You Buy
Once your measurements check out, Wheellightexpress gives you a direct path from confirmed clearance to a finished install, without guessing at generic overseas kits that don’t specify fitment tolerances. Start with the Wheel Light Sizing Guide to confirm your rotor and wheel numbers match a kit size, then use the ring brackets product page to see exactly what hardware you’ll need before you drill.
If your wiring run needs a different length or your factory harness has seen better days, the wire harness leads and replacement wire harness product pages cover both extension and replacement needs. Every kit is designed and assembled in the U.S., backed by a satisfaction guarantee, and available with financing so a quality install doesn’t have to wait on a full paycheck.
Measure your clearance, mock-fit the ring, and when the numbers line up, head to the Wheel Light Ring and Strip page to order, or reach out to support if you’re unsure whether your specific caliper and wheel combination will clear.
Frequently Asked Questions
What is the minimum wheel light caliper clearance I should aim for? Most manufacturer manuals set 1/4 inch as the baseline minimum gap between the ring and the caliper, though your exact requirement depends on rotor size, caliper shape, and kit diameter. Always confirm with a mock-fit rather than relying on the baseline alone.
Can I install a wheel light kit without removing the wheel? You can measure through some open-spoke wheels, but a full mock-fit against the dust shield almost always requires pulling the wheel, and often the caliper, for accurate access.
Do bigger trucks need more caliper clearance than passenger cars? Generally yes. Larger factory calipers and bigger rotors on trucks and off-road vehicles reduce the working space inside the wheel, which is why measuring your specific rotor and caliper dimensions matters more than trusting a generic clearance figure.
Will upgrading my brakes affect a wheel light kit I already installed? It often will. Aftermarket calipers and larger rotors change both key measurements in your fitment equation, so re-measure and re-mock-fit any time you swap brake components.
How do I stop my wheel lights from causing radio interference? Separate power wiring from data or communication cables, cross them at close to 90 degrees when they must intersect, and add a ferrite choke or inline noise filter if interference persists after improving your ground connection.
Sources
- LED WHEEL RING LIGHT (installation manual)
- Reducing light bar electrical noise in vehicles | OCM Upfitting