

Pick 60 LEDs per meter for hidden accent runs, background cove lighting, and budget-conscious vehicle accents where the strip sits behind a diffuser or out of direct sight. Pick 120 LEDs per meter when the strip is visible, the surface is reflective, or you need task-level brightness. The core difference is straightforward: 60 LEDs/m delivers roughly 500–600 lumens per meter at about 5 W/m, while 120 LEDs/m delivers roughly 1,000–1,200 lumens per meter at about 10 W/m, making the 120-count strip approximately twice as bright and twice as power-hungry under the same chip and drive conditions.
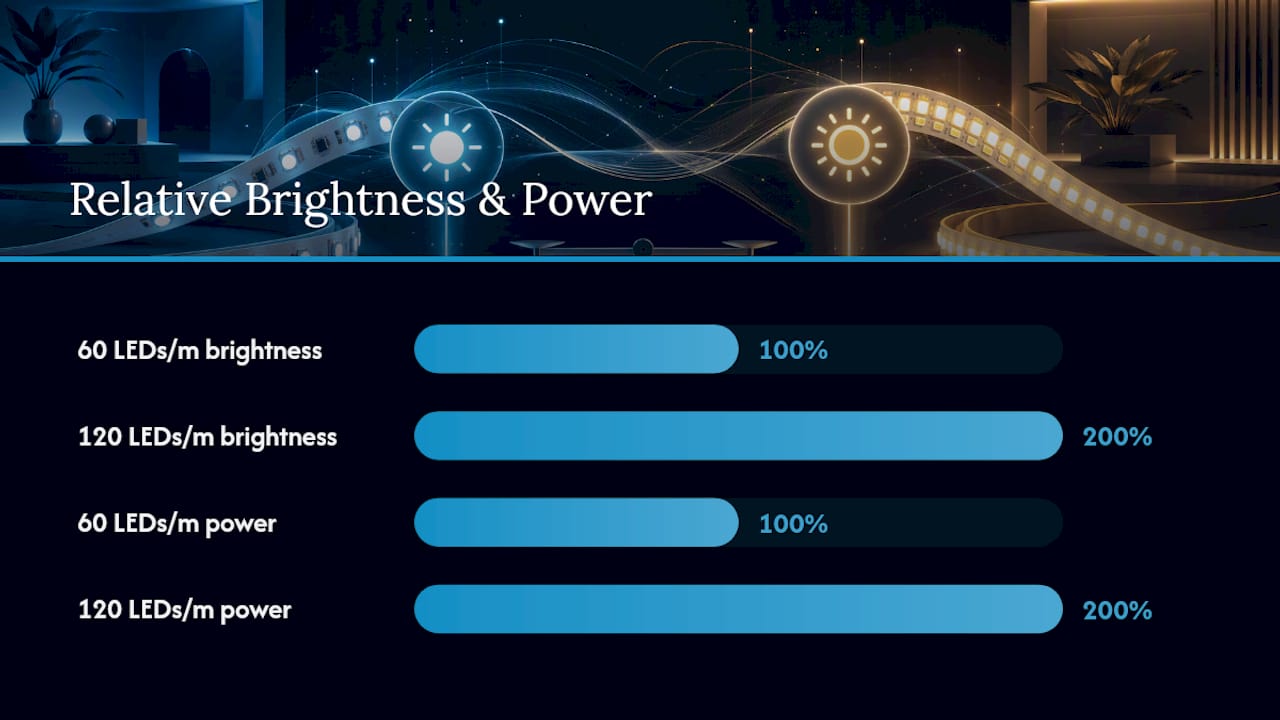
For most vehicle accent builds, 60 LEDs/m handles underglow and hidden rock-light channels well. For wheel wells, vanity bars, or any spot where the strip reflects off a painted or polished surface, 120 LEDs/m is the right call. Wheellightexpress designs its automotive-grade strips with these exact trade-offs in mind, and the guidance below maps every major decision point to a real install scenario.
Quick comparison:
- 60 LEDs/m: ~500–600 lm/m, ~5 W/m, wider cut intervals, lower cost per meter, best behind a diffuser or in a hidden channel
- 120 LEDs/m: ~1,000–1,200 lm/m, ~10 W/m, tighter cut intervals, higher cost per meter, best for direct-view and reflective surfaces
| Feature | 60 LEDs/m | 120 LEDs/m |
|---|---|---|
| Brightness (lm/m) | ~500–600 | ~1,000–1,200 |
| Power draw (W/m) | ~5 | ~10 |
| Uniformity / dot visibility | Visible dots without diffuser | Near dot-free at normal viewing distances |
| Price per meter | Lower | Higher (LEDs are the costliest component) |
| Best for | Ambient, hidden, accent | Task, direct-view, reflective surfaces |
Key Takeaways
The single most important decision in a 60 vs 120 LED strip comparison is viewing distance and surface type: those two factors determine whether density or diffusion solves your uniformity problem.
| Point | Details |
|---|---|
| Brightness doubles with density | 120 LEDs/m delivers ~1,000–1,200 lm/m vs ~500–600 lm/m for 60 LEDs/m under the same chip conditions. |
| Direct-view needs 120 LEDs/m | Reflective surfaces and close viewing distances show dot patterns from 60 LEDs/m even with a frosted diffuser. |
| Power draw doubles too | Plan for ~10 W/m at 120 LEDs/m; size your PSU at 1.25× the raw draw and inject power on runs over 3–4 m at 12V. |
| Heat sinking is required at 120 LEDs/m | Mount high-density strips in an aluminum channel to protect LED lifetime and keep adhesive from failing. |
| Wheellightexpress for vehicle builds | The Wheel Light Ring and Strip lineup with matching wire harnesses covers both density tiers for automotive-grade installs. |
Table of Contents
- How do 60 vs 120 LED strips compare on specs you can actually use?
- Why does LED density change how a strip looks and performs?
- How does density affect power draw, heat, and your driver setup?
- Where should you use 60 vs 120 LEDs per meter?
- How do you get a smooth, dot-free line without always buying 120 LEDs/m?
- Is the higher price of 120 LEDs/m worth it?
- How do you estimate brightness and size a power supply yourself?
- Installer perspective: what pros do that most buyers skip
- Wheellightexpress has the strips and harnesses your vehicle build needs
- What the installer perspective gets wrong about density
- Sources
How do 60 vs 120 LED strips compare on specs you can actually use?
Planning a run means knowing the numbers before you buy. The figures below reflect typical 2835-chip strips on 12V, which cover the majority of consumer and automotive installs. Strips using 5050 chips or running on 24V will shift these ranges, so always cross-check the manufacturer’s spec sheet.
| Parameter | 60 LEDs/m | 120 LEDs/m |
|---|---|---|
| LED spacing (mm) | ~16.7 | ~8.3 |
| Typical lm/m (2835 chip) | 500–600 | 1,000–1,200 |
| Typical W/m | ~5 | ~10 |
| Common cut interval | Every 3 LEDs (~50 mm) | Every 3 LEDs (~25 mm) |
| Max single-feed run (12V) | ~5 m | ~3–4 m |
- Same chip, different density: lumen output scales predictably when the LED type and drive current stay constant. Doubling density roughly doubles lumens per meter, which makes planning estimates reliable.
- 12V vs 24V: 24V strips of either density handle longer single-feed runs before voltage drop becomes a problem, which matters for full-vehicle or under-chassis installs.
- Manufacturer reporting: lumen specs are measured at the strip’s input, not at the lit surface. Diffuser losses, mounting angle, and reflector efficiency all reduce delivered light. Lumens are the primary spec to compare across strips, not watts or LED count alone.
- CRI matters for whites: for interior cabin lighting or vanity applications, CRI above 90 is recommended to keep skin tones and upholstery colors accurate.
Manufacturer catalogs, such as the HitLights 2026 product catalog, list exact lm/m, W/m, and cut spacing for individual SKUs. Use those sheets to confirm the numbers for the specific reel you are ordering.
Why does LED density change how a strip looks and performs?
The physics here are simple but often overlooked. Each LED emits light in a cone, typically 120 degrees. At 60 LEDs/m, the spacing between chips is about 16.7 mm. At that gap, the cones from adjacent LEDs overlap only partially, which leaves a visible bright spot centered on each chip when the strip is viewed directly or reflected off a surface.
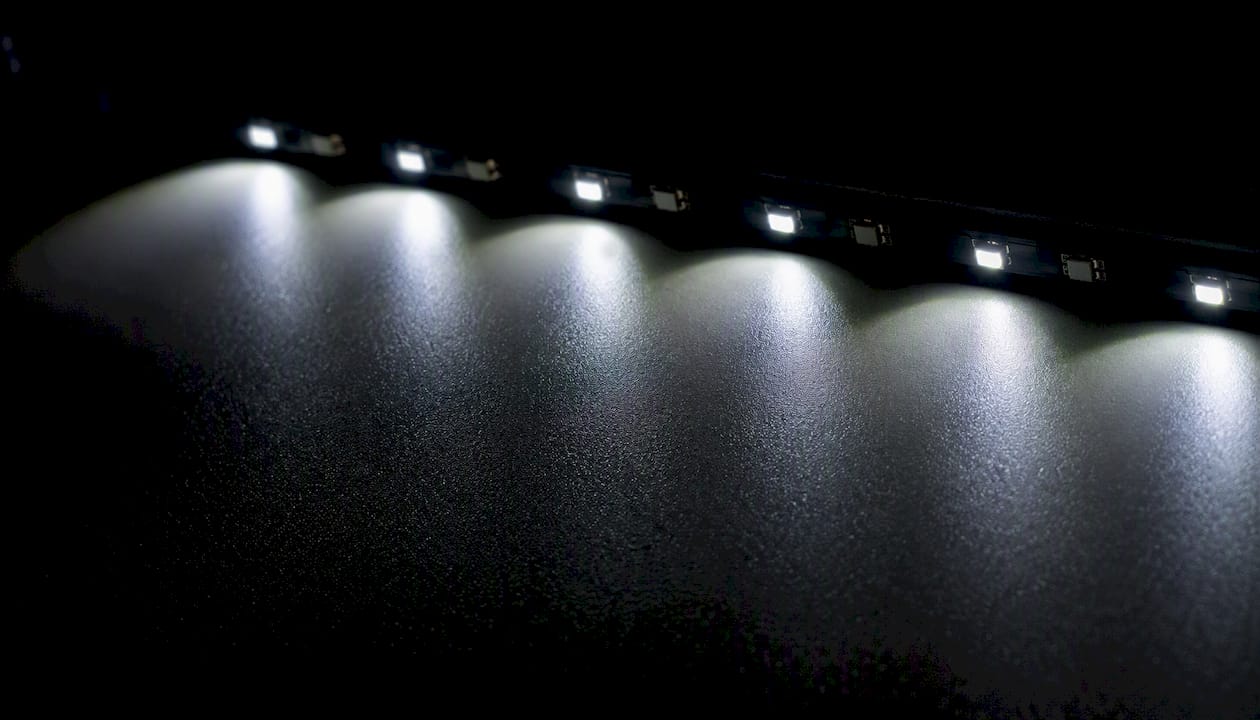
At 120 LEDs/m, spacing drops to about 8.3 mm. The cones overlap more completely, and the eye perceives a continuous line rather than a string of dots. For direct-view lighting or reflective surfaces, installers specify 120 LEDs/m or higher because even a faint dot pattern reflects as discrete spots on glossy paint or polished trim.
LED package type interacts with density in ways that matter:
- 2835 chips are the current workhorse for strip lighting. They run cooler per LED than older 5050 chips and produce competitive lumens per watt, making them the default for both 60 and 120 density strips.
- 5050 chips are larger, draw more current per LED, and produce more lumens per chip. A 60 LEDs/m strip with 5050 chips can match or exceed the lumen output of a 120 LEDs/m strip with 2835 chips, but it runs hotter and costs more per meter.
- Drive current: manufacturers can underdrive or overdrive chips to hit a target lumen level. Two strips with identical density and chip type can still differ in brightness if their drive currents differ. Always compare lm/m from the spec sheet, not just LED count.
Pro Tip: When comparing strips from different brands, ask for the lm/m figure at the strip’s rated wattage, not the chip’s maximum rated output. Overdriven chips produce more light short-term but shorten lifespan.
The predictable relationship between density and output is what makes planning straightforward. Waveform Lighting’s per-LED cost model confirms that LEDs are the dominant cost driver in a strip, so doubling density raises both performance and price in roughly equal proportion.
How does density affect power draw, heat, and your driver setup?
A 5 m reel of 60 LEDs/m at 5 W/m draws 25 W total. The same length at 120 LEDs/m draws 50 W. That difference shapes every downstream decision: driver capacity, wire gauge, and how long the strip lasts.
Voltage drop and run length are where higher density creates real constraints. More current per meter means voltage sags faster along the run. Higher density reduces the maximum single-feed run length for a given power supply because it draws more current per meter. A practical rule: for 12V strips, keep single-feed runs to 5 m or less for 60 LEDs/m and 3–4 m or less for 120 LEDs/m. Beyond those lengths, inject power at the far end or switch to 24V.
Thermal management is not optional for 120 LEDs/m strips. Increased power per meter raises heat generation, and without proper heatsinking, LED lifetime drops significantly. An aluminum channel serves two jobs: it diffuses light and conducts heat away from the strip substrate.
| Scenario | 60 LEDs/m | 120 LEDs/m |
|---|---|---|
| 5 m reel total draw | ~25 W | ~50 W |
| Recommended PSU (with 1.25x safety factor) | ~30 W | ~60 W |
| Max single-feed run (12V) | ~5 m | ~3–4 m |
| Aluminum channel required? | Recommended | Required |
For vehicle installs, the 12V system voltage is fixed, so run-length management matters more than in home installs where you can choose a 24V driver. High-density strips need larger power supplies and deliberate power-injection planning. On a truck or SUV, that often means splitting the strip into two independently fed segments rather than running one long continuous feed. See the high-lumen strip install guide for wiring and injection point specifics.
Where should you use 60 vs 120 LEDs per meter?
The right density depends on three factors: whether the strip is visible, how bright the space needs to be, and whether the surface behind or around the strip is reflective.
60 LEDs/m works well for:
- Hidden cove or soffit lighting where the strip sits inside a channel and only the glow is visible
- Under-shelf or under-cabinet ambient lighting viewed from more than 1 m away
- Vehicle underglow and rock lights mounted inside a channel or behind a rock guard
- Budget-conscious accent builds where a frosted diffuser handles the dot-blending
120 LEDs/m is the right call for:
- Under-cabinet task lighting where you cook or work directly under the strip
- Vanity and mirror lighting where the strip reflects off glass or polished surfaces
- Wheel well and portal lighting on trucks where the strip is visible at close range
- Retail display or show-vehicle builds where dot-free uniformity is a quality signal
Mixed-density strategy: use 120 LEDs/m where the eye focuses and 60 LEDs/m for ambient fill zones. On a custom truck build, for example, you might run 120 LEDs/m in the wheel wells and cab interior, then use 60 LEDs/m for the chassis underglow that sits behind a rock slider. That approach controls cost without sacrificing the visual quality where it counts.
For direct-view or reflective-surface installs, 60 LEDs/m with a frosted diffuser is often not enough. The dot pattern still shows through shallow profiles at close viewing distances. Stepping up to 120 LEDs/m eliminates the problem at the source rather than trying to diffuse it away.
Stacking two 60 LEDs/m strips in parallel on the same channel is a workaround some builders use to approach 120 LEDs/m lumen output, but it doubles the heat load and complicates wiring. Stacking strips for extra brightness is viable, but only when the channel and power supply are sized for the combined draw. For most installs, buying the correct density from the start is simpler and more reliable.
For application-specific guidance on where each density fits a vehicle build, the LED strip applications guide for custom vehicles covers exterior and interior placement in detail.
How do you get a smooth, dot-free line without always buying 120 LEDs/m?
A frosted diffuser and the right channel depth can make 60 LEDs/m look nearly continuous, but only under specific conditions. Here is how to work through the decision:
- Measure your viewing distance. If the nearest viewer is more than 1 m from the lit surface, a shallow frosted profile over 60 LEDs/m usually blends the dots adequately. Closer than 1 m, and you will likely see individual chips even through a frosted lens.
- Choose the right profile depth. Deeper channels give light more distance to spread before it exits the diffuser. A channel with 15–20 mm of internal depth over 60 LEDs/m performs noticeably better than a 6 mm surface-mount clip.
- Select the diffuser finish. Frosted (opal) diffusers scatter light and reduce dot visibility. Clear diffusers protect the strip but do almost nothing for uniformity. For 60 LEDs/m in a direct-view position, always use frosted.
- Test before final adhesion. Lay the strip in the channel, power it on, and check from the actual viewing angle before peeling the adhesive backing. This step catches dot-visibility problems before they are permanent.
- Upgrade to 120 LEDs/m if dots persist. When a deep frosted profile still shows dots at your viewing distance, the strip density is the limiting factor, not the diffuser.
Trimming and mounting tips:
- Cut only at marked cut points. Cutting between points damages the circuit and kills the LEDs past the cut.
- For vehicle installs, use a secondary adhesive (3M VHB tape or a compatible automotive adhesive) in addition to the strip’s factory backing. Heat and vibration degrade factory adhesive over time.
- Keep strips away from exhaust heat sources. Even 120°F ambient temperatures sustained over months will shorten LED life on strips not rated for high-temperature environments.
- Check IP ratings before mounting in wheel wells or under-chassis positions where water and debris are a factor.
LED density’s effect on vehicle appearance is covered in depth with visual examples if you want to see the dot vs. smooth comparison before committing to a density.
Is the higher price of 120 LEDs/m worth it?
LEDs are the most expensive component in a strip, so doubling density raises the per-meter cost meaningfully.
When the premium pays off:
- Direct-view installs where dot visibility would require replacing the strip anyway
- Reflective surfaces (polished wheels, mirror glass, gloss paint) where dots are amplified
- Commercial or show builds where visual quality is a selling point
When 60 LEDs/m is the smarter spend:
- Hidden or indirect installs where no one sees the strip itself
- Long runs where the cost difference compounds across many meters
- Projects where a better diffuser or deeper channel solves the uniformity problem for less money than upgrading density
Budget strategy: if your install is borderline, price out both options including the channel and diffuser. A 60 LEDs/m strip in a quality aluminum channel with a deep frosted diffuser often costs less total than a 120 LEDs/m strip in a shallow clip-on profile, and it can deliver comparable visual results for ambient applications. For task lighting or direct-view, the 120 LEDs/m strip is the more cost-effective long-term choice because it eliminates the problem rather than managing it.
Comparing lumen output across strips for your vehicle gives a practical cost-per-lumen breakdown that helps with this calculation.
How do you estimate brightness and size a power supply yourself?
Two formulas cover most planning scenarios:
- Total lumens = lm/m × run length (m)
- PSU watts required = W/m × run length × 1.25 (safety factor)
Worked example: 2.5 m under-cabinet or interior run
The 1.25 safety factor keeps the driver from running at full load continuously, which extends its life. Some installers use 1.3 for high-ambient-temperature environments like engine bays or enclosed vehicle cavities.
For a 5 m vehicle underglow run at 120 LEDs/m, the math is: 10 W/m × 5 m × 1.25 = 62.5 W minimum. A 75 W driver gives comfortable headroom. If the run exceeds 3–4 m on 12V, split it into two 2.5 m segments fed from the same driver via a power injection point at the midpoint.
Pro Tip: *Always measure the actual run length with a tape measure along the mounting path, not a straight-line estimate.
Voltage drop and maximum run length differ by density. When in doubt, go with a 24V strip for runs longer than 4 m, regardless of density.
Installer perspective: what pros do that most buyers skip
Most density-related installation failures come down to three skipped steps, not the strip choice itself.
Plan heat sinking before you buy the strip. A 120 LEDs/m strip mounted directly to plastic trim with no aluminum channel will run hot enough to degrade the adhesive and shorten LED life within months. The channel is not optional for high-density installs. Thermal management is the primary engineering challenge for high-power LED arrays, and it applies to strips just as it does to individual high-power LEDs.
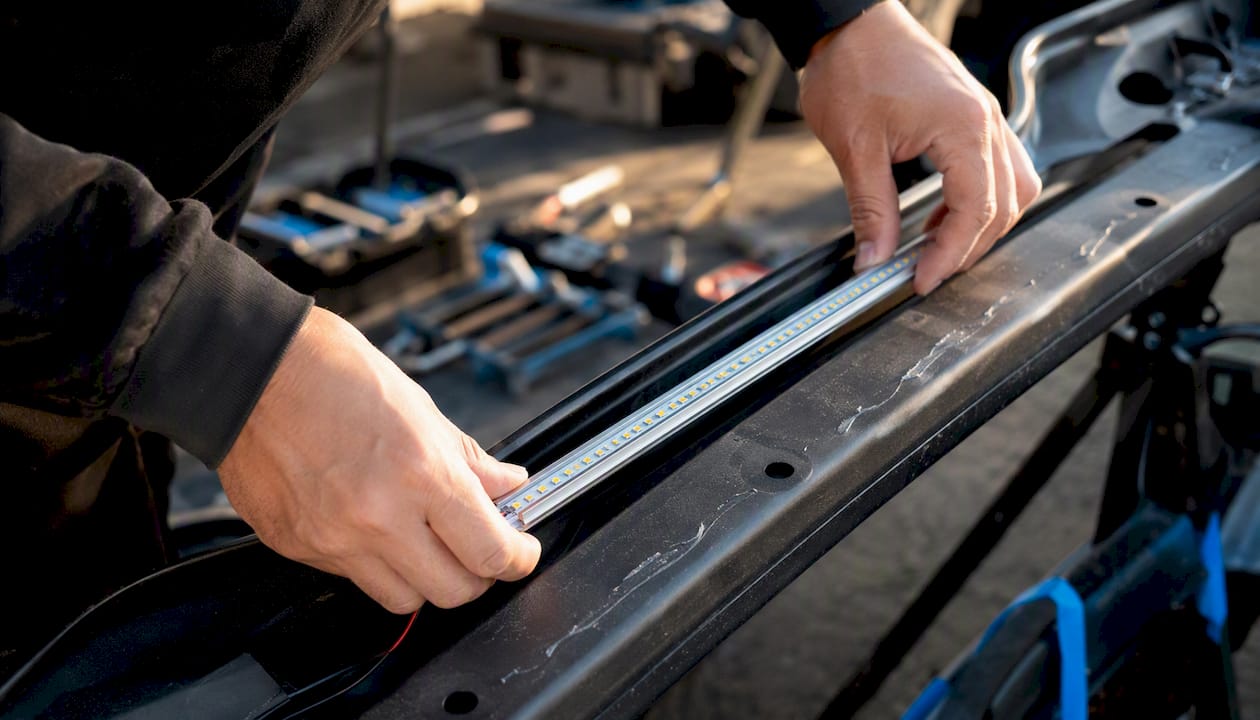
Test with the actual diffuser and at the actual viewing angle. Strips look different in hand than they do installed. A 60 LEDs/m strip that looks fine on a workbench can show obvious dots when mounted inside a wheel well and viewed from 18 inches away at an angle. Power the strip in the channel, hold it in position, and check before committing the adhesive.
Don’t choose density by price alone. The cost difference between 60 and 120 LEDs/m is real, but it is smaller than the cost of pulling a strip out and replacing it because the visual result was wrong. 60 LEDs/m is the practical workhorse for many installs, while 120 LEDs/m is the right upgrade for dot-free direct-view results. Decide based on the install, not the price tag.
Common mistakes to avoid:
- Ignoring CRI when buying white strips for interior cabin lighting. A CRI below 80 makes upholstery and trim look washed out.
- Skipping power injection on long 12V runs and wondering why the far end is dim.
- Mixing densities on a single controller channel without accounting for the different current draws.
When to call a professional: multi-zone power distribution across a full vehicle, waterproofing for submerged or high-pressure wash environments, or any build that mixes RGB addressable strips with static white strips on a shared controller. Those scenarios involve enough wiring complexity that a mistake costs more to fix than the consultation.
Wheellightexpress has the strips and harnesses your vehicle build needs

Wheellightexpress designs and assembles its automotive-grade LED strips and wire harnesses in Louisiana, which means every product is built for the demands of real vehicle installs, not adapted from generic home-lighting stock. Whether you are deciding between a lower-density accent strip for a hidden channel or a high-density strip for a wheel well or vanity bar, the product lineup maps directly to the 60 vs 120 decision this guide covers.
The Wheel Light Ring and Strip is the go-to for high-brightness, direct-view wheel and accent applications. For repairs or density upgrades on an existing build, the Replacement Wheel Light Strip fits the same harness system. Every kit pairs with Wheellightexpress’s wire harness leads, which handle the power injection and multi-zone routing that high-density installs require. Browse the full lineup and contact support for custom vehicle fitment questions at Wheellightexpress.
What the installer perspective gets wrong about density
Most density debates focus on brightness. The real variable is uniformity, and uniformity is a function of viewing distance as much as LED count.
A 60 LEDs/m strip viewed from 2 m through a frosted diffuser looks nearly identical to a 120 LEDs/m strip in the same setup. The same 60 LEDs/m strip viewed from 30 cm on a reflective surface looks like a string of lights. The strip did not change. The install did.
This matters because buyers routinely over-specify density for hidden installs and under-specify it for direct-view ones. The result is wasted money in one direction and a redo in the other. The correct approach is to define the viewing distance and surface type first, then pick the density. Every other spec follows from that decision.
There is also a tendency to treat higher density as automatically better quality. It is not. A well-binned 60 LEDs/m strip with consistent color temperature and CRI above 90 will outperform a poorly binned 120 LEDs/m strip in any application where color accuracy matters. Density controls uniformity and brightness. Binning and CRI control color quality. Both matter, and neither substitutes for the other.
Sources
- LED Strip Density Comparison: Finding the Right Configuration for Your B2B Customers - Alibaba.com Seller Blog
- What does LED density on an LED strip mean Waveform Lighting
- LED Strip Density 60/120/240 per Meter: Comparison & Choice ARTLED
- Thermal management of high-power LEDs - Wikipedia
- How to choose the right LED strip light for your project - FlexfireLEDs