

If you’re wiring standard LED light bars, pods, or accent strips and you’re not sure of the exact load, start with 12 AWG. It’s the safest general-purpose choice for most off-road lighting circuits and gives you room to handle higher amp draws without excessive voltage loss.
Two things push you away from that baseline: total amp draw (watts divided by 12 volts) and round-trip wire length, meaning the full distance from your battery to the light and back to ground. A short run with a low-wattage pod can get away with thinner wire. A longer round trip to a high-wattage bar requires thicker wire.
Undersized wire doesn’t just underperform. It heats up, drops voltage before it reaches the light, and can knock out a meaningful chunk of your output. Get the gauge right and everything downstream, from fuse sizing to connector choice, gets easier.
- Start at 12 AWG when unsure of load or distance.
- Recalculate for anything over 100 watts or runs longer than 15 to 20 feet one way.
- When your calculation lands between two sizes, always choose the thicker wire.
Pro Tip: Keep a spool of 10 AWG on hand even if most of your lights don’t need it. It costs a little more and takes up a little more space in your loom, but it eliminates guesswork on your next add-on light.
Key Takeaways
Getting off-road light wire gauge right comes down to matching wire thickness to amp draw and round-trip distance, then protecting that wire with the correct fuse, connectors, and routing.
| Point | Details |
|---|---|
| Start at 12 AWG | Use it as a safe baseline for standard LED light bar installs when load or distance is unclear. |
| Calculate, don’t guess | Divide watts by 12V for amps, then measure the full round-trip distance before picking gauge. |
| Target 3% to 5% voltage drop | Keep drop under 3% for sensitive electronics and under 5% as the practical ceiling. |
| Fuse the wire, not just the device | Size fuses to protect the wire’s ampacity and mount them close to the battery. |
| Choose a matched harness when it’s complex | Wheel Light Express offers pre-sized wire harnesses and leads built to these same AWG and protection standards. |
Table of Contents
- Off-Road Light Wire Gauge Chart by Load and Distance
- How to Calculate the Right Wire Gauge for Your Lights
- Fuse and Relay Sizing for Off-Road Lighting Circuits
- Choosing Wire, Connectors, and Routing for Off-Road Conditions
- Signs Your Off-Road Light Wiring Is Undersized
- Pre-Made Harness or DIY Wiring: Making the Call
- What Installers Get Right That Manuals Miss
- Skip the Guesswork With a Correctly Spec’d Harness
- FAQ: Off-Road Light Wire Gauge Questions
- Sources
Off-Road Light Wire Gauge Chart by Load and Distance
Wire gauge decisions come down to two numbers: how many amps the light pulls, and how far the current has to travel. Below are practical starting points for common off-road lighting loads, based on round-trip circuit design rather than one-way distance.
LED accent strips and rock lights draw very little current, usually under 2 amps each, so 18 AWG handles most short runs without issue. Standard 55 to 65 watt work lights and driving lights sit in the 4.5 to 5.5 amp range and call for 16 AWG on runs under 10 feet. High-power LED light bars in the 180 to 300 watt range pull 15 to 25 amps, which is where 12 AWG earns its reputation as the default choice for anything under 10 feet.
| Light Type | Typical Load | Wire Gauge (Under 10 ft) | Wire Gauge (10–20 ft) |
|---|---|---|---|
| LED accent strip / rock light | 12–24W (1–2A) | 18 AWG | 16 AWG |
| Standard work light | 55–65W (4.5–5.5A) | 16 AWG | 14 AWG |
| High-power LED light bar | 180–300W (15–25A) | 12 AWG | 10 AWG |
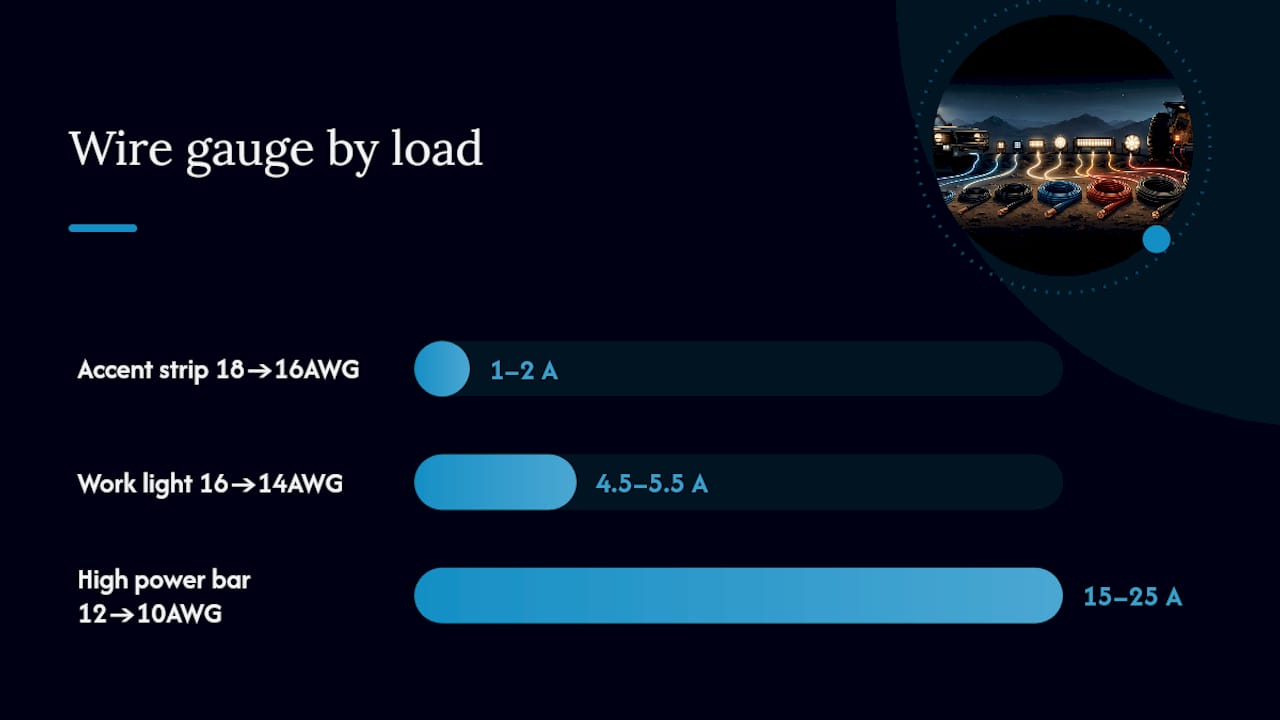
These figures track with the SAE J1128 automotive wiring standard, which sets ampacity guidance for vehicle circuits, and with practical amp-vs-length tables used by lighting installers that show the same wattage needing progressively thicker wire as distance increases. Notice the pattern: every load steps up one or two gauges once you cross the 10-foot mark. That’s not a rounding error. It reflects how resistance accumulates over distance, and it’s the same principle behind the voltage-drop math in the next section.
One more detail that trips up first-time installers: not all wire is created equal, even at the same gauge. Automotive-grade stranded copper wire handles vibration and flexing far better than the solid-core wire found in home electrical work, and it should always carry insulation rated for underhood or exterior automotive temperatures.
Pro Tip: If your run falls right at the edge of a distance band, like 9.5 feet, size up anyway. The cost difference between 16 and 14 AWG for a 10-foot run is a few dollars. The cost of chasing a dim light six months from now is your Saturday.
How to Calculate the Right Wire Gauge for Your Lights
The quick-reference table covers common setups, but any custom install, whether it’s a multi-light bar array or an oddly routed rock light, benefits from doing the math yourself. It only takes three steps.
Step 1: Find your amp draw. Divide the light’s wattage by 12 volts. A 180-watt light bar draws 15 amps. A 40-watt pod draws about 3.3 amps.
Step 2: Measure round-trip distance. This is the distance from your battery or power source to the light, plus the distance back to ground. A light mounted 12 feet from the battery has a 24-foot round-trip circuit, not a 12-foot one. Skipping this step is the single most common reason installers undersize their wire, since circuit length calculations require the full round trip, not just the one-way distance to the fixture.
Step 3: Apply the voltage-drop formula.
Vdrop = 2 × I × R × L Where I is current in amps, R is the resistance per foot for your wire gauge, and L is the one-way distance in feet. The “2” accounts for the round trip.
Most installers target a voltage drop of 3% or less for sensitive electronics like LED drivers, and treat 5% as the practical ceiling for standard 12-volt vehicle circuits, a threshold echoed by most 12V wire gauge calculators built for automotive use.
Worked example: A 180-watt light bar draws 15 amps. It’s mounted 15 feet from the battery, giving a 30-foot round trip. Plugging that into a voltage-drop calculator that accounts for current, distance, and allowable drop shows that 12 AWG keeps you right around the 3% target, while 14 AWG pushes past 5%. That single gauge step is the difference between a light that runs at full brightness and one that visibly dims after dark. For multi-light setups pulling current from a shared feed, our guide on powering multiple high-lumen lights walks through combining loads before you size the main feed wire.
Fuse and Relay Sizing for Off-Road Lighting Circuits
Wire and fuses are a package deal. The fuse’s job is to protect the wire, not the light, so size it based on the wire’s ampacity, not just the device’s rated draw.
- Mount the fuse as close to the battery as physically practical, ideally within the first few inches of the power lead.
- Size the fuse slightly above your steady-state amp draw but below the wire’s maximum safe ampacity. A 15-amp light bar on 12 AWG wire typically runs a 20-amp fuse.
- Use a relay for any light bar or group of lights over roughly 10 amps. Run the relay’s power feed straight from the battery or fused bus bar, and let the switch only carry a small trigger current.
- Account for in-rush current. Some LED drivers spike to nearly three times their running amperage for a fraction of a second at startup, which can cause a fuse sized for steady-state draw to trip repeatedly.
For a deeper walkthrough of matching fuse ratings to specific light setups, see our fuse sizing guide for LED lights.
Pro Tip: If a new fuse blows immediately on install, don’t jump straight to a bigger fuse. Check for in-rush current first. A slightly slower-blow fuse rating often solves nuisance trips without masking an actual wiring fault.
Choosing Wire, Connectors, and Routing for Off-Road Conditions
Gauge selection only matters if the wire itself can survive the environment it’s routed through. Off-road wiring lives with vibration, heat, water, and constant flexing, conditions that residential wire was never built for.
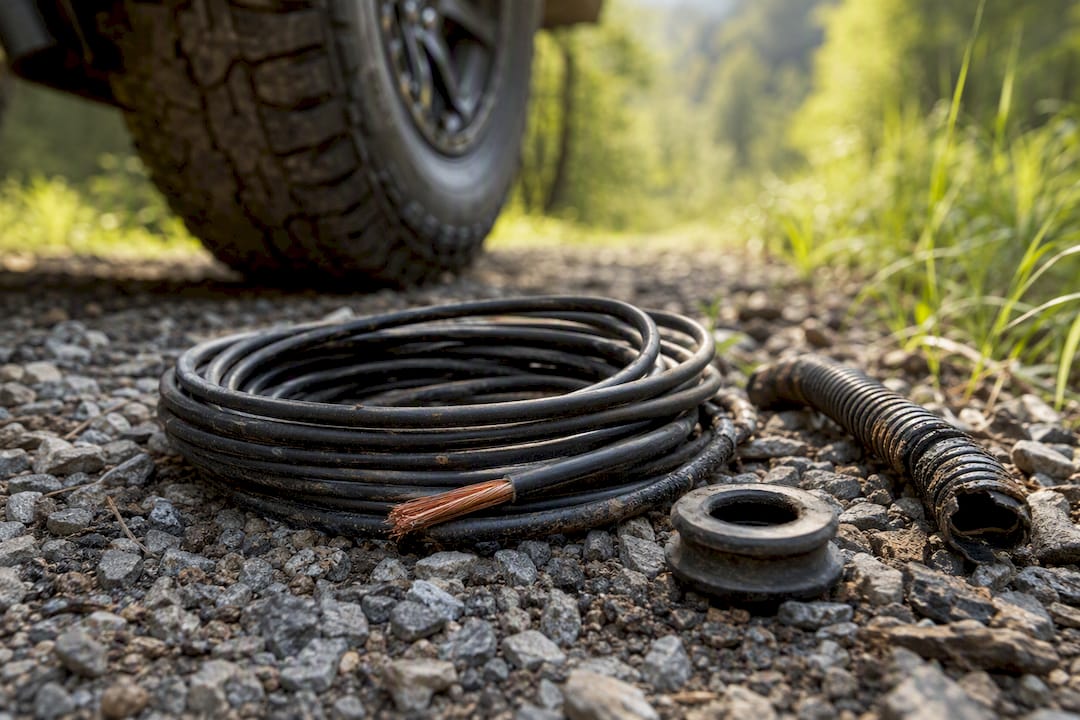
Stick with stranded automotive-grade copper wire, not solid-core wire like household Romex. Stranded wire flexes without cracking, which matters when your rig is bouncing over washboard trails for hours. Look for insulation rated for high underhood or exterior temperatures with resistance to oil and abrasion, a standard recommendation for any vehicle wiring project.
Routing matters as much as the wire itself. Run wires through split loom or conduit anywhere they’re exposed, and always use a grommet where a wire passes through sheet metal or a firewall. Keep every run clear of exhaust components, moving suspension parts, and sharp body edges, and secure the loom every 12 to 18 inches so it can’t sag into a hazard.
At the connection points, crimped and heat-shrunk terminals beat plain electrical tape every time, and a soldered joint with adhesive-lined heat shrink adds an extra layer of protection against moisture intrusion. For exterior connections exposed to mud and water crossings, use connectors rated for outdoor or marine use rather than standard automotive spade connectors. Our wheel light wiring walkthrough covers termination technique in more detail if you’re wiring for the first time.
Signs Your Off-Road Light Wiring Is Undersized
Undersized wire tends to announce itself, if you know what to look for.
- Dim or flickering lights, especially at idle or when other electrical loads are running.
- Warm or hot wire insulation anywhere along the run, particularly near connectors or bends.
- Repeated blown fuses with no obvious short circuit.
- Voltage-sensitive components acting erratically, like a light bar’s onboard driver cutting out under load.
If you notice any of these, measure voltage at the light itself while it’s running and compare it to your battery voltage. A gap of more than 5% points to voltage drop from undersized wire. A quick fix, like a slightly larger fuse, only masks the real problem. If the wire is genuinely undersized for the load and distance, replace the run with the correct gauge rather than patching around it.
Pre-Made Harness or DIY Wiring: Making the Call
A pre-made harness makes sense once your install gets complicated: multiple light bars on one switch panel, long runs to rear-mounted lights, or simply less wiring experience than you’d like for a job that touches your electrical system.
Look for a harness with the correct AWG already matched to its rated amperage, heavy-duty crimped or soldered terminals, a fused power lead built in, and weatherproof connectors at every exposed joint. Strain relief at the connector boots matters too. It’s often the first point of failure on cheap kits.
Wheel Light Express designs and assembles its harnesses and wiring accessories in Louisiana, matched to the same AWG and protection standards covered throughout this guide. If you’re replacing a damaged harness or adding lights to an existing setup, our sizing guide walks you through picking the right harness for your specific light count and amp draw.
What Installers Get Right That Manuals Miss
Good wiring habits separate a light that lasts one season from one that lasts ten. A few things worth stealing from anyone who’s wired more than a handful of rigs.
Always double-check terminal seating with a light tug after crimping. A loose crimp looks fine until it isn’t. Dielectric grease on exposed connector pins prevents corrosion in wet or muddy conditions, and running ground returns to a single common chassis point rather than scattering them reduces the chance of a bad ground causing mystery flickering. Test every circuit under full load before you finalize any mounting bracket. It’s much easier to fix a wiring issue before the bumper is bolted back on.
For serviceability, label your split loom sections and leave a small service loop of slack near connectors. Future you, troubleshooting in the dark with cold hands, will be grateful.
There’s a real tension between gauge and routing. Thicker wire is always the safer bet electrically, but it’s stiffer, bulkier, and harder to route through tight factory harness paths. Sizing up one gauge beyond the minimum is usually worth the extra routing hassle. Sizing up two or three gauges past what the math calls for often just makes the install unnecessarily difficult without a meaningful safety gain.
Skip the Guesswork With a Correctly Spec’d Harness
Running the numbers on amp draw, round-trip distance, and voltage drop gets you a solid gauge recommendation. Buying a harness that’s already built to that spec gets you there faster, with fewer connection points that can fail on the trail.

Wheel Light Express carries wire harness leads and replacement harnesses sized correctly for common off-road lighting loads, with heavy-duty terminals and weatherproof connectors already in place. That means no measuring resistance tables at your workbench, no soldering in a cold garage, and no wondering if your crimp job will hold up on a rocky trail. If you’re adding a light bar or replacing a harness that’s seen too many seasons, browse the wire harness leads and wires collection or check the replacement wire harness options built for multi-light setups. Every harness is designed and assembled in Louisiana and backed by a satisfaction guarantee, and financing is available if you’d rather spread the cost across your build instead of paying it all upfront.
FAQ: Off-Road Light Wire Gauge Questions
What gauge wire do I need for a 100-watt LED light bar? A 100-watt bar draws about 8.3 amps. For runs under 10 feet round trip, 14 AWG usually keeps voltage drop within an acceptable range. Past 10 to 15 feet, step up to 12 AWG.
Can I use household wire for off-road lighting? No. Solid-core household wire like Romex isn’t rated for vibration or the temperature swings inside a vehicle. Stick with stranded automotive-grade copper wire rated for underhood or exterior use.
Does wire length really affect light brightness? Yes. Longer runs increase resistance, which increases voltage drop. A light bar that runs bright on a 5-foot test bench can visibly dim once wired through a 20-foot round-trip run on the vehicle.
Do I need a relay for every light I install? Not for small accent lights or single low-amp pods. For light bars or any load over roughly 10 amps, a relay protects your switch and keeps the long wire run on the high-current side short and direct from the battery.
Is it better to size up if I’m unsure? Generally, yes. The incremental cost of the next gauge up is small compared to the cost of chasing a voltage-drop problem or replacing failed wire later.
Sources
- SAE J1128
- Wire Gauge Calculator (AWG) Online | Tembrica
- 12V Wire Gauge Calculator - Free Amp & Length Tool – Ultra Bright Lightz
- What Gauge Wire For 12V lights? (LED, RV, Landscape) - PortablePowerGuides