

A lighting wire harness organizes, protects, and delivers both power and control signals to your vehicle’s lights while providing fusing, switching, and strain relief in a single, testable assembly. You need a dedicated lighting harness whenever you’re running high-current LED light bars, multi-light daisy chains, trailer lighting, or any exterior lamp that requires sealed connectors and relay-switched circuits.
Quick checklist before you buy or install:
- Confirm the harness’s rated current matches or exceeds your light’s draw
- Verify connector sealing (look for an IP rating of IP67 or better for exterior lamps)
- Check that a fuse is positioned close to the power source, not buried mid-harness
Table of Contents
- What is the role of wire harness lighting in a vehicle?
- How do harnesses function specifically in vehicle lighting?
- Key engineering and practical design choices for lighting harnesses
- How to choose the right harness for your lights
- Installation essentials and a troubleshooting workflow for common harness failures
- How to maintain a lighting harness and signs it needs replacement
- Why quality harnesses matter — expert findings and engineering consequences
- What standards apply to lighting wire harnesses?
- Where is lighting harness technology headed?
- Key Takeaways
- A practical perspective on harness quality
- Wheellightexpress has the harness your lighting build needs
- Authoritative sources and further reading
What is the role of wire harness lighting in a vehicle?
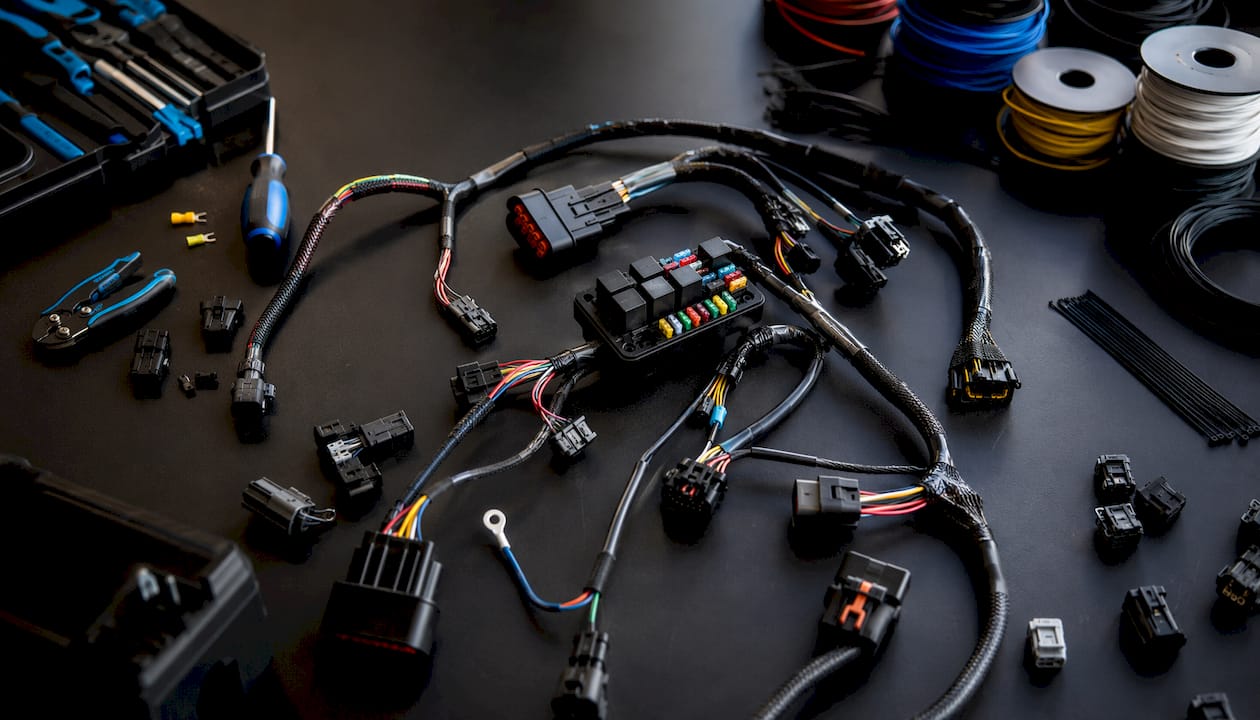
A wiring harness is an organized assembly of conductors, terminals, connectors, and protective coverings that routes electrical power and signals between the parts of a system. In plain terms, it turns a tangle of individual wires into one bundled, routed unit you can install in a single step, inspect at a glance, and test end-to-end. For lighting specifically, the harness carries current from the battery or fuse box to each lamp, routes the switching signal from your dash or relay, and returns current through a dedicated ground path.
The components you’ll find inside a lighting harness vary by application, but the core parts are consistent:
| Component | Function | Typical form in lighting harnesses |
|---|---|---|
| Wire/conductor | Carries current and signals | 12–18 AWG stranded copper for most lighting; heavier for LED bars |
| Terminal/crimp | Connects wire to connector pin | Ring, spade, or pin terminals; sealed barrel crimps for exterior use |
| Connector | Joins harness segments or attaches to the lamp | Weatherproof multi-pin (Deutsch DT, Molex MX150) or OEM-style plugs |
| Fuse | Protects the circuit from overcurrent | Blade fuse (ATO/ATC) or MIDI fuse inline near the battery |
| Relay | Switches high current via a low-current trigger | 30–40A SPDT relay mounted near the battery or power feed |
| Pigtail | Short pre-terminated lead for a single lamp | Factory-matched plug on one end, open leads on the other |
| Inline resistor | Corrects flash rate for LED turn signals | Small resistor wired in parallel with the lamp |
| Ground strap | Provides a low-resistance return path | Short braided strap from chassis ground point to harness ground node |
| Grommet | Seals and protects wire where it passes through sheet metal | Rubber or silicone; sized to wire bundle OD |
| Heat-shrink | Insulates splices and protects crimps | Adhesive-lined for exterior or high-moisture zones |
| Overmold | Encapsulates connector body to block water entry | Injection-molded TPE or PVC over the connector shell |
Commonly confused items: A fuse is a one-time sacrificial device that opens the circuit when current exceeds its rating. A relay is a reusable electromechanical switch that lets a small trigger current control a large load current. A pigtail is simply a short pre-wired connector lead, not a protection device. An inline diode prevents reverse current flow and is sometimes added to protect sensitive control modules from back-EMF.
How do harnesses function specifically in vehicle lighting?
The wire harness lighting role changes depending on which lamp circuit you’re wiring, but the underlying job stays the same: deliver rated voltage and current to the lamp, switch it cleanly, and return current through a solid ground.
Common use cases and how the harness serves each:
- LED light bars: Draw 10–30A or more, requiring a relay-switched harness with a fuse at the battery, heavy-gauge feed wire (typically 12 AWG or heavier for runs over 6 feet), and a sealed connector at the bar itself.
- Headlights and DRLs: OEM harnesses use relays to protect the headlight switch; aftermarket upgrades often add a relay harness to restore full voltage to upgraded halogen or LED bulbs.
- Brake and turn signal circuits: Lower current draw (under 5A for LED lamps), so these harnesses are simpler, but they still need grommets and strain relief where they pass through doors or body panels.
- Sequential lighting: Requires a controller module in the harness that interprets a single trigger signal and sequences multiple outputs. You can read more about the wiring patterns involved in sequential lighting control.
- Trailer lighting: Seven-way or four-way connectors carry brake, turn, running, and reverse signals; sealed connectors are non-negotiable because the connector sits exposed to road spray.
- Aftermarket wheel and strip lights: Thin, high-gauge wires power low-draw LEDs, but the harness still needs a fuse and a clean ground to prevent flickering.
Why the relay-and-fuse arrangement matters for an LED light bar: Without a relay, the full 20–30A load runs through your dash switch, which is typically rated for 5–10A. That overloads the switch, generates heat in the switch wiring, and risks a fire. The relay keeps high current on a short, heavy-gauge path between the battery and the bar. The fuse, placed as close to the battery as practical, protects the feed wire from a dead short. Without either, an overloaded harness can overheat its insulation, damage the vehicle’s wiring, or start a fire behind the dash.
Key engineering and practical design choices for lighting harnesses
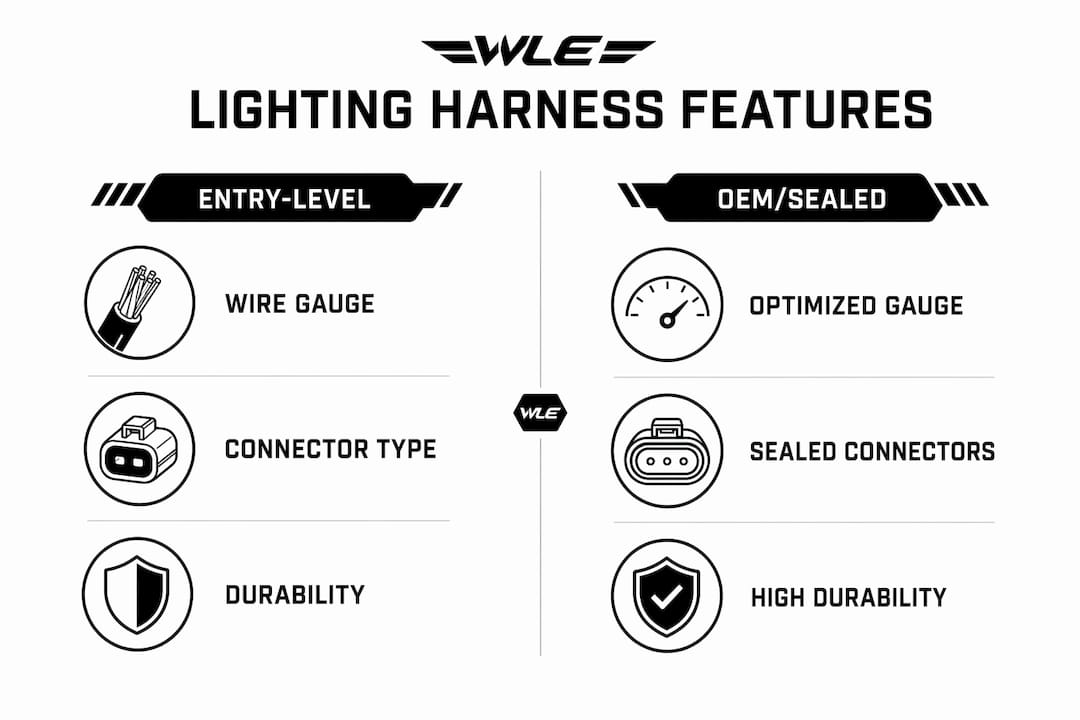
Wire gauge is the single most consequential design decision in a lighting harness. Undersized conductors create resistance, and resistance creates heat and voltage drop that visibly dims your lights. A 10-foot run feeding a 20A LED bar needs at least 12 AWG; push that to 18 AWG and you’ll lose meaningful voltage before the current even reaches the lamp. Always calculate gauge for the full round-trip length (feed plus ground return) and the actual load current, not the fuse rating.
Fuse and relay placement follows a clear rule: fuse at the source, relay close to the battery or power feed. The fuse protects the wire between the battery and the relay; the relay protects the switch circuit. Placing the fuse 3 feet from the battery instead of 12 inches leaves 3 feet of unprotected wire that can arc if it chafes against sheet metal.
Sealed, over-molded connectors are the most important quality signal on any exterior lighting harness. Unsealed connectors allow water to wick into the connector body and travel down the wire, corroding terminals and downstream electronics. Fleet managers and OEM lighting suppliers consistently specify sealed harnesses precisely because wicking is the most common cause of lighting system failures in service.
Routing, strain relief, and vibration protection are where many aftermarket harnesses cut corners. Every point where the harness passes through sheet metal needs a grommet. Every section that runs near a moving part needs abrasion sleeving. Tie-down points should be spaced no more than 12–18 inches apart, and the harness needs a service loop at each lamp so the connector can be unplugged without pulling the wire tight.
Pro Tip: In high-temperature zones near LED drivers or engine heat, standard PVC insulation can embrittle at sustained temperatures above 105°C. Specify UL 1015 or silicone-insulated wire in those zones to prevent cracking over time.
| Feature | Entry-level harness | Aftermarket mid-range | OEM/sealed harness |
|---|---|---|---|
| Durability | Basic PVC insulation, exposed crimps | Abrasion sleeving, heat-shrink on crimps | Overmolded connectors, silicone or cross-linked insulation |
| Sealing | None or minimal | Partial (some sealed connectors) | Fully sealed, IP67+ rated connectors |
| Expected lifespan | Varies from a few years to over a decade depending on harness quality and sealing, with better-sealed OEM styles lasting the life of the vehicle. | ||
| Typical price band | $10–$30 | $35–$120 | $35–$120 |
How to choose the right harness for your lights
The right harness starts with your light’s actual current draw, not the bulb’s watt rating. Pull the spec sheet, find the amperage, then work backward through gauge, fuse size, and connector rating.
Buying checklist:
- Rated current at least 125% of your light’s draw (headroom for inrush and heat)
- Conductor gauge matched to run length and load (use a voltage-drop calculator)
- Connector IP rating of IP67 or better for any exterior lamp
- Fuse sized 10–20% above continuous draw, located within 18 inches of the battery
- Relay rated for the load (30A relay for most LED bars, 40A for dual-bar setups)
- Harness length with at least 6–12 inches of extra service loop at each end
- Mounting hardware and tie-down points included or specified
Questions to ask a seller before you buy:
- “What IP rating are the connectors?”
- “Where is the fuse located in the harness?”
- “What AWG is the feed wire, and what run length is it rated for?”
- “Can you supply a measured voltage-drop figure for my run length and load?”
Red flags that tell you to walk away: undersized wire with no gauge marking, exposed crimps on exterior connectors, non-sealed connectors on a harness marketed for exterior lamps, absent or undersized fusing, and no strain relief at the lamp end. A harness without a visible fuse is not a lighting harness; it’s a fire risk.
For custom lighting integration on builds with multiple light zones, a pre-made aftermarket harness in the $35–$120 range covers most needs. OEM-style sealed harnesses make sense for trailer lighting, underbody strips, or any lamp that lives in a permanently wet environment. A basic DIY pigtail harness works only for interior or protected lamps with draws under 5A.
Installation essentials and a troubleshooting workflow for common harness failures
Pre-install checks:
- Measure your light’s current draw with a clamp meter before routing any wire.
- Inspect every connector and crimp on the harness before installation. Reject any harness with green corrosion, cracked insulation, or loose pin retention.
- Plan your routing on the vehicle before cutting any zip ties. Identify heat sources, moving parts, and sheet-metal edges that need grommets.
- Apply dielectric grease to every connector before mating, especially on exterior circuits.
Tools you need: digital multimeter, clamp meter, test light, ratcheting crimper (matched to terminal size), heat-shrink tubing, dielectric grease, and zip ties rated for automotive use.
Step-by-step troubleshooting checklist:
- Visual inspection first. Look for chafed insulation, melted wire, corroded connectors, and blown fuses. A blown fuse is a symptom, not the root cause.
- Continuity check. With the circuit de-energized, use a multimeter to confirm continuity from the fuse output to the lamp connector. An open reading means a broken wire or failed crimp.
- Voltage at the lamp under load. With the lamp energized, measure voltage at the lamp connector. For a 12V system, you want 11.8V or better at the lamp. Readings below 11.5V indicate voltage drop from undersized conductors or a poor connection.
- Fuse and relay test. Swap the relay with a known-good unit. Test the fuse for continuity with a multimeter, not just visual inspection (a fuse can look intact but be open internally).
- Connector pin resistance check. Measure resistance across each mated connector pair. Anything above 0.1 ohm per connection is a problem; corroded pins often read 1–5 ohms and cause visible dimming.
- Voltage-drop test setup. Connect your multimeter in voltage mode across the feed wire (positive probe at the battery terminal, negative probe at the lamp’s positive input) with the lamp running at full load. A drop greater than 0.5V on the feed wire means the conductor is undersized or a connection is failing. Repeat on the ground return.
For a practical guide to strip light installation that pairs with these checks, Wheellightexpress has a step-by-step resource on the site.
When to replace the harness entirely: repeated fuse failures with no clear short, insulation that crumbles when flexed, voltage drop that persists after cleaning all connections, or any harness that has been submerged. At that point, repair is a temporary fix.
How to maintain a lighting harness and signs it needs replacement
A lighting harness doesn’t need much attention, but ignoring it entirely is how you end up with an intermittent light at the worst possible moment.
Quarterly or annual maintenance checklist:
- Visual inspection of all accessible connectors and wire runs for cracking, chafing, or corrosion
- Check for water intrusion at grommets and connector bodies; re-seal with silicone if needed
- Confirm all tie-down points are secure and no section of harness is rubbing against a moving part
- Re-torque battery and chassis ground connections if they’re accessible
- Apply fresh dielectric grease to any connector that was opened during inspection
Replacement triggers you shouldn’t ignore:
- Insulation that is brittle, cracked, or flaking when you flex the wire
- Green or white corrosion inside connector bodies that doesn’t clean off
- Repeated voltage-drop failures after cleaning all connections
- Lights that flicker or drop out intermittently under vibration (a classic sign of a failing crimp)
- Any harness that has been heat-damaged near an exhaust component
Expected lifespan by harness quality: A basic aftermarket harness in an exterior application typically lasts 1–3 years before connector corrosion becomes a problem. A mid-range harness with partial sealing runs 3–7 years. A fully sealed OEM-style harness, properly installed with dielectric grease and correct routing, can last the life of the vehicle, often 10–15 years or more in normal conditions.
Why quality harnesses matter — expert findings and engineering consequences
The engineering case for a quality harness comes down to one word: failure modes. Poor harnesses don’t just fail; they fail in ways that damage the expensive lights they’re supposed to protect.
Water wicking is the most common failure mode in exterior lighting harnesses. Once water enters an unsealed connector, it travels down the wire by capillary action, corroding terminals and reaching control modules far from the original entry point. The fix costs far more than the sealed connector would have.
Wire harness design is an optimization problem that balances electrical performance, EMI control, signal integrity, and mechanical routing under vibration and thermal stress. That’s not marketing language; it’s why a harness engineered for a specific application outperforms a generic bundle of wires every time.
A well-designed harness converts dozens of discrete splices into a repeatable, testable assembly. That repeatability reduces assembly errors and lowers field failures compared to ad-hoc wiring. For vehicle enthusiasts, that translates directly to fewer warranty claims on expensive LED lighting and fewer roadside failures.
Harness manufacturing uses automated test benches to validate crimp force, continuity, and correct assembly, which means a production harness from a quality manufacturer has been electrically verified before it ships. A DIY splice has not. That gap in traceability is the core difference between a professional harness and a field repair.
What standards apply to lighting wire harnesses?
In the U.S., lighting wire harnesses are governed by a layered set of standards that cover materials, assembly quality, and vehicle-specific performance.
IPC/WHMA-A-620 is the primary quality standard for cable and wire harness assemblies in North America. It defines requirements for crimping, pull-test force, conduit installation, and electrostatic protection, and it classifies products into three tiers based on application criticality. Any harness supplier worth working with should be able to reference this standard.
SAE International publishes specifications that govern automotive wiring directly. SAE J1128 covers low-voltage primary wire used in road vehicles, specifying insulation materials, temperature ratings, and conductor construction. SAE J2030 addresses heavy-duty electrical connector performance. For lighting specifically, SAE J565 covers sealed beam headlamp assemblies, and SAE J1889 addresses LED signal and marking lighting.
UL (Underwriters Laboratories) standards matter most for wire insulation. UL 1015 and UL 1007 define performance requirements for general-purpose hookup wire, including temperature ratings and flame resistance. In high-temperature zones near LED drivers, specifying UL 1015-rated wire (rated to 105°C) is a minimum; silicone-insulated wire handles up to 150°C and beyond.
ISO 6722 is the international standard for road vehicle cables, specifying dimensions, electrical properties, and environmental resistance. OEM harness suppliers building for global vehicle platforms work to ISO 6722 alongside SAE standards.
DOT regulations govern the performance of lighting systems on road vehicles (FMVSS 108), but they address the lamp output and visibility, not the harness itself. The harness must support the lamp’s compliance, which means delivering rated voltage and current without drop.
Where is lighting harness technology headed?
The harness itself is evolving faster than most vehicle enthusiasts realize, driven by three converging pressures: smarter lighting systems, higher electrical loads, and the push to reduce vehicle weight.
Smart lighting integration is the most visible trend. Modern adaptive headlight systems, OLED taillights, and RGB ambient lighting all require harnesses that carry data signals alongside power. CAN bus, LIN bus, and MOST (Media Oriented Systems Transport) protocols now run through lighting harnesses in production vehicles, allowing the body control module to adjust brightness, color, and activation timing dynamically. Aftermarket systems are following, with controller-based harnesses that accept smartphone or remote inputs for color and pattern control.

Wireless control interfaces are beginning to reduce the number of physical signal wires in a harness. Bluetooth and RF-based controllers let you trigger lighting zones without running a dedicated switch wire through the firewall. The power feed and ground still require physical conductors, but the control signal path can go wireless, simplifying routing on complex builds.
Higher-voltage architectures in hybrid and electric vehicles are pushing harness design into new territory. Where a traditional 12V lighting harness operates at low risk, 48V mild-hybrid systems and 400–800V EV platforms require harnesses with enhanced insulation, shielding, and connector locking mechanisms to meet safety requirements.
Digital design tools and model-based workflows are also changing how harnesses are engineered. Digital twins of the harness allow manufacturers to simulate routing, thermal performance, and EMI before cutting a single wire, reducing development time and improving first-article quality.
For aftermarket enthusiasts, the practical near-term impact is better plug-and-play harness kits with integrated controllers, cleaner routing options, and harnesses designed specifically for LED and RGB lighting loads rather than adapted from generic wiring.
Key Takeaways
A lighting wire harness delivers rated power and control signals to your vehicle’s lights while protecting circuits from overcurrent, water, vibration, and heat through fusing, sealing, and strain relief.
| Point | Details |
|---|---|
| Core harness role | Organizes, protects, and delivers power and switching signals to vehicle lights in one testable assembly. |
| Gauge and voltage drop | Undersized conductors cause visible dimming; calculate gauge for full run length and actual load current. |
| Sealing is non-negotiable | Sealed, over-molded connectors prevent water wicking, the most common failure mode in exterior lighting. |
| Fuse at the source | Place the fuse within 18 inches of the battery; use a relay for any load over 10A to protect dash switches. |
| Wheellightexpress harnesses | Wheellightexpress designs replacement wire harnesses and LED lighting in Louisiana, with sealed connectors suited for exterior vehicle lighting. |
A practical perspective on harness quality
Most vehicle enthusiasts focus on the light itself — lumens, color temperature, beam pattern. The harness is an afterthought, bought for the lowest price that ships fast. That’s the wrong order of priorities.
The harness determines whether your expensive LED lighting performs at its rated output or dims by 15–20% due to voltage drop. It determines whether your lights survive two winters or corrode out after one. A sealed connector costs a few dollars more than an open one. The labor to replace a corroded harness buried behind a wheel well costs far more.
The other thing people underestimate is the relay. Skipping a relay on a high-current LED bar doesn’t just risk the switch; it risks the entire dash wiring loom. A switch rated for 10A carrying 25A will eventually fail, and when it does, it rarely fails cleanly. The relay is a $5–$15 part that protects hundreds of dollars of vehicle wiring.
Quality harnesses, built to a standard and tested before they ship, are the foundation that makes everything else work. The light gets the credit; the harness does the work.
Wheellightexpress has the harness your lighting build needs
If you’ve read this far, you know what separates a harness that lasts from one that fails at the worst moment: sealed connectors, correct gauge, a fuse at the source, and a relay for high-current loads. Wheellightexpress builds exactly that, designing every harness and LED lighting product in Louisiana rather than sourcing generic assemblies overseas.

Whether you need a full replacement wire harness for your lighting system or individual wire harness leads to complete a custom build, Wheellightexpress offers products built for vehicle enthusiasts who care about getting it right. Financing options are available, so you don’t have to compromise on harness quality to stay within budget. Browse the full harness and lighting catalog at Wheellightexpress and find the right fit for your build.
Authoritative sources and further reading
These references support the technical claims throughout this article and are worth bookmarking if you’re specifying or building a lighting harness:
- IPC/WHMA-A-620 standard — The North American quality benchmark for cable harness assemblies, covering crimping, pull-test requirements, and product classification. Relevant to the design and standards sections.
- Altium: What Is Wire Harness Design? — Engineering-level overview of the trade-offs in harness design, including EMI, signal integrity, and routing constraints. Best for the design considerations section.
- Siemens: Wire Harness Engineering — Covers model-based design workflows, digital twins, and manufacturing traceability. Relevant to future trends and EEAT insights.
- Fleet Equipment Magazine: Spec’ing the Proper Lighting Harness — Practical guidance from fleet and OEM lighting professionals on sealing, connector selection, and insulation choices. Directly supports design and troubleshooting sections.
- Brifar Electric: Wire Harness Explained — Component-level breakdown of harness assemblies with manufacturing and QA context. Useful for definition and benefits sections.
- FQ Wire Harness: Headlight Wire Harness Engineering Guide — Focused on voltage drop, conductor sizing, and performance validation for automotive lighting. Best paired with the installation and troubleshooting section.
- GSI GVX LED Light Bar — Example of a high-draw aftermarket LED light bar that requires a properly rated relay harness for safe installation.