

A wire lighting kit wired directly to your SXS battery is the most reliable way to power LED lighting for off-road use. Unlike portable battery packs, a direct battery connection delivers consistent voltage across rough terrain, water crossings, and extended night runs. LEDs provide high illumination at low power consumption, which makes them the right choice for any battery-powered lighting system on a side-by-side. This guide covers everything you need: tools, wiring steps, kit selection, and troubleshooting for a professional result.
What tools and materials does a wire lighting kit SXS battery setup require?
Getting the right components before you start saves time and prevents costly mistakes. A proper SXS battery light setup requires both electrical tools and purpose-built hardware rated for off-road conditions.
Essential tools:
- Digital multimeter (for voltage and continuity testing)
- Wire strippers and crimping tool
- Heat gun (for heat-shrink tubing)
- Drill with step bits for switch mounting
- Zip tie gun and panel removal tools
Key materials:
- Wiring harness with pre-terminated leads
- Waterproof M8 barrel connectors for daisy-chaining lights
- Sealed fuse holder and 30-amp fuse
- Sealed relay (30-amp minimum)
- IP67-rated rocker switch
- Extension cables in 1m, 3m, and 5m lengths
- Self-tapping screws and tube mount adapters
The table below shows typical kit contents for a four-light rock light setup, which is the most common starting point for SXS owners.
| Component | Specification | Purpose |
|---|---|---|
| Rock lights | RGBW, 4-pack | Wheel well and frame illumination |
| Extension cables | 1m, 3m, 5m | Flexible routing to mounting points |
| Fuse holder | Sealed, inline | Overcurrent protection |
| Relay | 30-amp, sealed | Load switching and spike protection |
| Switch harness | IP67 rated, 3-foot lead | Driver-controlled on/off |
| Connectors | Waterproof M8 barrel | Moisture-proof light connections |
Pro Tip: Buy 10% more wire than you think you need. Routing around frame rails and through body panels always adds length you did not plan for.
How do you wire a lighting kit to an SXS battery safely?
Safe wiring starts before you touch a single wire. Disconnect the negative battery terminal first. This eliminates the risk of shorts while you route cables through the frame.
Step 1: Plan your mounting points
Identify where each light will sit. Wheel wells, lower frame rails, and A-pillars are the most common locations. Professional installer kits include tube mount adapters designed for standard frame bar diameters, which speeds up this step significantly.
Step 2: Route the wiring harness
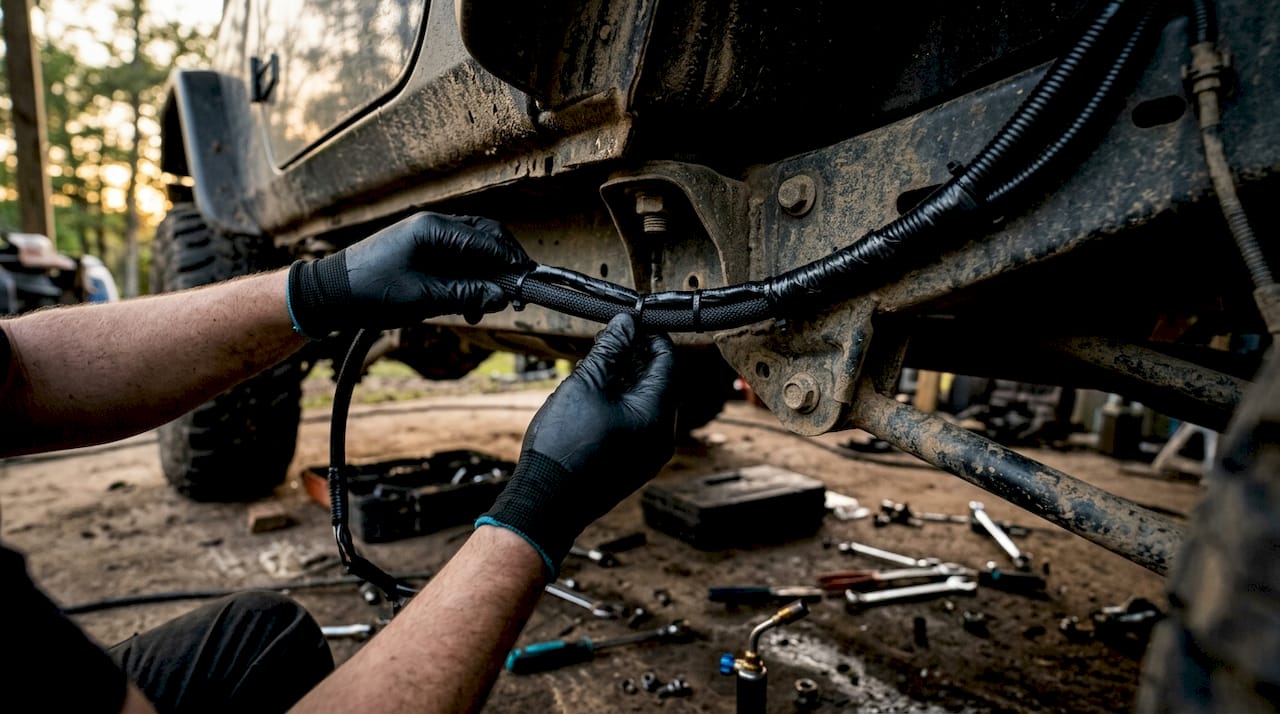
Run the main power cable from the battery toward the center of the vehicle first. Keep wiring away from exhaust components and moving suspension parts. Use factory grommets where cables pass through body panels to prevent chafing.
Step 3: Install the relay and fuse
Mount the relay close to the battery, not near the lights. Pre-assembled harnesses with sealed relays protect your LEDs from voltage spikes that occur when the circuit switches off. The fuse holder goes on the positive wire within 18 inches of the battery terminal. This is non-negotiable for fire safety.
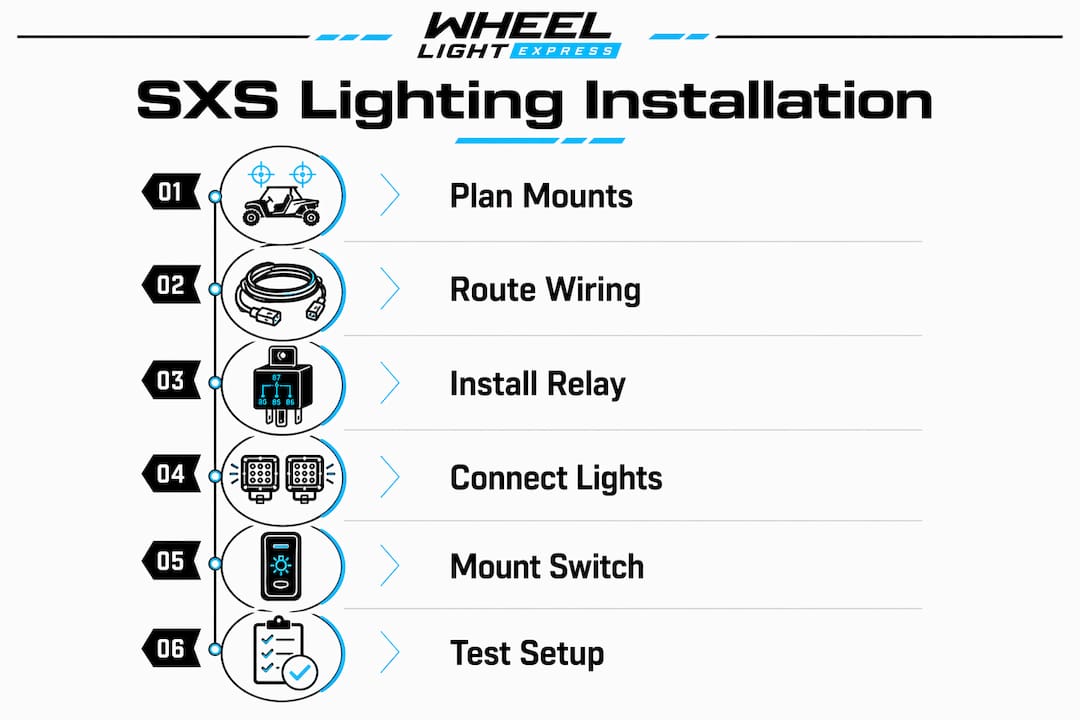
Step 4: Connect the lights
Use the waterproof M8 connectors to join each light to its extension cable. Twist the connector until it clicks and seats fully. A loose M8 connection is the number one cause of intermittent lighting faults on trail rides.
Step 5: Mount and wire the switch
Choose a location on the dash or roll cage that you can reach without looking. IP67-rated switches handle water and mud without failure. Wire the switch into the relay trigger circuit, not directly into the main power feed.
Step 6: Test before buttoning up
Reconnect the battery and test every light before securing any panels. Check for flickering, which signals a loose ground. Check for lights that stay on when the switch is off, which signals a relay wiring error.
Pro Tip: Use a multimeter to confirm 12V at the light connector before connecting each fixture. This isolates wiring faults before they become buried under panels.
How do you choose the best lighting kit and battery setup for your SXS?
The right kit depends on three factors: how much light you need, how long you run off-grid, and what your existing electrical system can handle.
LED light types compared
RGBW rock lights deliver color and white output from a single fixture, making them the most versatile choice for SXS owners who want both aesthetics and trail visibility. Light bars produce the highest forward throw but draw more current. LED strips work well for accent lighting along frame rails and under the cab.
LEDs enable longer runtimes and reduce the strain on your SXS battery compared to any other light technology. That runtime advantage compounds when you add multiple fixtures to a single circuit.
For a full UTV lighting overview covering rock lights, strips, and wheel rings, Wheellightexpress has published a detailed 2026 buyer’s guide worth reading before you purchase.
Battery chemistry and runtime
Lithium-ion and LiFePO4 batteries are the current standard for extended off-grid lighting. Integrated lithium-ion systems support over 12 hours of operation without draining the vehicle battery. LiFePO4 chemistry adds cycle life and thermal stability, which matters in Louisiana summers and desert runs alike.
Your stock SXS battery handles a four-light rock light setup without issue. Add a light bar or more than eight fixtures and you need to calculate total draw. A 30-amp relay and fuse combination protects the circuit at that load level.
Power management and surge protection
High surge protection prevents accessories from failing during the initial power spike when circuits energize. Systems rated for surge loads above the steady-state draw of your lights give you a safety margin that matters when you flip the switch at full throttle. If you plan to run a light bar alongside rock lights, a dual-relay setup with separate fused circuits is the right approach.
Compatibility check before you buy:
- Confirm your SXS battery output voltage (12V or 48V systems differ)
- Check the total amp draw of all planned lights
- Verify connector types match your harness leads
- Confirm switch mounting dimensions fit your dash cutout
If you are shopping for a new SXS to build around, the TrailMaster Challenger 300EX is a well-regarded platform with accessible wiring access points for lighting upgrades.
What are the most common wiring mistakes and how do you fix them?
Most lighting failures trace back to three root causes: bad grounds, undersized fuses, and unsealed connectors. Knowing what to look for cuts your troubleshooting time in half.
Mistakes that cause the most problems:
- Grounding to painted metal instead of bare chassis steel
- Using an automotive blade fuse instead of a sealed inline fuse holder
- Leaving M8 connectors half-seated, which allows water intrusion
- Running the main power cable near exhaust heat without shielding
- Wiring the switch into the main feed instead of the relay trigger
Diagnosing common symptoms:
- Flickering lights: Check ground connections first. A loose or corroded ground causes voltage fluctuation that shows up as flicker before it causes complete failure.
- Battery drain overnight: The relay is likely wired incorrectly, keeping the circuit energized when the switch is off. Test relay coil voltage with the switch off. It should read zero.
- Lights that won’t turn on: Start at the fuse. A blown fuse is the most common cause and the easiest fix. Then check the relay with a test light on the output terminal.
- Extension cable failure: Inspect the M8 connector for bent pins or cracked housing. Replace the cable rather than repairing the connector.
Sealed relays prevent voltage spikes on switch-off from damaging LED drivers. Pre-assembled relay harnesses eliminate this risk entirely by incorporating suppression diodes into the relay circuit.
Maintenance that extends system life:
- Inspect all M8 connectors after every muddy ride
- Apply dielectric grease to connector threads annually
- Check fuse holder integrity every six months
- Re-torque ground connections at the start of each season
Pro Tip: Label every wire with a paint marker before routing. Six months later, when a connector fails on the trail, you will know exactly which circuit to isolate without tracing the entire harness.
Key Takeaways
A direct battery connection with a sealed relay, IP67 switch, and waterproof M8 connectors is the professional standard for any SXS wire lighting kit installation.
| Point | Details |
|---|---|
| Start with the right components | Use sealed relays, inline fuse holders, and IP67 switches rated for off-road conditions. |
| Route before you connect | Plan harness paths away from heat and moving parts before making any electrical connections. |
| LED efficiency preserves battery life | LEDs draw far less current than other light types, extending runtime on your SXS battery. |
| Ground quality determines reliability | Always ground to bare chassis steel. Painted surfaces cause flickering and premature failure. |
| Inspect connectors after every muddy ride | Waterproof M8 connectors fail when seated improperly. Check and reseat after harsh conditions. |
What I have learned from wiring SXS lighting kits the hard way
The single biggest mistake I see is skipping the relay. Owners wire the switch directly into the power feed because it is faster, and then they wonder why their LED drivers fail within a season. Relays protect electronics from voltage spikes that occur every time you cut the circuit. That spike is invisible to the eye but destructive to LED driver boards over time.
The second lesson took me longer to learn: lithium-ion battery chemistry changes the math on runtime planning. Once I switched to a LiFePO4 auxiliary setup, I stopped worrying about draining the start battery during long camp sessions. The LED efficiency advantage compounds when you pair it with the right battery chemistry.
My honest recommendation is to buy a purpose-built wiring harness rather than building one from scratch. The time savings are real, and the pre-tested relay and fuse assembly eliminates the most common failure points before you even start. Wheellightexpress designs its wire harnesses in Louisiana specifically for this kind of installation, and the quality difference over generic imports is noticeable the moment you handle the connectors.
— Christopher
Wheellightexpress has the wiring components you need
Getting the wiring right starts with components built for the job. Wheellightexpress designs and builds its wire harness leads in Louisiana, with quality control that generic overseas kits cannot match. Every harness ships with the connectors, leads, and hardware you need for a clean, professional installation.

If you need LED strips or wheel rings to complete your build, the Wheel Light Ring and Strip is a popular choice for SXS owners who want both visibility and style. Wheellightexpress also offers financing options, so you can get the full kit without waiting. Visit the site, check the product catalog, and reach out to the team if you have questions about compatibility with your specific vehicle.
FAQ
What size fuse does a wire lighting kit SXS battery setup need?
A 30-amp inline fuse on the positive power cable is the standard for a four-light rock light setup. Larger configurations with light bars require separate fused circuits sized to each circuit’s total amp draw.
Can I run LED rock lights directly off my SXS battery without a relay?
Running lights without a relay works short-term but damages LED drivers over time. Sealed relays prevent voltage spikes on switch-off that degrade LED electronics with every use.
What does IP67 mean for an off-road switch?
IP67 means the switch is fully dust-tight and can withstand submersion in water up to one meter for 30 minutes. This rating is the minimum standard for any switch mounted on an SXS used in mud or water crossings.
How long will LED lights run on an SXS battery?
Runtime depends on total draw and battery capacity, but lithium-ion systems support over 12 hours of LED operation. A standard four-light rock light kit draws well under 5 amps total, which places minimal load on any stock SXS battery.
What is the best connector type for SXS rock light installations?
Waterproof M8 barrel connectors are the industry standard for SXS rock light kits. Professional installer kits include M8 connectors with multiple extension cable lengths to handle any mounting configuration cleanly.