

Every custom lighting build starts with the same foundation: a clear parts checklist before you buy a single component. Whether you’re designing an automotive accent setup or a DIY fixture from scratch, knowing what goes into a complete system saves you from costly mismatches and mid-build surprises. Here’s the core custom build lighting components list you need to work from:
- LED light sources (chips, modules, strips, or bulbs)
- Power supply and drivers (constant current or constant voltage)
- Printed circuit boards (PCBs) and mounting hardware
- Heat sinks and thermal management components
- Optical elements (lenses, diffusers, reflectors)
- Housing and structural assemblies (enclosures, canopies, sockets)
- Wiring and connectors (cloth cord, silicone wire, stranded wire)
- Electrical controls (switches, dimmers, sensors)
- Control systems (microcontrollers, wireless modules)
- Safety and compliance hardware (fuses, circuit breakers)
- Mounting accessories (brackets, screws, clips)
- Environmental protection components (seals, gaskets)
Each category plays a specific role in system performance, safety, and longevity. Custom lighting systems group into four core areas: light source, power and control, structural assembly, and optical diffusion. Getting all four right is what separates a fixture that lasts from one that flickers out in six months.
1. What you need to know about LED light sources
The LED light source is the heart of any custom build. Your choice here determines lumen output, color temperature, power draw, and how complex the rest of your build will be.
Types of LED sources used in custom builds:
- LED chips (COB and SMD): Surface-mounted diodes (SMDs) are the most common in strip lighting and PCB arrays. Chip-on-board (COB) packages cluster multiple diodes into a single high-density emitter, delivering more lumens per square inch.
- LED modules: Pre-wired units with a built-in lens and thermal pad, designed for direct mounting onto heat sinks. Popular in signage and automotive accent builds.
- LED strip lights: Flexible circuit boards populated with surface-mounted diodes, widely used in accent, task, and underbody lighting. Most strips can be cut at marked intervals for precise custom lengths.
- LED bulbs: Standard E26 or E27 base bulbs work well in pendant and canopy-style DIY fixtures where you want easy replacement.
Key specs to confirm before purchasing:
- Forward voltage (typically 2.8V–3.4V per diode)
- Drive current (milliamps per LED)
- Color temperature (2700K for warm white, 5000K–6500K for daylight)
- Lumen output per foot or per module
- CRI (color rendering index) rating, especially for display or interior builds
LEDs can reduce energy use by up to 75% compared to incandescent sources, which is one reason they’ve become the default for custom builds across automotive, residential, and commercial applications. For automotive builds specifically, our guide on LED strip applications covers power matching and layout planning in detail.
2. How to choose power supplies and driver components
The driver is what keeps your LEDs alive. Get this wrong and you’ll see flickering, overheating, or outright failure within weeks.
Constant current vs. constant voltage:
- Constant current drivers deliver a fixed milliamp output regardless of voltage fluctuation. Use these with individual LED chips and high-power modules where current stability protects the diode junction.
- Constant voltage drivers maintain a fixed DC voltage output (typically 12V or 24V). Use these with LED strip lights, which have built-in current-limiting resistors.
Mismatching driver type to LED load causes flickering and premature failure. Experienced builders verify this compatibility before every purchase.
Additional power components to include in your checklist:
- Transformers: Required when stepping down from 120V AC mains to low-voltage DC for LED systems
- Dimmers: Must be rated for LED loads; standard incandescent dimmers cause buzzing and shortened LED life
- PWM controllers: Pulse-width modulation controllers allow smooth dimming and color mixing in RGB builds
- Inline fuses: Protect the driver and LED circuit from current spikes
Specs to verify before buying a driver:
- Output voltage and current range
- Wattage capacity (should exceed your total LED load by at least 20%)
- Dimming compatibility (0–10V, TRIAC, or PWM)
- Ingress protection (IP) rating for outdoor or automotive use
Pro Tip: Define your total LED wattage first, then select a driver rated at least 20% above that load. Running a driver at full capacity shortens its lifespan noticeably.
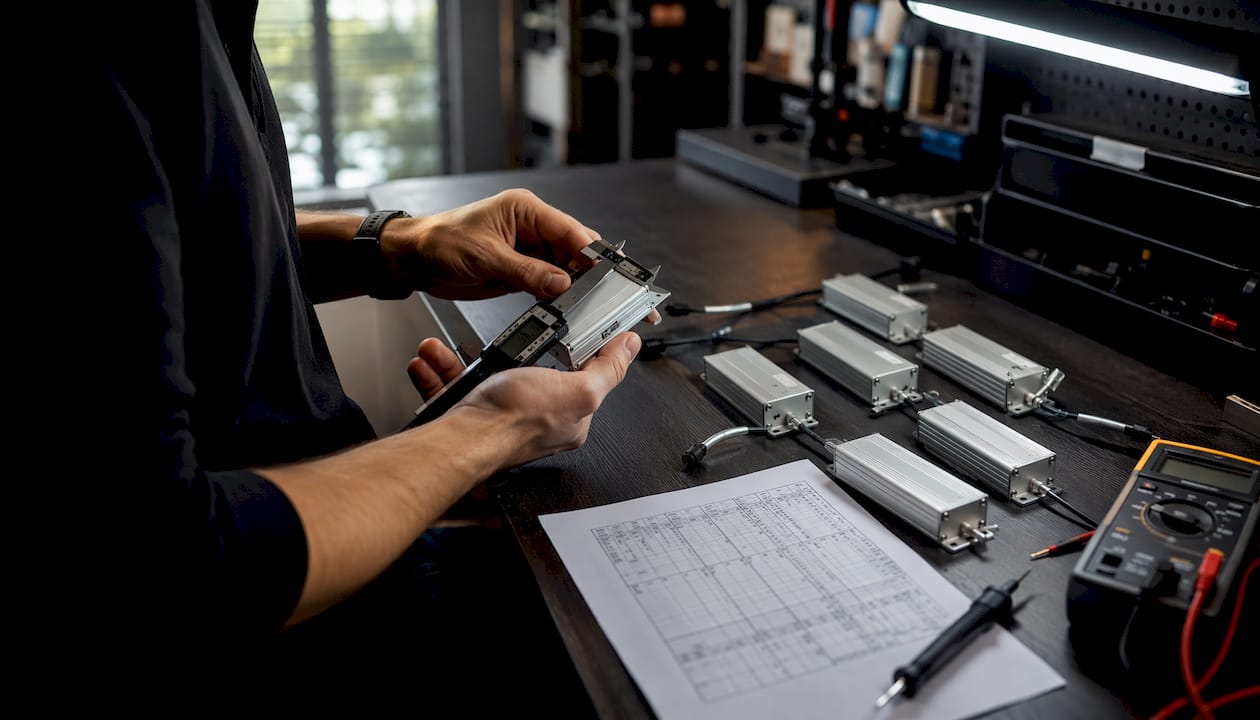
3. Structural components: PCBs, housings, and thermal management
Once you’ve locked in your light source and driver, the physical build begins. Three structural elements determine whether your fixture holds up over time: the circuit board, the housing, and the heat management system.
PCBs and mounting
Printed circuit boards in custom lighting come in several forms. Rigid FR4 boards work for fixed-position arrays. Flexible PCBs allow curved or contoured installations, common in automotive wheel wells and body accents. Metal-core PCBs (MCPCBs) bond the circuit layer directly to an aluminum substrate, transferring heat away from the diode far more efficiently than standard FR4.
Mounting methods include direct screw attachment, thermal adhesive tape, and press-fit clips. For high-output builds, direct metal contact between the MCPCB and heat sink is the most reliable approach.
Housings and enclosures
Housing options range from extruded aluminum profiles to injection-molded polycarbonate shells. Aluminum extrusions are the standard for linear LED builds because they double as passive heat sinks. Lamp parts suppliers also offer ceiling canopies, E26/E27 sockets, and tubing fittings for pendant and chandelier-style DIY fixtures. Selecting consistent finishes across all housing components keeps the final build looking intentional rather than assembled from mismatched parts.
Thermal management
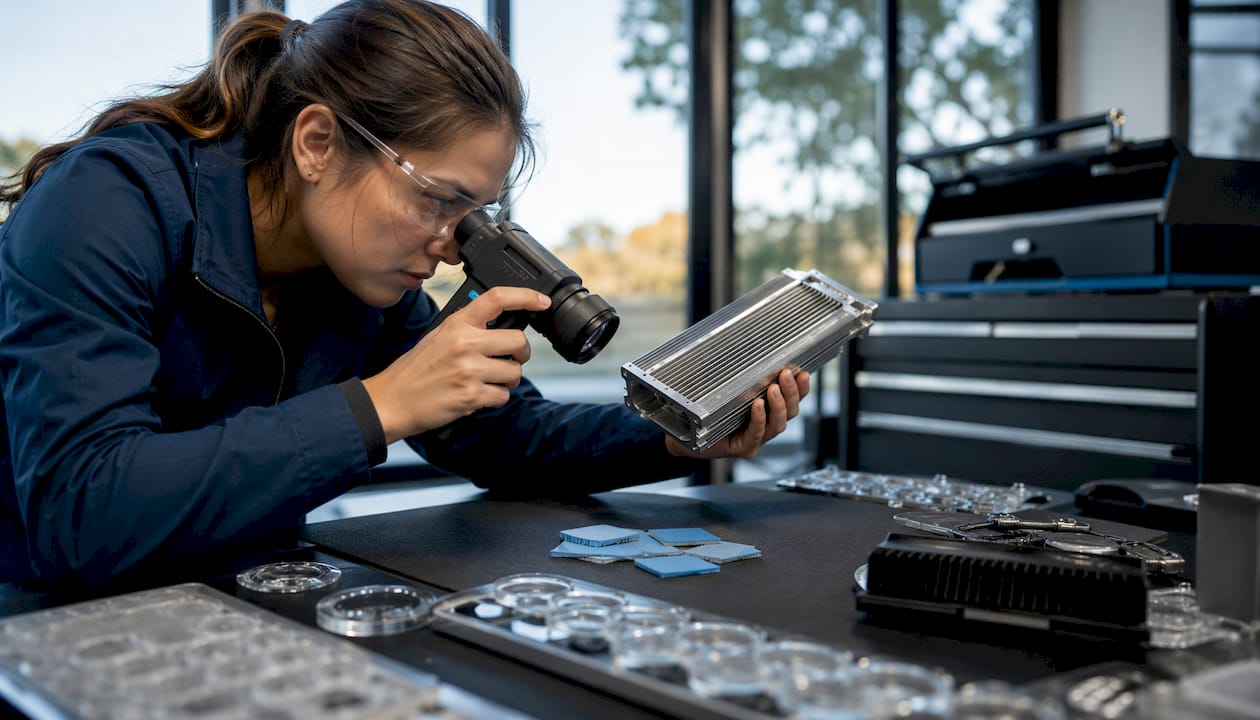
Poor heat sinking is the most common reason LED brightness and color accuracy degrade over time, regardless of chip quality. Aluminum housings or dedicated heat sinks are recommended for any high-output build. Thermal interface materials (TIMs) such as thermal paste or phase-change pads fill microscopic air gaps between the LED and heat sink, dramatically improving heat transfer. For enclosed fixtures, small axial fans or thermally conductive potting compounds can supplement passive cooling.
Thermal management checklist:
- Aluminum heat sink sized to LED wattage
- Thermal interface material (paste or pad)
- Adequate airflow or ventilation in the enclosure
- Temperature monitoring for high-power arrays
4. How optical components shape your light output
Optics control where the light goes and how it looks when it gets there. Skipping this part of your lighting parts checklist means accepting whatever raw beam pattern the LED produces, which is rarely what you actually want.
Lenses concentrate or spread the beam angle. Narrow-beam lenses (10°–15°) work for spotlighting or directional automotive accents. Wide-angle lenses (60°–120°) distribute light evenly across a surface. Most LED modules accept snap-on or adhesive-mount secondary lenses made from PMMA (acrylic) or polycarbonate.
Diffusers scatter light to eliminate hot spots and create a uniform glow. Custom linear lighting builds commonly use extruded acrylic or polycarbonate diffusers shaped by CNC routing to achieve precise optics matched to the fixture profile. Frosted polycarbonate diffusers are a practical choice for automotive strip builds because they’re impact-resistant and UV-stable.
Reflectors redirect light that would otherwise be lost behind the LED. Specular (mirror-finish) reflectors maximize intensity. Diffuse reflectors produce a softer, more even output. Reflector material and geometry both affect efficiency.
Selecting optics for your build:
- Match beam angle to the application (task, accent, ambient, or directional)
- Choose UV-stable materials for outdoor or automotive exposure
- Verify diffuser transmittance rating (higher percentage means more light passes through)
- Confirm physical fit with your PCB or module footprint before ordering
5. Wiring, connectors, and basic electrical controls
Wiring is where many DIY builds run into trouble. The right wire gauge, insulation type, and connector choice directly affect safety and long-term reliability.
Wire types for custom lighting builds:
- Cloth-covered cord: Popular for pendant and chandelier fixtures where the cord is visible. Available in hundreds of colors and finishes for aesthetic matching.
- Silicone-insulated wire: Handles high temperatures and flexes without cracking, making it the right choice for automotive and high-heat enclosures.
- Stranded copper wire: Standard for most low-voltage DC runs. More flexible than solid wire and better suited to vibration-prone environments like vehicles.
Connector types:
- JST connectors: Compact and reliable for low-current LED strip connections
- Wago lever-nut connectors: Tool-free, reusable, and rated for solid and stranded wire in residential builds
- Waterproof butt connectors: Heat-shrink lined for outdoor and automotive applications
- Cord grips and strain relief fittings: Required by electrical safety codes to prevent pull forces from reaching terminal connections, especially in vibration-prone environments
Basic electrical controls:
- Inline switches: Simple on/off control for single-zone builds
- Rotary or slide dimmers: Must be LED-rated to avoid buzzing and flicker
- Motion sensors and photocells: Add automation without a full smart system
- Relay modules: Allow low-current control signals to switch higher-current LED loads
For automotive builds, our custom lighting integration guide covers wire routing, relay placement, and switch mounting in detail.
6. Expert insights on building a reliable custom lighting system
Getting a custom lighting system right comes down to treating it as a complete electrical system, not a collection of independent parts.
The most common failure point in custom LED builds isn’t the LED itself. It’s the driver or the heat sink. When one fails, the whole assembly suffers. Every component in the system needs to be selected with the others in mind. Matching driver type to LED load, sizing the heat sink to actual wattage, and choosing optics that fit the PCB footprint are the decisions that determine whether a build lasts two years or ten.
That interdependence is why industry experts advise viewing fixtures as integrated electrical systems rather than modular parts lists. Driver or heat sink failure affects the whole assembly.
One of the most consistent mistakes we see in DIY builds is prioritizing aesthetics before technical specs are confirmed. Experts recommend defining voltage, lumen output, and color temperature first. Choosing a housing or diffuser before you know your LED’s thermal output or beam angle often forces expensive rework.
At Wheellightexpress, our automotive lighting builds follow this same discipline. Every wire harness and LED strip we design in Louisiana starts with the electrical spec, not the aesthetic. That approach is what makes our builds reliable enough to back with a satisfaction guarantee.
Pro Tip: Lock in your driver type, LED load, and heat sink sizing before you select a single housing or diffuser. Aesthetic decisions made before technical specs are confirmed almost always require revision.
For a deeper look at how these principles apply to vehicle builds specifically, our lighting best practices guide walks through component selection and assembly sequence step by step.
7. Safety and regulatory compliance components
Safety hardware isn’t optional. It’s what keeps a custom build from becoming a fire hazard or a code violation.
Fuses and circuit breakers protect the wiring and driver from overcurrent events. Every custom build should include an inline fuse rated just above the expected operating current, placed as close to the power source as possible. For automotive builds, blade-style fuses in a fuse holder are the standard. For residential fixtures, a circuit breaker at the panel handles branch-circuit protection, but an inline fuse on the fixture itself adds a second layer.
Ground fault circuit interrupter (GFCI) protection is required by the National Electrical Code (NEC) for fixtures installed in wet or damp locations, including bathrooms, kitchens, and outdoor spaces. GFCI outlets or breakers trip within milliseconds of detecting a ground fault.
Certifications to look for on components:
- UL listing: Underwriters Laboratories certification confirms a component has been tested to American safety standards. UL-listed drivers, cords, and sockets are the baseline for any fixture intended for permanent installation.
- ETL listing: An alternative to UL, issued by Intertek, and equally recognized by the NEC.
- IP ratings: Ingress protection ratings (e.g., IP65, IP67) confirm a component’s resistance to dust and water. Match the IP rating to the installation environment.
- RoHS compliance: Confirms the component is free of restricted hazardous substances, relevant for automotive and commercial builds.
A UL-listed fixture, built with UL-approved components, is the standard for any custom build intended for permanent residential or commercial use.
8. Mounting hardware and installation accessories
Mounting hardware is the part of the lighting parts checklist that builders most often underestimate until they’re standing on a ladder with a finished fixture and nothing to hang it from.
Brackets and mounting plates attach the fixture body to the ceiling, wall, or surface. Ceiling canopies cover the junction box and provide the structural anchor for pendant and chandelier builds. For automotive builds, aluminum mounting brackets and L-brackets position LED strips along body panels, wheel wells, and undercarriage rails.
Screws, nuts, and standoffs secure PCBs to heat sinks and housings to mounting surfaces. Stainless steel hardware resists corrosion in outdoor and automotive environments. Nylon standoffs electrically isolate PCBs from metal enclosures when needed.
Clips and channel retainers hold LED strip lights inside aluminum extrusion profiles. End caps seal the profile ends and give the fixture a finished look. Mounting clips for the extrusion itself allow tool-free attachment to surfaces.
Additional accessories worth including:
- Strain relief cord grips (protect wire entry points on enclosures)
- Cable management clips (keep wire runs organized and secure)
- Adjustable swivel mounts (allow beam angle adjustment after installation)
- Threaded lamp pipe and fittings for pendant-style builds
9. Environmental protection components for outdoor and automotive builds
Any fixture exposed to moisture, dust, or vibration needs environmental protection built into the design from the start, not added as an afterthought.
Seals and gaskets create a barrier between the fixture housing and the mounting surface or cover plate. Silicone gaskets are the most common choice because they remain flexible across a wide temperature range and resist UV degradation. Neoprene gaskets work well in automotive applications where oil and fuel exposure is possible.
Waterproofing methods for LED strips:
- IP65 strips: Coated with a silicone sleeve over the diodes, protecting against water spray
- IP67 strips: Fully encased in a silicone tube, suitable for submersion up to 1 meter
- IP68 strips: Rated for continuous submersion, used in pool lighting and underbody automotive builds
Potting compounds fill the interior of a sealed enclosure with epoxy or silicone resin, protecting the electronics from moisture, vibration, and thermal cycling. Drivers and junction boxes in outdoor or automotive builds often use potting for maximum protection.
Conduit and cable glands seal wire entry points on enclosures. A properly rated cable gland maintains the IP rating of the enclosure at every wire penetration. Skipping this step on an otherwise IP67-rated build defeats the entire waterproofing effort.
For a specialized lens assembly or a headlight switch rated for outdoor automotive use, sourcing from suppliers who specialize in vehicle-grade components ensures the environmental ratings are genuine, not just printed on a spec sheet.
Ready to build? Wheellightexpress has the parts you need

At Wheellightexpress, we design every product in Louisiana specifically for automotive enthusiasts who want original, high-quality lighting that holds up. Our LED strip and ring lighting and purpose-built wire harness leads are engineered to work together, so you’re not left guessing about compatibility. Financing options are available, so you can get the full build done right without waiting.
Key Takeaways
A complete custom build lighting components list covers twelve distinct categories, and skipping any one of them creates a gap in system performance, safety, or longevity.
| Point | Details |
|---|---|
| Match driver to LED type | Constant current drivers suit LED chips and modules; constant voltage suits LED strips. |
| Size the heat sink to actual wattage | Poor heat sinking degrades LED brightness and color accuracy over time, regardless of chip quality. |
| Verify safety certifications | UL or ETL listing on drivers, cords, and sockets is the baseline for any permanent installation. |
| Lock in specs before aesthetics | Define voltage, lumen output, and color temperature before selecting housing or diffuser. |
| Seal every wire entry point | A cable gland at each penetration maintains the IP rating of the full enclosure. |
Recommended
- Lighting Best Practices for Custom Automotive Builds – Wheel Light Express
- Automotive Lighting Color Combinations: Your 2026 Guide – Wheel Light Express
- Custom Lighting Integration Explained for Car Enthusiasts – Wheel Light Express
- Bespoke Lighting Concepts Explained for Car Enthusiasts – Wheel Light Express