

For most trucks and Jeeps, the best rock light placement starts with one pod per wheel well, then adds 2–4 pods along the rocker panels or frame rails for full-perimeter coverage. Everything else—bumper corners, differentials, skid plates—is layered on top based on how much coverage or show glow you want.
Quick verdict by build type:
- Minimum functional setup: 4 pods, one per wheel well
- Recommended practical setup: 6–8 pods, wheel wells plus rockers or bumper corners
- Show/full-perimeter setup: 8–12 pods, wheel wells, rockers, front and rear bumpers, and optional diff mounts
Wire every setup through a relay and inline fuse. A pre-wired harness with those components already integrated is the fastest way to a reliable install and the best insurance against blown fuses on the trail.
According to Yittzy Off-Road’s installation guide, wheel wells are the highest-priority mounts, with rocker and differential pods added for full trail coverage. A common full-coverage layout is characterized by multiple pods including wheel wells and rockers, with additional pods for continuous show glow.
Key Takeaways
The most reliable rock light setup prioritizes wheel wells first, uses a pre-wired harness with a relay and fuse, and aims every pod downward toward the tire contact patch.
| Point | Details |
|---|---|
| Start with wheel wells | One pod per wheel well is the functional minimum; aim 15°–30° down and 5°–15° outward. |
| Pod count by build | 4 pods minimum, 6–8 for a practical trail setup, 8–12 for full perimeter show glow. |
| Always use a harness | A pre-wired harness with relay and inline fuse prevents the most common wiring failures. |
| Check local laws | Red and blue visible lighting is restricted on public roads in most states; use white-only mode for road transit. |
| Wheellightexpress kits | U.S.-assembled kits with matched pods and integrated harnesses reduce install errors and include a satisfaction guarantee. |
Table of Contents
- How should you think about placement: coverage vs. looks?
- Where should you mount rock lights up front?
- Where do side-mounted rock lights go for the best coverage?
- What are the best rear rock light positions?
- How many rock lights do you need, and how should you space them?
- How do you aim rock lights to avoid glare?
- What mounting hardware and methods work best?
- What does a proper wiring setup include?
- How do you protect rock lights from water, debris, and heat?
- What are the legal rules for rock lights on public roads?
- Step-by-step install checklist from mock-up to finish
- How do you diagnose and fix common rock light problems?
- Why a purpose-built Wheel Light Express kit speeds a safe install
- What lumen levels and light intensity do you need for rock lights?
- What mounting height gives the best illumination with the least glare?
- A practical take on trail builds vs. show builds
- Wheellightexpress has the kit and harness you need
- Sources
How should you think about placement: coverage vs. looks?
Every placement decision comes down to three goals: illuminating the tire contact patch so you can see what the tire is sitting on, lighting the undercarriage sides so your spotter can see rocks that may hit your rocker panels, and creating a continuous perimeter glow for show builds. Most trail rigs need the first two. Show trucks want all three.
The three placement priorities, in order:
- Tire contact and line visibility: Wheel wells, aimed downward toward the ground directly beneath and just ahead of each tire
- Undercarriage protection visibility: Rocker panels and frame rails between the axles, revealing rocks on side-hill traverses
- Perimeter glow: Bumper corners, differentials, and skid plate areas for a full 360-degree wrap
Diminishing returns set in around 12 pods for trail function. Beyond that count, you are adding aesthetic coverage rather than meaningful visibility. A practical decision framework: start with the four wheel wells, add two rocker pods if you run side-hill terrain, then add bumper pods if you want approach/departure coverage or show lighting. Community photos on Pirate4x4 forum threads confirm this layered approach across dozens of real-world builds.
Pro Tip: If you want a dual-use rig, run dedicated white pods in the wheel wells for trail function and RGB pods on the rockers and bumpers for show nights. You get clean white light where it counts and color where it looks good.
Where should you mount rock lights up front?
The front end has three reliable mounting zones: under the front bumper (center and corners), inside the inner fenders just ahead of the front tires, and on forward-facing skid plate or differential mounts for low-slung components.
Primary front locations:
- Under the front bumper: Two pods at the corners cover approach angle and light the ground ahead of the front tires; a center pod adds coverage on flat approaches
- Inner fender / ahead of front tires: Mounts behind the headlight area illuminate the tire contact patch from a protected position; Pirate4x4 community members consistently recommend this spot for its protection from trail strikes
- Front differential or skid plate: A single forward-facing pod here lights the lowest point of the drivetrain on rock crawlers
Aiming guidance for front pods: Angle each pod 20°–30° downward and 10°–15° outward. That combination lights the tire patch and the ground 2–4 feet ahead without throwing light into oncoming drivers or your spotter’s eyes. Avoid pointing any front pod straight forward.
Mounting protection tips:
- Prefer mounting points behind a bumper lip or inside a grille opening rather than on exposed leading edges
- Keep pods away from exhaust routing; heat degrades housings and wiring over time
- Pre-fit with clamps before drilling to confirm clearance from steering components
A typical front-end layout for a full-size truck uses 2–4 pods: two at the bumper corners and one or two at the inner fenders. Jeep builds often add a differential pod given the lower clearance. The BliAuto 2026 truck guide puts 2–4 bumper pods as the standard for improving approach and departure coverage in a complete 360-degree layout.
Pro Tip: Use the factory fender liner bolts as your primary anchor points for inner fender pods. They are already in the right position, rated for vibration, and save you from drilling new holes into the inner fender.
Where do side-mounted rock lights go for the best coverage?
The sides of your rig are where rock light placement has the most direct impact on trail safety. Wheel wells are the highest-priority mounts on the entire vehicle.
Wheel well positions
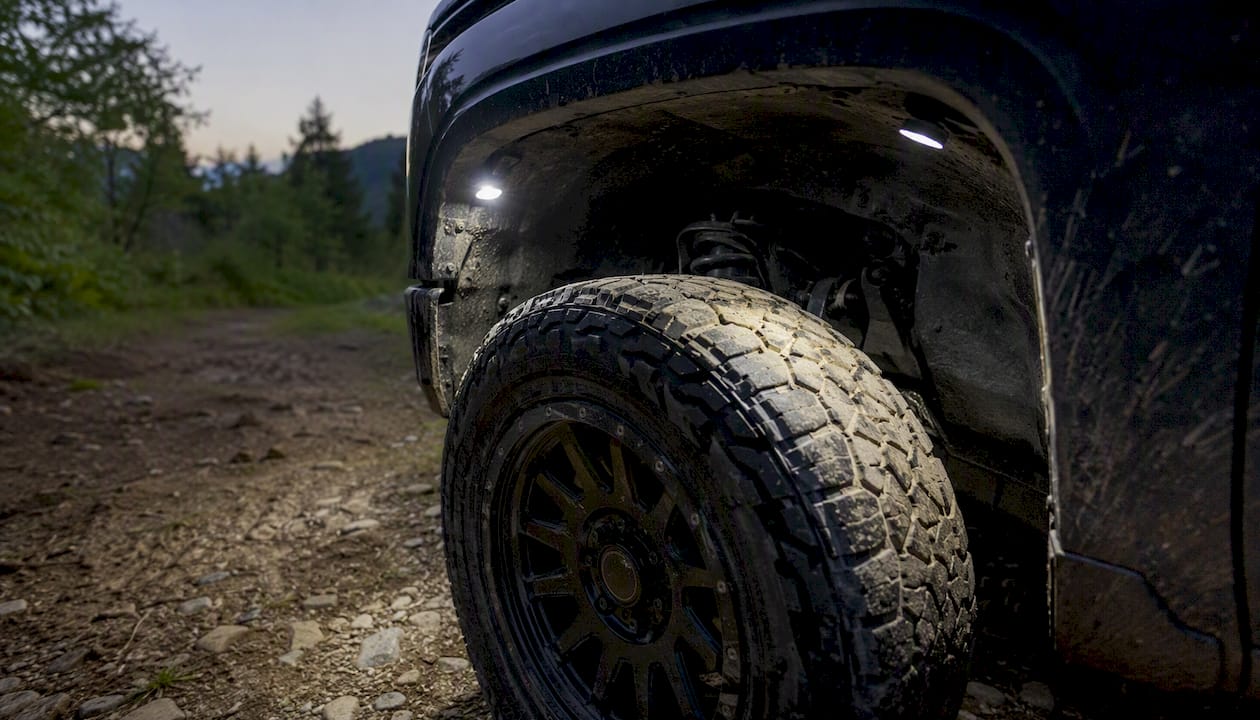
Mount wheel-well pods at the 12 o’clock position (top center) for direct downward light onto the tire contact patch, or at the 10 and 2 o’clock positions for broader side coverage. Ess K Customs documents both approaches and notes that a single high-output pod at 12 o’clock can sometimes cover a wheel well adequately, but two smaller pods at 10 and 2 give more even spread, particularly on wide-tire builds.
Rocker panel and frame rail positions
Secondary side mounts go along the rocker panels and frame rails between the axles. These pods reveal rocks that could contact the rocker during a side-hill traverse, which is the kind of damage that is expensive and invisible until you are already committed to the line.
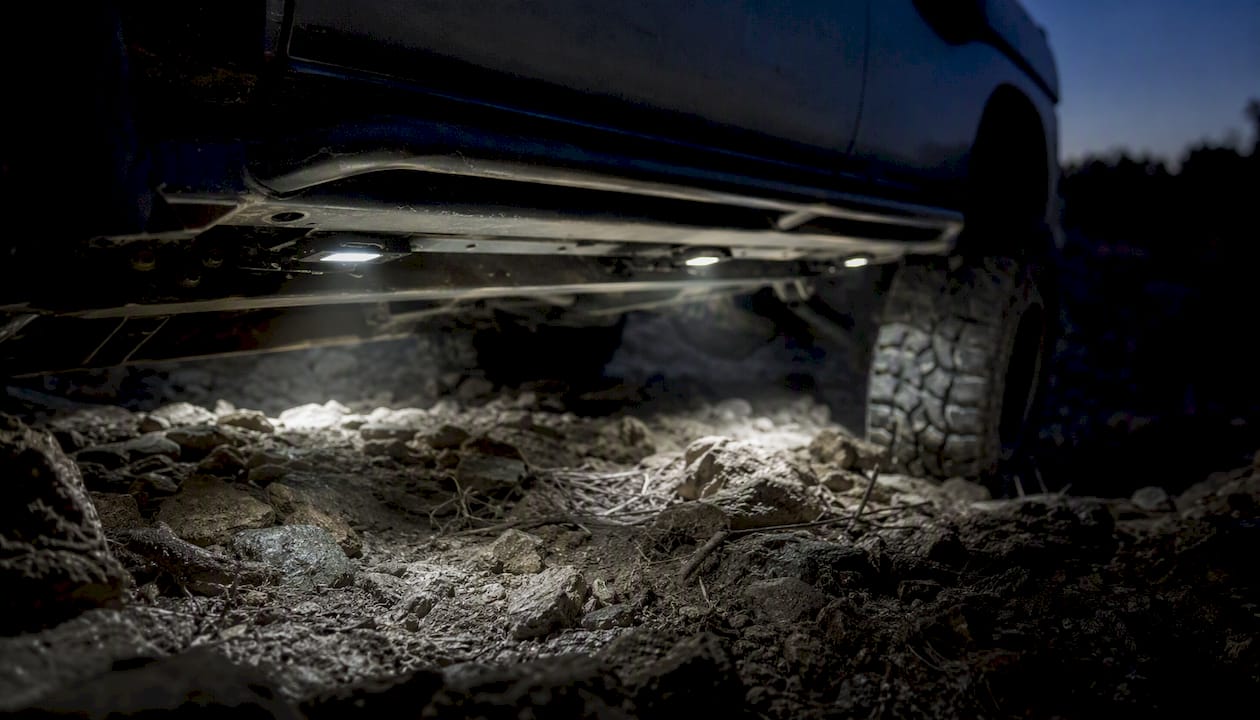
Spacing for rocker runs: Space pods 18–36 inches apart depending on output. Higher-output pods can cover more distance; lower-output pods need tighter spacing for continuous illumination.
Protection tips for side mounts:
- Never mount to thin plastic trim or fender flares. Vibration loosens fasteners from plastic, and the flare itself offers no structural support. Wrangler forum threads document this failure repeatedly.
- Allow wiring slack for full suspension droop. A wire pulled tight at full droop will eventually fatigue and break.
- Prefer steel frame rails, rocker guard tabs, or rigid mounting points over plastic body panels
Pro Tip: Before committing to rocker pod placement, cycle your suspension through full droop and full compression with the pods temporarily clamped in place. Watch for any contact with control arms, brake lines, or the tire sidewall at full lock.
What are the best rear rock light positions?
Rear placement serves two functions: improving reversing visibility on narrow trails and lighting the departure angle so you can see what the rear tires are dropping onto. Three locations cover both.
Common rear mounting spots:
- Under the rear bumper: Two pods spaced across the bumper width give the best departure-angle coverage and make reversing on tight trails significantly easier
- Behind the rear wheel wells: Pods here wrap the rear corners and connect the side coverage to the rear bumper pods for a continuous perimeter
- Near the rear differential or rear skid: Useful on lifted rigs where the diff hangs low and is vulnerable to contact
A practical rear layout for most trucks is two bumper pods plus the rear wheel-well pods from your side run. That four-pod rear cluster gives solid depth perception when backing toward a hitch or reversing down a shelf road. The BliAuto truck placement guide confirms that 2–4 bumper pods are the standard for approach and departure coverage in a complete layout.
Safety note on rear aiming: Always aim rear pods downward. Outward-facing red or blue lights on the rear of a vehicle are restricted or prohibited in many states and can be mistaken for emergency vehicle lighting. White pods aimed at the ground are the safest choice for rear bumper positions on any rig that sees public roads.
How many rock lights do you need, and how should you space them?
Pod count is the most common planning question, and the answer depends on vehicle size and your intended use.
| Build Type | Pod Count | Primary Locations |
|---|---|---|
| Minimum trail functional | 4 pods | One per wheel well |
| Recommended trail setup | 6–8 pods | Wheel wells + rockers or bumper corners |
| Show / full perimeter | 8–12 pods | Wheel wells, rockers, front and rear bumpers, diff mounts |
Spacing rules by zone:
- Wheel wells: One pod at 12 o’clock or two pods at 10 and 2 per well
- Rocker panels: 18–36 inches between pods depending on output level
- Bumper corners: One pod per corner, plus a center pod for wider bumpers
Vehicle-specific examples:
- Stock-height full-size truck: 4-pod kit covers the wheel wells; add 2 rocker pods for a complete 6-pod setup
- Lifted truck (4–6 inch lift): 6–8 pods recommended; the added ground clearance exposes more undercarriage, so rocker and bumper coverage matters more
- Jeep TJ or JL: 8 pods is a common community standard; 4 wheel wells, 2 rockers, and 2 bumper corners; add a front diff pod for a 9th if you crawl technical terrain
BliAuto’s buying guide confirms that four-pod kits suit stock-height trucks while six to eight pods are standard for lifted builds. The Yittzy Off-Road guide puts eight to twelve pods as the threshold for continuous show glow.
How do you aim rock lights to avoid glare?
Aiming is where most DIY installs go wrong. A pod pointed even slightly too high creates glare for oncoming drivers and your spotter, and it wastes light on the air above the ground rather than the rocks below.
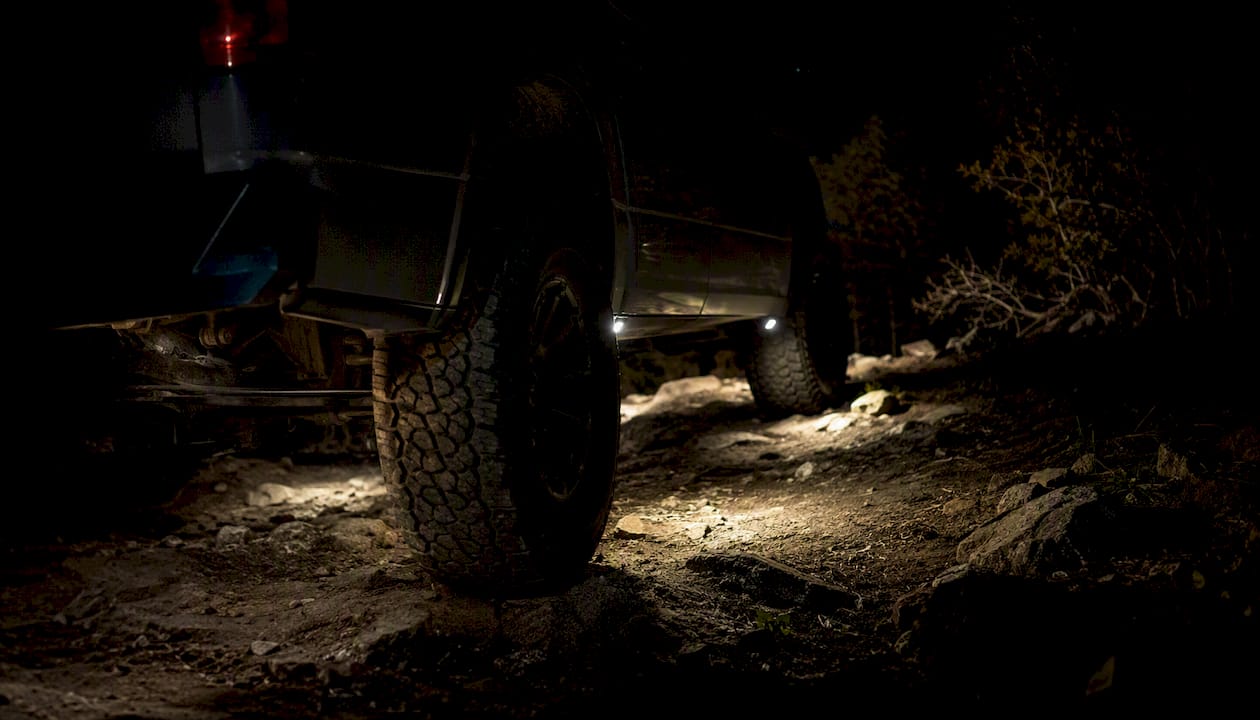
General aiming principle: Point every pod toward the tire contact patch and the ground 2–4 feet beyond the tire. No pod should be aimed at another vehicle, a mirror, or a spotter’s face.
Angle targets by zone:
- Wheel wells: 15°–30° downward, 5°–15° outward
- Rocker pods: Straight down or 5°–10° outward for side coverage
- Bumper pods: 20°–30° downward, 10°–15° outward
On-vehicle test checklist:
- Park on a level surface and set the vehicle at normal ride height.
- Switch all pods to white mode.
- Have a spotter stand 10–15 feet away at vehicle height and at ground level.
- Adjust any pod that throws light above the spotter’s knee height at 10 feet.
- Drive over a small obstacle or dip to simulate trail conditions and re-check.
The goal is a pool of light around the vehicle’s perimeter that a spotter can read clearly without squinting.
What mounting hardware and methods work best?
Solid mounting is what separates a rock light that lasts three seasons from one that vibrates loose on the first trail run.
Mount types by use case:
- Bolt-on brackets: Best for permanent installs on bumpers and rocker guards; use stainless or zinc-coated bolts with lock washers or a drop of threadlocker
- Tube clamps: Ideal for roll bars, roof racks, and cage tubing; rated for vibration and easy to reposition
- Weld-on tabs: The most secure option for frame rail mounts on dedicated trail rigs
- Magnetic mounts: Good for mock-up and temporary setups; Wheellightexpress magnetic rock light mounts let you test positions before committing to a drill
- Adhesive and zip-tie tactics: Acceptable only for non-structural, protected areas like inside fender liners where vibration is low
Recommended hardware:
- Stainless M6 or 1/4-inch bolts with nylon lock nuts for bumper and bracket mounts
- Threadlocker (medium strength) on any bolt that threads into metal without a lock nut
- Self-tapping screws only into metal, never into plastic body panels
- Backing plates where the mounting surface is thin sheet metal
Best practices:
- Pre-fit every pod with a clamp or magnet before marking holes
- Use existing factory bolt holes (fender liner bolts, rocker guard tabs) wherever they align
- Drill backing plates for thin sheet metal to prevent pull-through under vibration
Jeep Gladiator forum threads document 2–3 pods per side as a common community pattern, with consistent advice to use frame rails and avoid plastic flare mounts.
Pro Tip: Apply a small amount of dielectric grease to the threads of every bolt before installation. It prevents galvanic corrosion between dissimilar metals and makes future removal far easier after seasons of trail exposure.
What does a proper wiring setup include?
Wiring is the part of a rock light install that causes the most problems when done wrong and the fewest problems when done right. A proper harness includes a pre-wired waterproof connector set, a relay, an inline fuse, and a switch or Bluetooth controller, all rated for automotive use.
What a complete harness should include:
- Waterproof pod connectors (IP-rated, matched to pod specs)
- Relay mounted close to the battery
- Inline fuse at the battery, sized to the total amp draw of the pod set
- Switch on the dash or a Bluetooth controller for RGB setups
- Wire gauge matched to the run length and total draw
Amp draw and fuse sizing:
| Pod Count | Estimated Draw | Recommended Fuse |
|---|---|---|
| 4 pods | ~2–4 A | 10 A |
| 6 pods | ~3–6 A | 10–15 A |
| 8 pods | ~4–8 A | 15 A |
| 12 pods | ~6–12 A | 20 A |
These are conservative estimates for standard LED pods.
Routing and slack rules:
- Route wiring inside the frame rail wherever possible to protect from trail debris.
- Leave slack at every suspension pivot point equal to the full droop travel of that corner.
- Protect exposed runs with split loom conduit or spiral wrap.
- Secure with zip-ties every 6–8 inches on straight runs, and at every direction change.
Installation checklist:
- Fuse installed at the battery, within 18 inches of the positive terminal
- Relay mounted close to the battery, away from heat sources
- Switch accessible from the driver’s seat with a clear on/off indicator
- Test for parasitic draw after install with a multimeter in series with the battery
BliAuto’s buying guide emphasizes that kits including a pre-wired harness, relay, and fuse materially reduce installation errors that lead to blown fuses or wiring failures on the trail. The Wheellightexpress replacement wire harness and wire harness leads are built to this standard, with the relay and fuse arrangement already integrated.
How do you protect rock lights from water, debris, and heat?
Rock lights live in the worst possible environment: constant water, mud, rocks, and heat cycles. The housing and IP rating are your first line of defense.
IP rating guidance:
- IP68: The minimum for trail use. IP68-rated pods can withstand continuous submersion, which matters when you drive through water crossings.
- IP69K: Adds high-pressure wash resistance. Worth specifying if you pressure-wash your rig regularly.
Housing and build quality:
- Die-cast aluminum housings dissipate heat better than plastic and resist impact damage. BliAuto’s buying guide and manufacturer guidance consistently recommend aluminum over plastic for trail-use pods.
- Avoid pods with plastic housings in skid plate or differential mount positions where rock strikes are likely.
Protection checklist:
- Mount pods under protected bumper lips or inside fender liners rather than on exposed leading edges
- Route all wiring inside frame rails; where wires pass through metal, use rubber grommets to prevent chafe
- Add guards or shields at skid plate and differential mounts where impact is likely
- Seal every drilled hole with marine-grade sealant before mounting the pod
When you add rock lights during a broader custom build, protecting the surrounding finish matters too. Resources like this guide on choosing tint film for vehicles cover how to protect adjacent painted and wrapped surfaces during installation work.
What are the legal rules for rock lights on public roads?
Rock lights are designed as off-road accessories, and using them on public roads creates legal exposure in most states. The rules vary by state, but the patterns are consistent.
Key legal points:
- Red and blue lights visible from the front or rear of a vehicle are restricted or prohibited in most states because they mimic emergency vehicle lighting
- Multi-color underglow visible while driving is restricted in states including California, Illinois, and Texas, among others
- White pods aimed downward are generally the safest choice for any situation where the vehicle may be on a public road
Practical steps to stay legal:
- Install a keyed switch or a physically separate on/off control dedicated to rock lights so you can cut them before entering traffic.
- Default to white-only mode for any mixed-traffic or road-transit situation.
- Check your state’s vehicle code for underglow and auxiliary lighting restrictions before using colored modes in public. State DMV websites are the authoritative source.
- Aim all pods downward. Light that stays below bumper height and points at the ground is far less likely to trigger enforcement attention.
For more on how color choices interact with legal and visual considerations, the Wheellightexpress automotive lighting color guide covers RGB vs. single-color tradeoffs in detail.
This section is general information, not legal advice. Confirm current rules with your state’s vehicle code or a qualified professional before using colored lighting on public roads.
Step-by-step install checklist from mock-up to finish
A clean install follows a fixed sequence. Skipping steps, especially the mock-up phase, is where most problems originate.
Installation sequence:
- Measure and mock-up: Clamp or magnetically attach all pods at planned positions. Cycle suspension through full droop and compression. Confirm no contact with tires, control arms, or brake lines.
- Mark hole locations: Use a paint marker or tape. Double-check alignment with the pod’s mounting bracket before marking.
- Disconnect the battery: Always disconnect before any wiring work.
- Drill or tap mounting points: Use backing plates on thin sheet metal. Apply marine-grade sealant to every hole immediately after drilling.
- Mount pods: Torque bolts to spec with threadlocker or lock washers. Do not overtighten into plastic.
- Route harness: Run wiring inside frame rails where possible. Leave suspension slack at every pivot. Secure with zip-ties every 6–8 inches.
- Install fuse and relay: Fuse within 18 inches of the battery positive terminal; relay close to the battery and away from heat.
- Reconnect battery and test: Bench-test the harness before final mounting. Verify all pods illuminate. Check for voltage drop at the farthest pod.
- Seal and finish: Shrink-wrap all connectors. Secure excess wiring with spiral wrap. Re-check all zip-tie points.
- Final verification: Test under simulated suspension droop. Run a hose over the vehicle and check for water ingress at pod housings and wire entry points.
Installer checklist to hand to a shop:
- Pod locations with photos or a diagram
- Harness type and connector specs
- Fuse size and relay location
- Preferred wire routing path
Pro Tip: Take photos of every pod position and every wire run before closing up panels and fender liners. Those photos are worth their weight when you need to trace a fault six months later.
Yittzy Off-Road’s installation guide reinforces the pre-fit-with-clamps approach and specifically warns against screwing into plastic fender flares due to vibration loosening fasteners over time.
How do you diagnose and fix common rock light problems?
Most rock light failures trace back to four causes: loose fasteners, corroded connectors, a broken ground, or harness wear at a high-movement point.
Common faults and where to look:
- Dead pod or pods: Check the inline fuse first. A blown fuse is the most common single-pod or whole-system failure.
- Intermittent flickering: Usually a corroded connector or a wire that is flexing at a suspension pivot. Run a wiggle test at full droop to isolate it.
- Whole system dead: Verify the relay clicks when the switch is activated. No click means a relay fault or a wiring issue upstream of the relay.
- Corrosion at connectors: Common after water crossings. Clean with electrical contact cleaner and apply dielectric grease.
Troubleshooting sequence:
- Check the inline fuse at the battery.
- Listen for the relay click when the switch is activated.
- Test for voltage at the pod connector with a multimeter.
- Perform a wiggle test on harness runs at suspension pivot points to find broken wires.
Routine maintenance:
- Re-torque all pod mounting hardware after the first 50–100 miles of trail use. Vibration settles fasteners.
- Inspect wiring for rub-through at every point where the harness contacts metal after the first trail run.
- Clean lens surfaces with a soft cloth; abrasive cleaners scratch polycarbonate lenses and reduce output over time.
Pro Tip: Apply dielectric grease to every connector at installation and re-apply annually. It costs almost nothing and prevents the majority of corrosion-related failures that kill rock lights in their first season.
Why a purpose-built Wheel Light Express kit speeds a safe install
Buying a purpose-built kit rather than assembling loose pods and wiring from separate sources removes the most common failure points before you start.
Benefits of a matched kit:
- Pre-wired harnesses with the relay and fuse already integrated mean fewer custom splices and no guessing on fuse sizing
- Matched pod outputs across the kit make spacing and aiming rules predictable; you are not mixing pods with different beam angles or lumen outputs
- Weatherproof connectors rated for automotive use eliminate the improvised connections that corrode fastest
Wheellightexpress designs and assembles its kits in Louisiana, which means the harness lengths, connector types, and pod specs are engineered together rather than sourced separately and hoped to match. The Replacement Wire Harness includes the relay and fuse arrangement already set up for rock light installs, and the Wire Harness Leads give you clean extension options without custom splicing.
Pro Tip: If you are replacing a harness on an existing install, photograph the original routing before pulling it. The new harness will follow the same path, and the photos save significant time.
Wheellightexpress backs every kit with a satisfaction guarantee and offers financing options, so you can get a complete, U.S.-assembled lighting setup without waiting to save up the full cost upfront. Contact support for fit guidance on your specific vehicle before ordering.
What lumen levels and light intensity do you need for rock lights?
Lumen output for rock lights does not need to be high to be effective. These pods are lighting a small zone directly around the vehicle, not illuminating a road ahead.
For wheel-well pods, 100–300 lumens per pod is typically enough to clearly illuminate the tire contact patch at night. Rocker and bumper pods in the same range give adequate side and approach coverage without creating glare. High-output pods in the 500-lumen-plus range are useful for differential and skid plate mounts where the light has to travel further to reach the ground.
RGB pods often run at lower effective white-mode output than their rated peak, so if you plan to use white mode for trail function, verify the white-mode lumen spec rather than the peak color spec. A pod rated at 300 lumens in color mode may deliver 150–200 lumens in white, which is still functional but worth knowing before you buy.
For show builds where continuous perimeter glow matters more than raw ground illumination, lower-output RGB pods spaced consistently produce a cleaner visual effect than a few high-output pods with dark gaps between them.
What mounting height gives the best illumination with the least glare?
Mounting height directly controls both how much ground the pod illuminates and how much glare it creates. Lower mounts, closer to the ground, produce a tighter, more focused pool of light with less spill. Higher mounts cover more area but increase the risk of glare.
For wheel-well pods, the top-center (12 o’clock) position sits at roughly 12–18 inches above the ground on most trucks and is the standard reference height. At that height, a pod aimed 20°–30° downward lights the tire contact patch cleanly. Rocker panel pods mounted at 6–10 inches above the ground and aimed straight down or slightly outward produce the tightest, most useful side illumination with minimal upward spill.
Bumper pods are typically mounted at 12–20 inches above the ground depending on bumper design. The lower the mount within that range, the less likely the pod is to throw light at oncoming traffic. If your bumper forces a higher mount, compensate with a steeper downward angle, 30°–40°, to keep the light pool on the ground rather than in the air ahead of the vehicle.
The Wheellightexpress lighting best practices guide covers how mounting position and angle interact across different vehicle types and build heights.
A practical take on trail builds vs. show builds
There is a tendency in the rock light community to over-build the pod count before getting the fundamentals right. Twelve pods look impressive in a parking lot photo, but if the wheel-well pods are aimed wrong or the wiring has no relay, the build is less functional than a clean 4-pod setup done correctly.
My honest recommendation: nail the wheel wells first. Get the aiming right, use a proper harness, and run the wiring cleanly. Then add rocker pods if you run side-hill terrain. Add bumper pods if you want approach/departure coverage or a show look. That sequence keeps the build purposeful rather than decorative.
For trail-focused rigs, white pods in the wheel wells and rockers outperform RGB in every practical measure. RGB is worth adding at the bumpers and differentials for show nights without compromising the trail function. Document your pod positions and wire routing with photos before closing up fender liners. That one habit saves hours of troubleshooting later.
Wheellightexpress has the kit and harness you need
Getting the placement right is half the job. The other half is having hardware that holds up once you are on the trail.
Wheellightexpress builds U.S.-assembled rock light kits and harnesses designed specifically for trucks and off-road vehicles. The Replacement Wire Harness comes pre-wired with the relay and fuse already integrated, so you skip the custom splicing and get a factory-quality connection from the battery to every pod. The Wheel Light Ring and Strip and replacement strips give you matched LED output across the kit, which makes the spacing and aiming rules in this guide apply predictably to your build.

Every kit ships with a satisfaction guarantee and financing options are available, so you can get a complete setup without waiting. Contact Wheellightexpress support with your vehicle year, make, and model for fit guidance before you order.
Sources
These resources cover wiring diagrams, community photos, and vehicle-specific placement examples worth reviewing before you drill.
- Rock Lights Installation Guide for Jeeps | Yittzy Off-Road
- Rock Lights 101: Everything You Need To Know – Ess K Customs
- “Best” Location for Rock Lights