

Car exterior accent lighting is defined as targeted LED illumination applied to specific vehicle features to enhance visual appeal and personalization. This accent lighting car exterior guide covers everything you need to install a setup that looks sharp, stays legal, and holds up on the road. The most common types include underglow strips, grille accent lights, and wheel well lights. Each type highlights a different part of the vehicle’s body. Products rated to IP65 or IP67 standards handle outdoor exposure reliably, and choosing the right rating for each location is the first decision that separates a clean build from a failed one.
What tools and materials do you need for car exterior accent lighting?
LED strips designed for automotive exterior use are the foundation of any accent lighting build. Not all LED strips are equal. Exterior automotive LEDs must meet at least an IP65 rating for general exterior surfaces and an IP67 rating for wheel wells and undercarriage areas exposed to water and debris. IP67 means the strip can handle temporary submersion, which matters every time you drive through standing water.
Essential tools and materials
| Item | Purpose |
|---|---|
| IP65/IP67 LED strips | Weather-resistant light source for exterior surfaces |
| Wire harness | Routes power safely from battery to lights |
| Inline fuse | Protects the circuit from shorts and overloads |
| Mounting adhesive or clips | Secures strips to body panels and wheel wells |
| Remote or app controller | Controls color, brightness, and modes |
| Electrical tape and heat shrink | Seals and protects wire connections |
| Drill and self-tapping screws | Mechanical fastening for permanent mounts |
Beyond the lights themselves, a quality wire harness is the most underrated part of the kit. A poorly routed harness causes shorts, flickering, and fire risk. Wheellightexpress designs its wire harness leads specifically for automotive exterior builds, with connectors that resist vibration and moisture.
- Choose 3M automotive-grade adhesive tape for panel mounting
- Use self-tapping screws in wheel wells where adhesive alone fails
- Always include an inline fuse rated to your strip’s amperage
- Keep extra connectors and heat shrink tubing in your kit
Pro Tip: Buy 10–15% more LED strip than your measured length. Cutting strips to fit is easy. Running short mid-install is not.
How do you plan and position accent lights for the best effect?
Effective accent lighting focuses on two or three key vehicle areas rather than covering the entire body. Lighting the full vehicle overwhelms the design and dilutes the visual impact of each individual feature. The grille, wheel wells, and undercarriage are the three most popular targets because they define the vehicle’s silhouette from a distance.
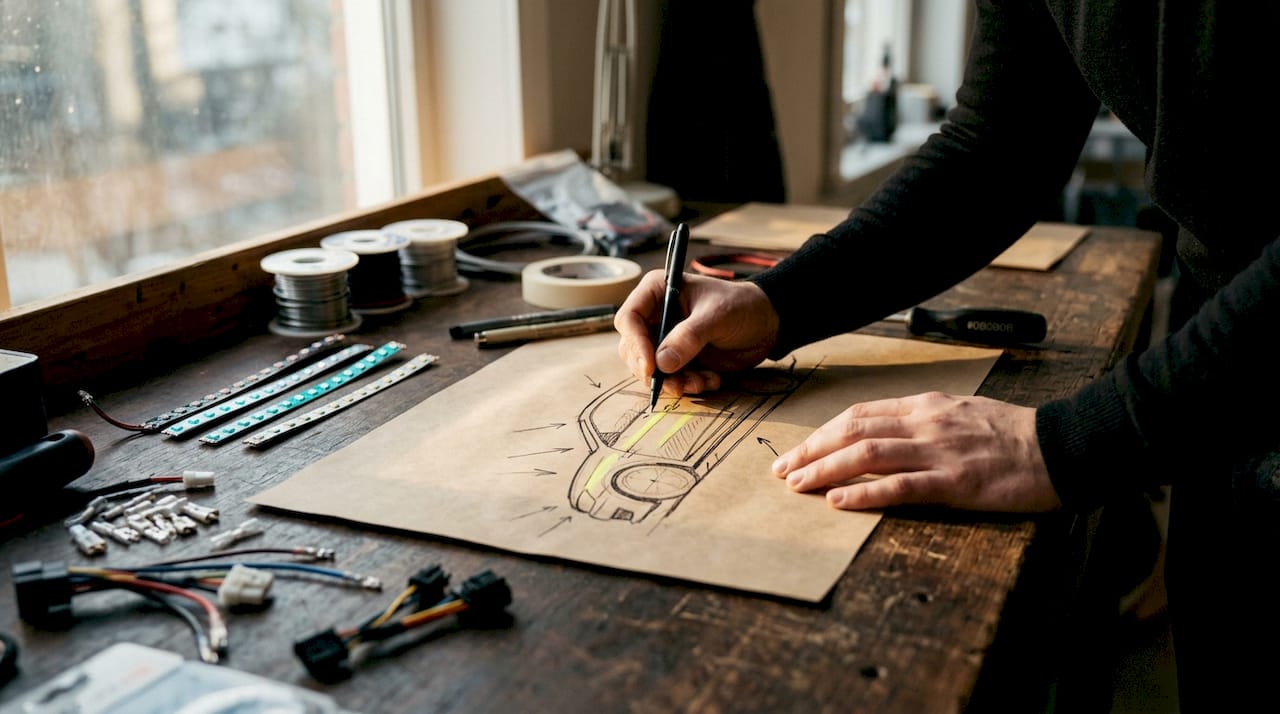
Brightness control is just as important as placement. Excessive lumens cause glare and distract other drivers, which creates both a safety problem and a legal one. Underglow strips can exceed 1,000 lumens per meter, so pairing them with a dimmer or controller is not optional. It is a practical requirement for any daily driver.
Legal restrictions shape your color choices before you buy a single strip. Local underglow laws vary significantly by state, with common restrictions on red and blue lights visible from the front or rear, flashing or animated modes, and any light that mimics emergency vehicle signals. Check your state’s vehicle code before purchasing colored strips.
- Grille lights: White or amber strips tucked behind the grille slats create depth without looking aggressive
- Wheel well lights: Colored strips mounted inside the wheel arch illuminate the tire and rim from below
- Undercarriage/underglow: Strips mounted along the rocker panels cast a glow on the ground beneath the car
- Rear diffuser accent: White or red strips along a rear diffuser add a track-inspired look
Pro Tip: Mount lights so the strip itself stays hidden. You want to see the glow, not the hardware. Recessing strips behind trim panels or inside wheel arches keeps the look clean.
For sports car builds, understanding how aero elements interact with lighting placement helps you position underglow and diffuser lights without blocking airflow or creating unwanted reflections on body panels.
How do you install car exterior accent lights step by step?
Planning the wiring route before touching the car saves hours of rework. Proper wiring routes away from exhaust pipes, moving suspension components, and sharp metal edges. Heat and vibration destroy unprotected wire faster than any other factor.
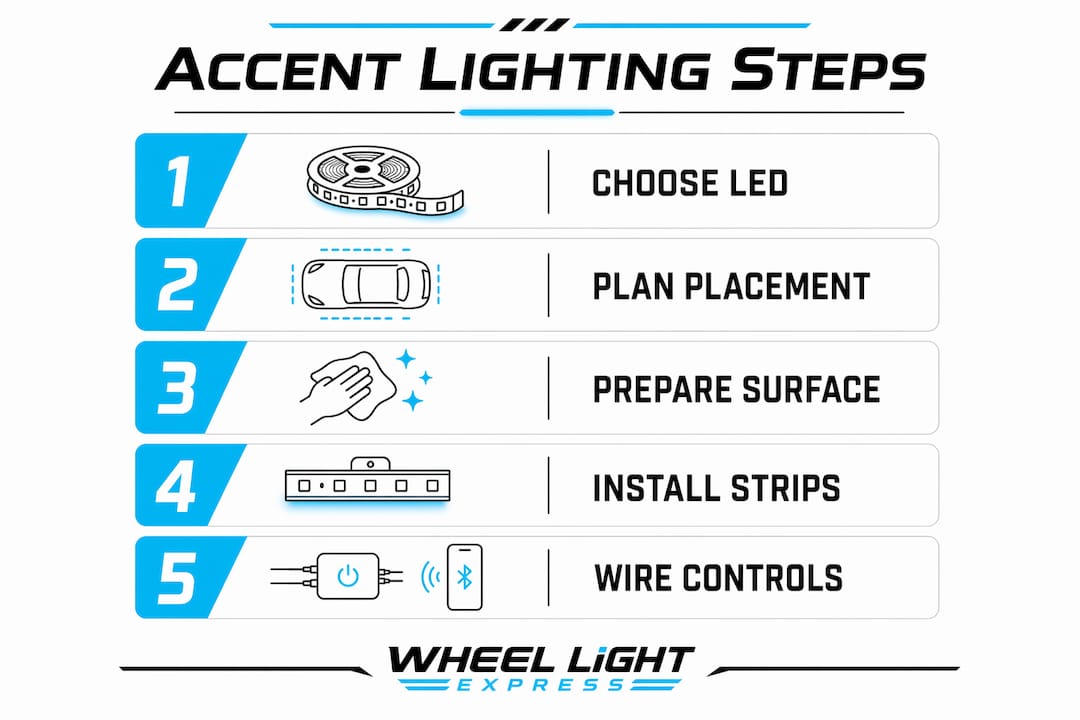
- Measure and plan. Run a tape measure along each intended strip location. Note every obstacle, including brake lines, exhaust, and suspension arms.
- Mount the strips. Clean the surface with isopropyl alcohol, apply adhesive-backed strips, and press firmly for 30 seconds. Use self-tapping screws in high-vibration areas like wheel wells.
- Route the wiring. Feed wires through existing grommets and body gaps. Avoid routing near the exhaust manifold or catalytic converter.
- Install the fuse. Place an inline fuse within 18 inches of the battery connection. This is the single most important safety step in the entire installation.
- Connect to power. Wire to a switched 12V source so lights turn off with the ignition, or wire through a dedicated toggle switch for manual control.
- Connect the controller. Plug in the remote receiver or app-based Bluetooth module according to the harness diagram.
- Test before closing up. Power on the system and check every strip for dead zones, flickering, or incorrect colors before sealing connections.
Skipping the fuse is the most common mistake in DIY exterior lighting builds. A short circuit without a fuse can start a fire in under 60 seconds. A $2 fuse protects a $500 build and, more importantly, your car.
App-controlled and remote-controlled systems offer millions of color options and music sync modes. Remote controls give you fast, one-button shutoff, which matters when you need to kill the lights quickly at a traffic stop. App-based systems offer more customization but require a phone to operate. For daily drivers, a physical remote is the more practical choice.
For a detailed walkthrough tailored to 2026 installation standards, the Wheellightexpress guide on installing LED strips under your car covers routing, grounding, and controller setup in full.
What are the most common accent lighting mistakes and how do you fix them?
Poor wiring is the leading cause of accent lighting failure. Connections that are not sealed with heat shrink or electrical tape corrode within months of road exposure. Thermal expansion, vibration, and debris exposure degrade exterior lighting mounts and connectors faster than most car owners expect, which is why inspecting wiring and adhesive quality every six months is the standard maintenance interval for exterior builds.
- Illegal colors: Red and blue lights visible from the front or rear are restricted in most U.S. states. Stick to white, amber, or green unless you have confirmed your state’s rules
- Flashing modes on public roads: Animated or strobing effects are illegal while driving in the majority of states. Use static color modes for daily driving
- Overly bright underglow: Strips above 1,000 lumens per meter without a dimmer create glare and attract law enforcement attention
- Adhesive-only mounting in wheel wells: Road debris and water pressure pull adhesive-mounted strips loose within weeks. Always supplement with mechanical fasteners in high-exposure areas
- No shutoff switch: Install a toggle switch in the cabin so you can kill all accent lights instantly without reaching for an app
Pro Tip: Set your controller’s default to a low-brightness static color. That way, if the system powers on unexpectedly, it does not draw attention or violate any lighting ordinance.
Subtle, controlled underglow with static colors is the standard recommendation for daily-driven vehicles. Keeping the setup easy to switch off protects you legally and extends the life of the system by reducing heat buildup during long drives. Review your lighting best practices before finalizing any build.
Key Takeaways
Effective car exterior accent lighting requires IP-rated LED strips, proper wiring with inline fuses, focused placement on two or three key areas, and strict compliance with local color and mode restrictions.
| Point | Details |
|---|---|
| Use the right IP rating | IP65 covers general exterior surfaces; IP67 is required for wheel wells and undercarriage. |
| Focus on two or three areas | Lighting the grille, wheel wells, and undercarriage creates impact without overwhelming the design. |
| Always install an inline fuse | A fuse within 18 inches of the battery is the single most critical safety step in any build. |
| Check local laws before buying | Red and blue lights and flashing modes are restricted in most U.S. states. |
| Inspect every six months | Adhesive, wiring, and connectors degrade from heat, vibration, and debris on exterior builds. |
Why I always tell people to start smaller than they think
Most car owners who contact me about accent lighting want to do too much at once. They see a show car with full underglow, lit grille, illuminated wheel wells, and a glowing diffuser, and they want all of it on their daily driver by the weekend. That approach almost always ends in a messy wiring job, a legal headache, or both.
My honest recommendation is to start with one area, get it right, and live with it for a few weeks. The wheel well is the best starting point. It is visible, it is contained, and it teaches you everything about adhesive choice, wiring routing, and controller setup without committing to a full underglow run. Once that is dialed in, adding the grille or undercarriage feels straightforward rather than overwhelming.
The legal side of this is where I see the most overconfidence. People assume that because they saw a car with blue underglow at a car show, it must be legal on the street. Car shows are private property. Public roads are a different story entirely. Research your state’s vehicle code before you buy a single strip. The five minutes that takes will save you a citation and a forced removal.
Static colors and a physical shutoff switch are non-negotiable for any build that sees regular street use. If you want the full color-changing, music-reactive experience, keep it for the driveway or the show field. Your daily driver needs to be legal and discreet at a moment’s notice.
— Christopher
Ready to build your accent lighting setup with Wheellightexpress?
Wheellightexpress designs all of its lighting products in Louisiana, and every kit is built for automotive exterior use from the ground up. The Wheel Light Ring and Strip is the most popular starting point for wheel well and undercarriage builds, with original designs that fit a wide range of vehicles.

For a complete build, pair the light strips with Wheellightexpress’s replacement wire harness and remotes for your harness to get a fully integrated system. Financing options are available, so you can get the full kit without paying everything upfront. Every order comes with a satisfaction guarantee.
FAQ
What IP rating do exterior car accent lights need?
Exterior LED strips need at least an IP65 rating for general body panels. Wheel wells and undercarriage areas require IP67 to handle water and debris exposure.
Is underglow legal in all U.S. states?
Underglow is not legal in all states. Most states restrict red and blue colors, flashing modes, and lights that are visible from certain angles. Check your state’s vehicle code before installing.
How many areas should I light on my car’s exterior?
Accent lighting works best when focused on two or three key areas, such as the grille, wheel wells, and undercarriage. Lighting more than that dilutes the effect and can overwhelm the vehicle’s design.
How often should I inspect my exterior accent lighting?
Inspect wiring, adhesive mounts, and connectors every six months. Road debris, thermal expansion, and vibration degrade exterior lighting hardware faster than indoor or static installations.
Can I install car accent lights myself?
Yes, most exterior accent lighting kits are DIY-friendly. The critical steps are proper wiring with an inline fuse, IP-rated strips for your specific locations, and confirming your color and mode choices comply with local law.