

Instagram car lighting refers to the accent lighting, placement choices, and camera techniques that turn a parked car into a scroll-stopping photo or reel. The look is cinematic and copyable, not accidental. To get there, you need three things working together: a lighting style (ambient, underglow, wheel-focused), smart placement (footwells, wheel wells, grille edges), and basic capture skills (golden hour, blue hour, longer exposures).
- Pick one cohesive color theme before you buy anything.
- Prioritize hidden wiring and diffusion over raw brightness.
- Shoot during the early morning or late evening with a tripod for cleaner LED detail.
- Start with a wheel light kit from a U.S.-based supplier like Wheel Light Express if you want a fast, fitment-checked entry point.
Pro Tip: Match your interior footwell color to your underglow or wheel lighting before you shoot. A single cohesive palette photographs far better than five colors fighting for attention.
Key Takeaways
A cohesive Instagram-ready car lighting look depends on matching one color theme across interior, wheel, and underbody zones, wiring it with a fused relay harness, and shooting during blue hour with a tripod.
| Point | Details |
|---|---|
| Pick one theme first | Match footwell, wheel, and underglow colors before buying any hardware. |
| Wire for reliability | Use a fused, relay-switched harness for any high-draw lighting to prevent flicker. |
| Shoot at the right hour | Blue hour makes LEDs and underglow pop; golden hour flatters paint and body lines. |
| Borrow from OEM, don’t copy it | Reference cars like the Genesis GV80 or Mercedes-EQS for color gradients and zone ideas, not exact hardware. |
| Buy fitment-checked kits | Wheel Light Express offers U.S.-assembled wheel lights and harnesses with a satisfaction guarantee and financing options. |
Table of Contents
- Eight Instagram Car Lighting Ideas Worth Copying
- How Do You Actually Build the Look?
- What Camera Settings Make Car Lighting Pop?
- Which Factory Cars Have Ambient Lighting Worth Copying?
- Which Aftermarket Kits Reproduce These Looks?
- What Safety and Legal Rules Should You Know?
- How Do You Keep Installed Lighting Working Long Term?
- Why Lighting Has Become Its Own Craft in Car Culture
- Ready to Build Your Own Instagram Lighting Setup?
- Sources
Eight Instagram Car Lighting Ideas Worth Copying
Every viral car lighting photo you’ve saved probably falls into one of these eight categories. Study the visual cue, not just the color.
- Subtle OEM+ ambient: soft, single-tone interior glow along the dash and door panels. Copy the restraint, not just the color; warm white or amber reads more premium than neon.
- Color-matched footwell: footwell LEDs tuned to match the paint or wheel finish. This is the easiest style for a beginner to nail because it needs just one strip per side.
- Underglow show look: RGB or RGBW strips mounted along the rocker panels and rear valance for a full-body glow. Best photographed at blue hour when ambient light won’t wash it out.
- Wheel-ring emphasis: light rings or strips built into the wheel barrel, drawing the eye to rolling motion in reels. A single accent color per wheel photographs cleaner than multicolor cycling.
- Speaker and enclosure accents: interior LED pods lighting up trunk-mounted audio builds. Works best with warm or cool white to keep focus on the hardware, not the light.
- Grille edge lighting: thin LED strips outlining the grille shape for front three-quarter shots. Keep it low-draw and diffused so it doesn’t blow out the exposure.
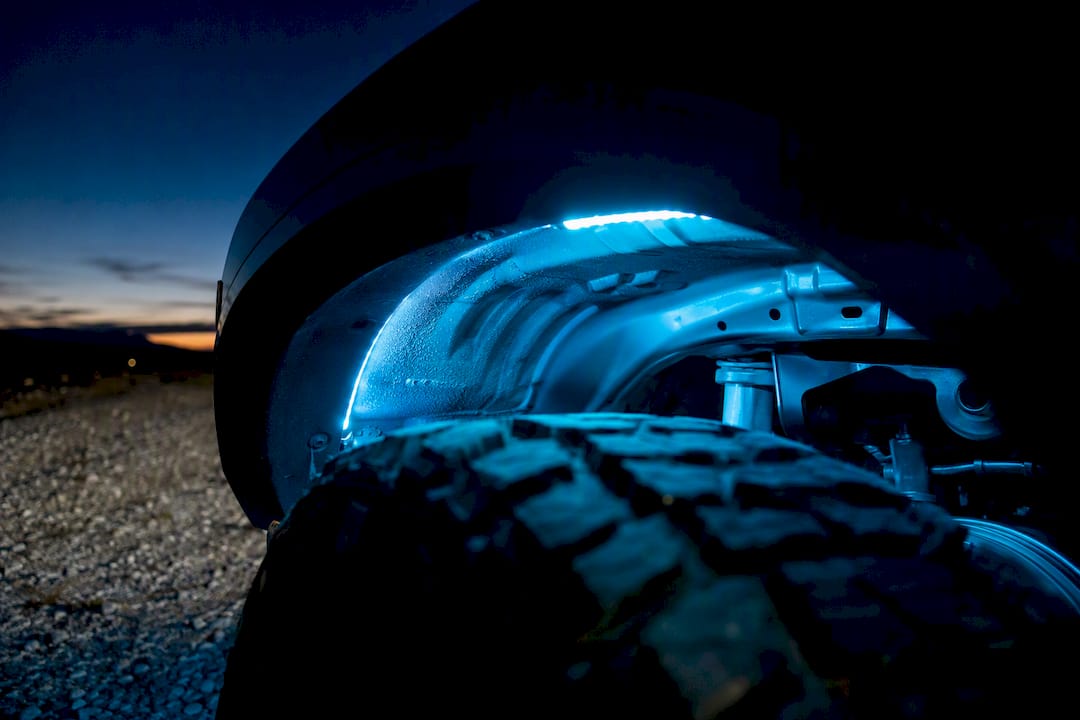
- Rock and wheel-well drama for lifted trucks: rugged, multicolor rock lights under the frame and wheel wells. RGBW controllers give you cleaner whites for trail shots and richer color for show shots.
- Sequenced signal and DRL art: sequential turn signals and animated daytime running lights, ideal for short-form video since the motion itself carries the content.
Pro Tip: Colors that contrast with your paint photograph better than colors that blend into it. A dark gray truck with amber rock lights pops; a dark gray truck with dark blue underglow disappears into shadow.
How Do You Actually Build the Look?
Getting from inspiration to installed lighting comes down to four decisions: kit type, placement, power, and control.
- Choose your kit type. Single-color strips are cheapest and most reliable. RGB kits let you shift hues but blend imperfect whites. RGBW and RGBWA controllers add dedicated white and amber channels, which matters if you want true white footwells or clean amber signal effects instead of a muddy RGB mix.
- Match fixture to placement. Interior spots (footwells, door pockets, console trim) do well with thin strips and diffusers. Exterior zones (underbody rails, wheel wells, grille, engine bay) need a sealed, weather-rated fixture. LEDs run cooler and fit tighter gaps than older lighting types, which is exactly why LED strips dominate accent installs in both zones.
- Wire it right. Any high-draw component, especially full underglow kits, needs a fused, relay-switched harness pulling straight from the battery. Skipping the relay is the single most common reason enthusiasts report flicker or premature failure.
- Pick your controller. A simple remote is reliable and cheap. App-based controllers unlock music sync and multi-zone themes but add another point of failure if the app or Bluetooth link drops.
Voltage matters more than most builders expect: most automotive LED strips run on 12 volts, and flicker almost always traces back to a bad ground, an underrated controller, or a harness that’s not fused for the load. Diffusion, sealed connectors, and proper power delivery matter more than sheer brightness if you want the install to still look good a year later. Our installation walkthrough for underbody LED strips covers harness routing in more detail.
Pro Tip: Route wiring through factory grommets wherever possible, and hide every splice behind a panel. The difference between a “kit installed” look and a “professionally built” look is almost entirely about what you can’t see.
What Camera Settings Make Car Lighting Pop?
Your lighting can be flawless and still look flat in a photo if your camera settings fight it. Start with a tripod for anything shot after sunset; hand-held long exposures almost never come out sharp.
- Shoot RAW where possible and start around ISO 400 to 800 at night, adjusting down as ambient light increases.
- Use a multi-second exposure for underglow and wheel lighting to let the LEDs fully register without blowing out.
- Golden hour, during early morning or late evening, gives you warm ambient detail on the car’s body.
- Blue hour, the 20 to 30 minutes after sunset, is when LEDs and underglow really separate from the background because ambient light has dropped but isn’t fully dark.
- Shoot low, near wheel height, to make lighting lines run the length of the car instead of foreshortening them.
- For reels, film a slow walk-around instead of a static clip. Static stills work better for grille and wheel detail shots.
For genuinely dramatic images, light-painting techniques let you expose the vehicle’s shape separately from its accent lighting, then layer the two so you keep surface detail without losing the glow. It takes a few extra shots per angle, but it’s the technique behind most of the moody, editorial-style car photos you see from professional shooters. Our guide to lighting for content creators breaks down the reel-specific version of this workflow.
Which Factory Cars Have Ambient Lighting Worth Copying?
Automakers have been pushing multicolor ambient lighting into more trim levels, and the flagship systems are a genuine idea bank for aftermarket builds.
- Mercedes-EQS: 64-color, multi-zone ambient lighting across the dash and doors, good reference for gradient transitions between zones.
- Porsche Taycan: understated, driver-focused ambient lines that show restraint pays off in photos.
- Lexus RX: soft, warm-toned interior glow, a strong reference for anyone building a subtle OEM+ look.
- Kia EV9: distinct front and rear lighting zones, useful for planning separate interior color themes.
- Cadillac Escalade IQ: bold, saturated ambient color, a good match for RGB underglow builds looking for a matching interior.
- Genesis GV80: dynamic lighting themes tied to drive modes, a direct reference for sequenced or animated builds.
Ambient lighting has moved well beyond luxury-only vehicles, with the most advanced multicolor systems concentrated in newer EVs and premium trims. Borrow the color gradients and zone concepts from these cars rather than trying to replicate the exact OEM hardware; a two-zone dash and a door-panel diffuser translate to aftermarket strips easily.
Which Aftermarket Kits Reproduce These Looks?
Wheel Light Express designs and assembles its lighting kits in Louisiana, which matters if you’ve been burned by an overseas kit with mismatched colors or a harness that melted at the connector. For the wheel-focused and rock-light styles covered above, look at wheel light rings and strips built specifically for barrel-mounted installs, replacement strips for existing kits, and wire harness options sized for high-draw underglow runs.
Installation options split into three tiers: plug-and-play harnesses you can wire yourself in an afternoon, a relay-fused kit for anyone adding a second lighting zone, and a professional install for headlight retrofits or full underglow systems pulling serious current. Before checkout, confirm four things:
- Does the kit fit your specific wheel size or vehicle trim?
- Check the weatherproofing rating for exterior components exposed to road spray.
- Is the controller compatible with a remote you already own, or do you need a new one?
- What does the warranty and return policy cover if a strip fails?
Our guide to why aftermarket LEDs outshine factory lights walks through fitment and durability trade-offs in more depth.
Pro Tip: Buy your wheel lights and harness from the same source. Mismatched connectors between brands are the number one reason DIY installs end up with intermittent flicker.
What Safety and Legal Rules Should You Know?
A good-looking build is worthless if it fails on the highway or gets you a ticket. Run through this before your first drive:
- Fuse every power run and ground it properly, not to a random bolt.
- Use sealed, weatherproof connectors on any exterior or underbody run.
- Mount fixtures securely; vibration loosens cheap adhesive mounts fast.
- Never run forward-facing red or blue lights, and check your state’s vehicle code before using underglow or wheel lighting on public roads, since rules vary widely by state.
Flicker and failure almost always trace back to poor wiring or an underrated controller rather than the LEDs themselves. If your install involves splicing into factory harnesses or running a high-draw system near fuel lines, bring in a professional installer rather than guessing.
How Do You Keep Installed Lighting Working Long Term?
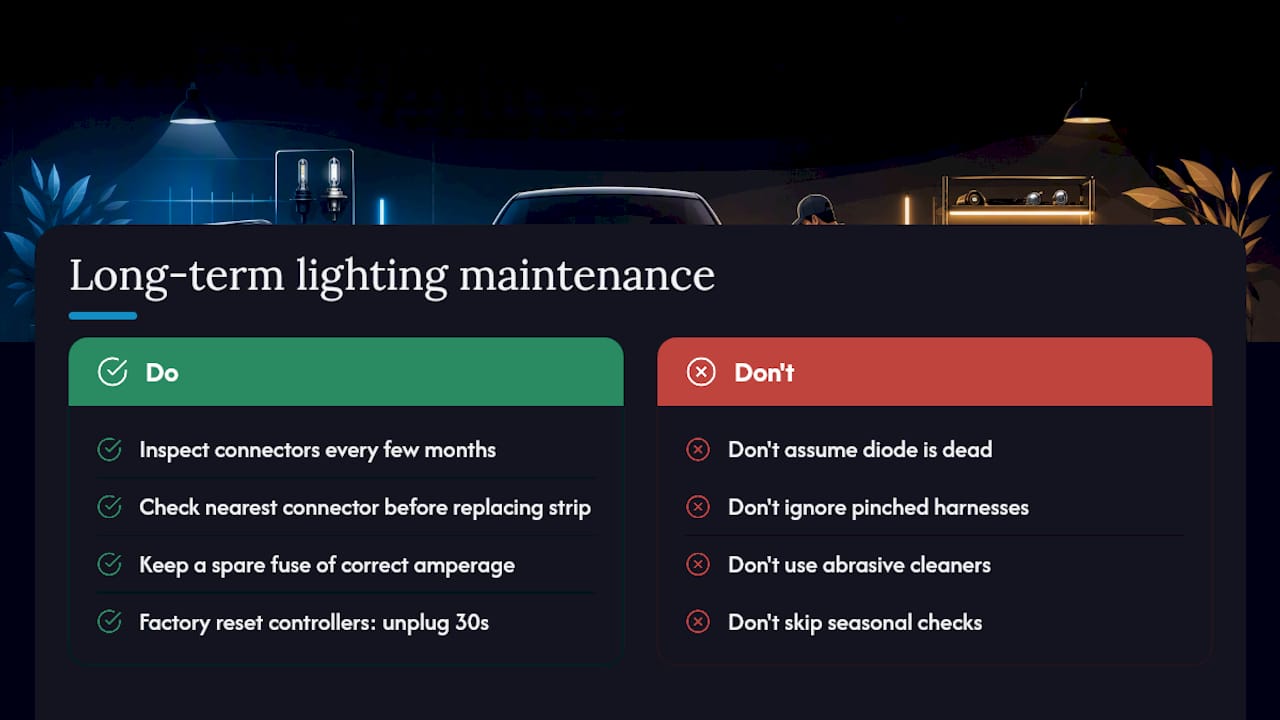
Most lighting failures show up in the first year, and almost all of them are preventable with a quick seasonal check. Inspect connectors every few months, especially on underbody and wheel-well lighting exposed to road salt, water, and debris. Corrosion at a connector is the most common cause of a strip that works fine one week and flickers the next.
If a section of a strip goes dark while the rest stays lit, the problem is almost always a bad connection point rather than a dead diode, since most strips are wired in segments. Check the nearest connector or splice before assuming you need a full replacement. If your whole zone cuts out intermittently, especially over bumps, suspect a loose ground or a harness pinched against a moving part like a suspension arm.
Keep a spare fuse of the correct amperage in your glovebox. A blown fuse from a momentary short is a five-minute fix if you’re prepared, and a frustrating tow-worthy mystery if you’re not. For controllers, a factory reset (unplug for 30 seconds, reconnect) resolves most app-pairing or remote sync issues without needing a replacement part.
Clean lenses and diffusers with a mild soap and water, never anything abrasive that scratches the diffusion layer, since scratches show up as ugly hot spots in photos. If a strip is visibly dimmer than when installed, check for voltage drop along a long run. This is also why relay-fed, properly gauged wiring matters more over time than it does on day one. A replacement wire harness is a cheap fix compared to chasing a wiring gremlin for a full weekend.
Why Lighting Has Become Its Own Craft in Car Culture
Lighting used to be an afterthought in build photos, something you noticed only if it was broken. Now it’s often the first thing that gets a comment. That shift says something about how car culture shares itself online: a clean paint job takes daylight to appreciate, but a well-lit wheel well or footwell reads instantly, even on a phone screen at 11 p.m. The builds that get shared aren’t always the most expensive ones. They’re the ones where someone clearly thought about color, placement, and how it would actually look on camera before installing anything. Our breakdown of lighting’s role in car community culture digs into why that shift happened.
Ready to Build Your Own Instagram Lighting Setup?
If you’ve been sketching out one of the eight looks above, Wheel Light Express gives you a shortcut past the trial-and-error most DIY builders go through with mismatched overseas parts and vague fitment charts. Every kit is designed and assembled in Louisiana, so wheel rings, strips, and harnesses are built to work together instead of forcing you to guess which connector fits which controller.

Start with the wheel light ring and strip kit if you’re chasing the wheel-focused look, or grab a replacement wheel light strip if you’re upgrading an existing setup instead of starting fresh. Every order comes with a satisfaction guarantee, and financing is available if you’d rather spread the cost across a few payments than pay it all upfront. Browse the full lineup and pick your first kit today.
Sources
- Cars With the Best Ambient Lighting - Kelley Blue Book
- LED Accent Lighting: Your Complete Vehicle Guide – Audio Jam Inc
- The Best Custom Car Light Ideas for Your Vehicle
- Light-Painting Techniques for Dark Vehicles: 2026 Genesis GV80 Coupe Black — Tom England
- How to Take Better Car Photos for Instagram: The Ultimate Guide