

Yes, you can safely power multiple high-lumen LED lights on your truck — provided you size your wiring correctly, protect every circuit with fuses and relays, and use a purpose-built harness. A Wheellightexpress U.S.-designed wire harness is the most reliable starting point because it arrives pre-fused, correctly gauged, and ready to connect. Skip those three fundamentals and you will deal with flickering lights, melted connectors, or a dead battery on the trail. Get them right and your rig runs bright all night.
Table of Contents
- What parts do you need before you start wiring?
- How do you calculate amperage draw for multiple high-lumen lights?
- Why use a wiring harness instead of point-to-point wiring?
- Does your battery and alternator handle the extra load?
- Where and how should you mount high-lumen lights?
- Step-by-step installation checklist and cost ranges
- Key Takeaways
- The wiring is where most builds succeed or fail
- Wheellightexpress harnesses and kits for your multi-light build
- Trusted sources and further reading
What parts do you need before you start wiring?
Having every component on hand before you begin prevents mid-job trips to the parts store. Here is what you need:
Essential components:
- Lights rated by wattage and lumen output (confirm specs before buying)
- A purpose-built wiring harness (Wheellightexpress replacement wire harness covers most multi-light setups)
- Relay(s) rated for your total amperage draw
- Inline fuses or a fuse block, placed as close to the battery positive as possible
- Power and ground wire in the correct gauge for your run length
- Quality weatherproof connectors and ring terminals
- Toggle switch, upfitter interface, or remote switch module
- Mounting hardware appropriate for your bumper or cab position
Optional but worth having for larger builds:
- Second battery or dual-battery isolator
- Higher-output alternator
- Distribution block or busbar for multi-zone feeds
- Heat-shrink butt connectors and waterproof terminal boots
Tools checklist: multimeter, quality crimp tool, heat-shrink tubing, ring terminals, zip ties, and a torque driver for mounting bolts.
How do you calculate amperage draw for multiple high-lumen lights?
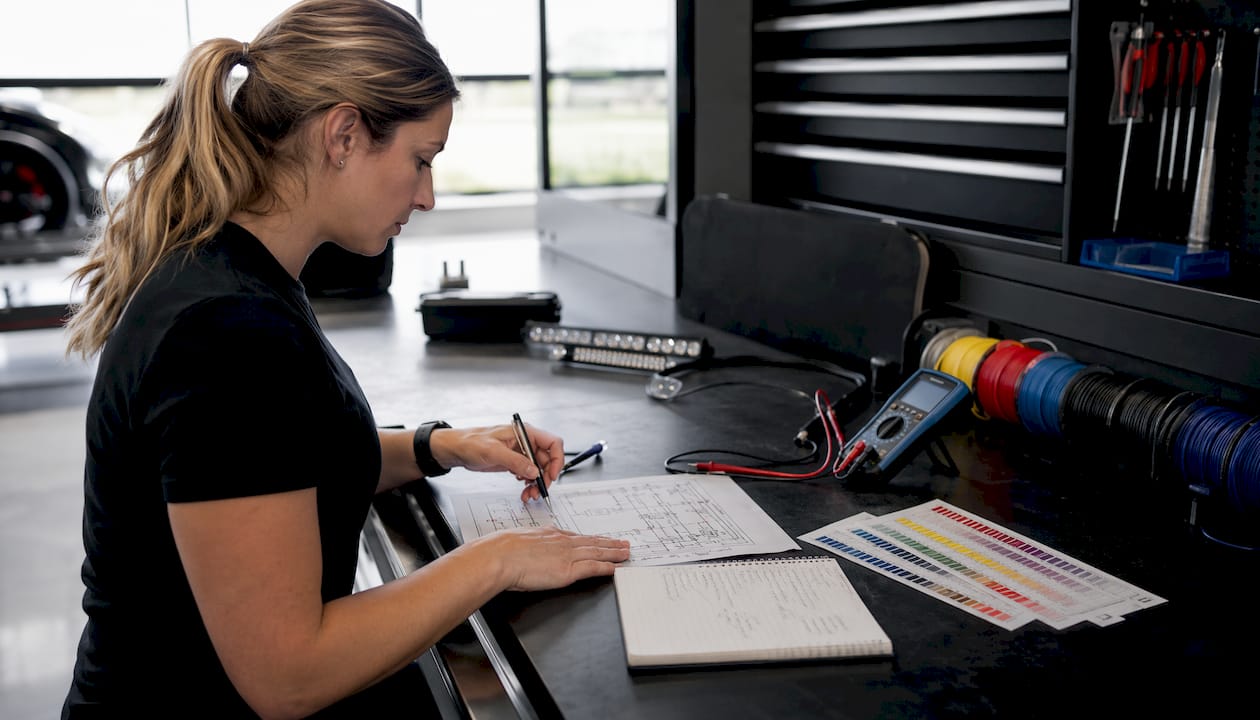
This is where most installs go wrong. The math is straightforward: Amps = Watts ÷ Volts. On a standard 12V truck system, every watt of LED load draws roughly 0.083 amps.
Worked example
Suppose your build includes multiple LED pods and a light bar with moderate wattage ratings:
- Total watts: (3 × 40W) + 60W = a calculated total wattage
- Amps at 12V: divide the total wattage by 12V to get the amperage draw
- Apply the 125% fuse rule to size the fuse appropriately (round up to the next standard fuse size)
That 20A fuse protects the circuit without nuisance tripping. Size each branch fuse the same way for individual light runs.
Wire gauge reference table
| Total Amps | Run Length (one way) | Minimum Wire Gauge |
|---|---|---|
| Up to 10A | Up to 10 ft | — |
| Up to 15A | Up to 15 ft | 12 AWG |
| Up to 20A | Up to 20 ft | 10 AWG |
| 20A+ or long runs | 20+ ft | 8 AWG or home-run feeds |
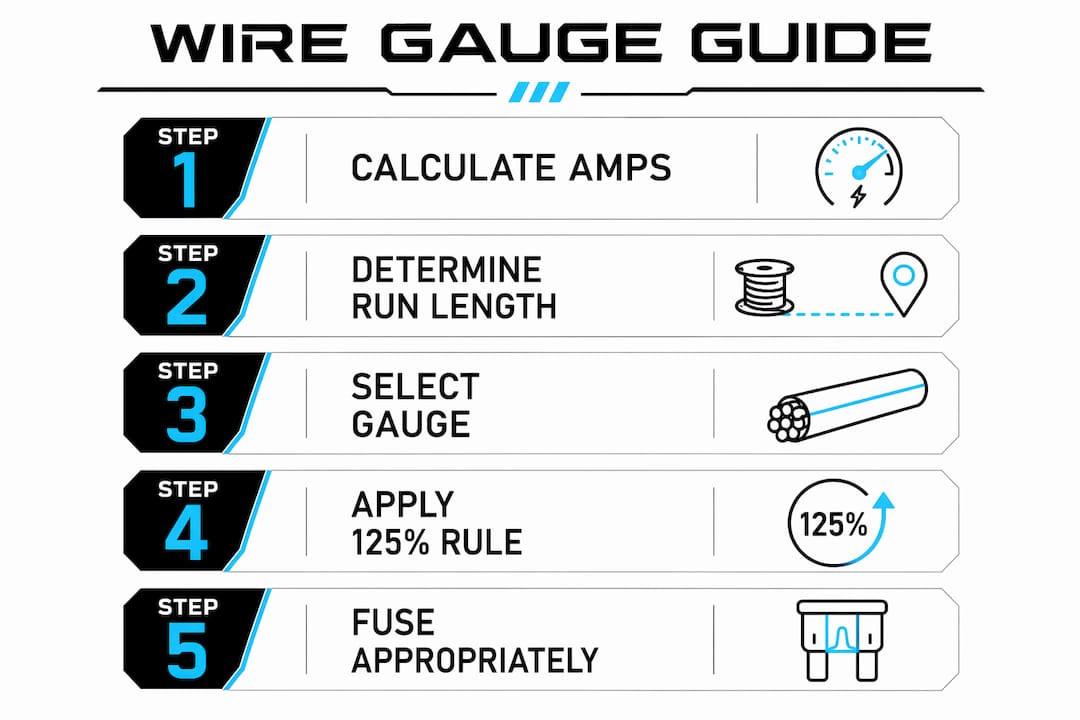
Voltage drop and wire gauge are the most common failure points when linking multiple high-lumen LEDs on a vehicle. Heavier 12 AWG is the practical minimum for most truck runs; step up to 10 AWG for runs over 15 feet or 15 amps. You can also compare lumen output across strip types to nail down your wattage totals before you buy wire.
Pro Tip: When total amperage exceeds 20A or run lengths stretch past 20 feet, consider running separate home-run feeds directly from the battery to each light zone rather than daisy-chaining. This cuts voltage drop dramatically and keeps brightness consistent across all lights.
Modern LED work lights produce far more lumens per watt than halogen equivalents. Many LED pods run less wattage compared to comparable halogen lights, which is why running multiple LEDs on a single truck is practical when the wiring is done right.
Why use a wiring harness instead of point-to-point wiring?
Point-to-point wiring works in theory. In practice, it multiplies your failure points with every connection you add. A purpose-built harness eliminates most of those risks before you even open the hood.
Here is how a properly fused harness circuit flows:
Battery positive → main inline fuse (as close to battery as possible) → relay → distribution to individual light runs → branch inline fuses → lights → chassis ground Each relay lets your switch control a low-current signal while the relay itself handles the high-current load to the lights. Your factory switch wiring never carries more than a few milliamps.
Experienced installers consistently report that wiring infrastructure — gauge, connectors, and routing — fails more often than the LEDs themselves. A pre-made harness solves the most common mistakes: correct gauge wire, sealed connectors, pre-terminated ring terminals, and a single clean ground point.
Never route high-current feeds through interior switch assemblies or thin factory harness wiring. The Wheellightexpress light switching guide covers toggle, upfitter, and remote options so you can match the switching style to your cab setup.
Does your battery and alternator handle the extra load?
A typical truck alternator produces 120–160A at highway RPM, but available reserve at idle is considerably lower. Add up every accessory already running — heated seats, a winch controller, a stereo — then add your new lighting load. If the total approaches your alternator’s rated output, you need to plan for an upgrade.
Symptoms that tell you the charging system is struggling:
- Headlights dim noticeably when the auxiliary lights switch on
- Lights flicker under load or at idle
- Battery voltage drops below 12.4V after extended use and recovers slowly
- Voltage at the battery reads under 13.5V with the engine running at 2,000 RPM
Decision checklist:
- Small install (under 20A total): your stock alternator almost certainly handles it; verify with a multimeter before and after the install.
- Mid-size install (20–40A): measure resting voltage, voltage with lights on at idle, and voltage at 2,000 RPM. If you see more than a 0.5V drop under load, consider a second battery.
- Large install (40A+): plan for a dual-battery setup with an isolator or a higher-output alternator from the start. The Wheellightexpress 2026 buyer’s guide covers alternator and battery upgrade paths in detail.
Where and how should you mount high-lumen lights?
Mounting position shapes both beam performance and long-term durability. Bumper-mounted forward lights eliminate hood glare entirely and project light where you need it without bouncing reflection into your eyes. Cab-top or A-pillar mounts work well for wide flood coverage on job sites and trails but require careful aim to avoid blinding oncoming drivers.
LEDs run cooler than halogens, but they still generate heat at the driver board. Metal housings with adequate airflow behind them extend LED life significantly. Never box a light into a sealed cavity with no airflow. For off-road builds, look for an IP67 or IP68 rating on both the light and its connectors, and use stainless steel or corrosion-resistant mounting hardware. The KC HiLiTES 57" Gravity Titan LED light bar is one example of a high-output bar designed with thermal management and trail durability in mind.
Pro Tip: Design your mounts so you can reach the connectors and inline fuses without removing the light. Serviceability matters most at 2 AM on a trail when a fuse blows.
For custom aesthetic builds, the Wheellightexpress show truck lighting guide walks through placement choices that balance visual impact with practical beam control.
Step-by-step installation checklist and cost ranges
Installation sequence
- Plan and measure: map every light location, measure wire runs, and confirm total amperage.
- Mount lights: secure housings with appropriate hardware; do not tighten fully until beam aim is confirmed.
- Route power and ground cables: keep power away from heat sources and sharp edges; use grommets through any sheet metal.
- Install harness and relays: connect the main fuse at the battery first, then route relay and distribution leads.
- Connect branch fuses and light leads: terminate each light run with its own inline fuse.
- Test all circuits: use a multimeter to confirm voltage at each light before final tightening.
- Secure and seal: zip-tie wiring every 6–8 inches, apply heat-shrink to all exposed terminals, and confirm all connectors are fully seated.
The Wheellightexpress strip light install guide provides model-specific wiring steps that pair well with this sequence.
Time and cost estimates
| Build Complexity | Time Estimate | Approximate Cost Range |
|---|---|---|
| Basic (harness + 2 lights, DIY) | 3–6 hours | $150 |
| Mid-size (harness + 4–6 lights, DIY) | 6–10 hours | $400 |
| Full show/off-road setup (multi-zone) | 10+ hours | $2,000+ |
| Professional install (labor only) | Add 2–4 hours shop time | $150 labor |
A pre-made harness shortens the wiring phase by two to three hours and removes the guesswork on gauge and fuse sizing. DIY point-to-point wiring costs less upfront but carries real risk if gauge or fuse sizing is off.
Key Takeaways
Correct wire gauge, proper fuse placement, and a relay-protected harness are the three non-negotiables for safely running multiple high-lumen LED lights on any truck.
| Point | Details |
|---|---|
| Calculate amps before buying wire | Use A = W ÷ V; apply the 125% rule to size your fuse correctly. |
| Wire gauge determines reliability | Use 12 AWG minimum for most runs; step to 10 AWG for runs over 15 feet or 15 amps. |
| Fuse at the battery, relay at the load | Place the main fuse as close to the battery positive as possible; never run high current through factory switch wiring. |
| Check your charging system | Measure voltage at idle and 2,000 RPM; add a second battery or upgraded alternator for installs over 40A. |
| Wheellightexpress harness kits | Pre-fused, correctly gauged, and U.S.-designed — the dependable choice for multi-light builds with a satisfaction guarantee. |
The wiring is where most builds succeed or fail
Most enthusiasts spend weeks choosing lights and an afternoon choosing wire. That ratio is backwards. The lights are the easy part. A 40W LED pod from a reputable brand will perform reliably for years. What fails is the infrastructure around it: undersized wire that heats up under load, a fuse sized for convenience rather than the circuit, a ground bolted to a painted surface that corrodes within a season.
My honest recommendation: if you are building a multi-zone show truck or a serious off-road rig with four or more lights, buy the harness first and plan the lights around it. A U.S.-designed harness from Wheellightexpress gives you correct gauge, sealed connectors, and factory-grade ring terminals out of the box. That is not a small thing. It means your first test drive does not become a troubleshooting session.
DIY wiring is absolutely worth doing on a simple two-light bumper setup where run lengths are short and the math is easy. Scale up to six or eight lights across multiple zones and the wiring complexity grows faster than most builders expect. At that point, a purpose-built harness pays for itself in saved time and avoided failures. Document your wiring with photos before you close everything up, and keep a small kit of spare fuses and connectors in the cab. You will thank yourself eventually.
Wheellightexpress harnesses and kits for your multi-light build
You have done the math, planned the routes, and picked your lights. Now you need wiring that keeps up with the build.

Wheellightexpress designs its wire harnesses and LED kits in Louisiana, U.S.A., with factory-grade ring terminals, pre-sized gauge wire, and sealed connectors that address every failure mode covered in this guide. The replacement wire harness handles most multi-light setups right out of the box, and the wire harness leads let you extend or customize runs without splicing into the main harness. Financing is available, so you can build the full setup now rather than piece it together over multiple orders. Every purchase comes with a satisfaction guarantee. Browse the full harness and lighting kit lineup at wheellightexpress.net and reach out for custom kit recommendations if your build has specific zone or color requirements.
Trusted sources and further reading
The technical guidance in this article draws from installer experience and published resources. These are worth bookmarking for deeper reference:
Key principle from industry experts: “The LED transition is about consistent delivered light as much as peak lumen numbers — LEDs reduce electrical load compared to halogen, supporting multiple lights on a single vehicle when wired correctly.” — Strobes N’ More
- Voltage drop and wire gauge guidance for automotive LED installs — DIY.StackExchange
- High Lumen Strip Light Install Guide — Wheellightexpress
- Truck Light Switching Systems: What Enthusiasts Must Know — Wheellightexpress
- Best LED Upgrades for Trucks: 2026 Buyer’s Guide — Wheellightexpress
A quick note on U.S. road legality: white and amber auxiliary lights are generally permitted for on-road use when aimed correctly; red and blue are restricted to emergency vehicles in most states. Off-road use gives you more color freedom, but always confirm your state’s specific rules before driving on public roads with auxiliary lighting active. This article is general information — check your state’s vehicle code or consult a licensed installer for your specific situation.