

Vehicle LED lighting uses semiconductor diodes to convert electrical current directly into light, and the single most important selection rule is this: match your optics and driver specs to your vehicle, not just the lumen number on the box. A 10,000-lumen retrofit bulb dropped into a halogen housing can produce dangerous glare and worse road illumination than the stock bulb it replaced.
- LED systems combine three core elements: the diode package, the optical assembly (reflector or projector lens), and a constant-current electronic driver. All three must work together.
- Proper optics and thermal management determine safety and real-world performance far more than raw lumen counts. Beam pattern, cut-off line, and junction temperature are the specs that actually matter.
Buyers looking for a quick product decision can jump to the buying checklist. Installers should read the thermal management and installation sections. Anyone curious about adaptive matrix lighting and where the technology is heading will find that in the advanced systems section near the end.
Table of Contents
- How does vehicle LED lighting actually work?
- What types of LED lighting are used in vehicles?
- Why thermal management determines how long your LEDs last
- What are the real advantages and trade-offs of LED vehicle lighting?
- What does installing LED lighting actually cost and take?
- How to choose the right LED for your vehicle and use case
- Common LED myths that lead to bad purchases
- What advanced LED systems mean for modern vehicles
- Key Takeaways
- The part most guides skip entirely
- Wheellightexpress makes your LED upgrade straightforward
- Useful sources for further reading
How does vehicle LED lighting actually work?
An LED (light-emitting diode) is a semiconductor diode that emits photons when forward current flows through its p-n junction. Unlike a halogen bulb, which heats a tungsten filament to incandescence, an LED produces light through electroluminescence. That distinction matters because LEDs are current-driven devices: a small rise in forward voltage (VF) causes an exponential increase in forward current (IF), which is why a constant-current driver is not optional — it is the component that keeps the diode alive.
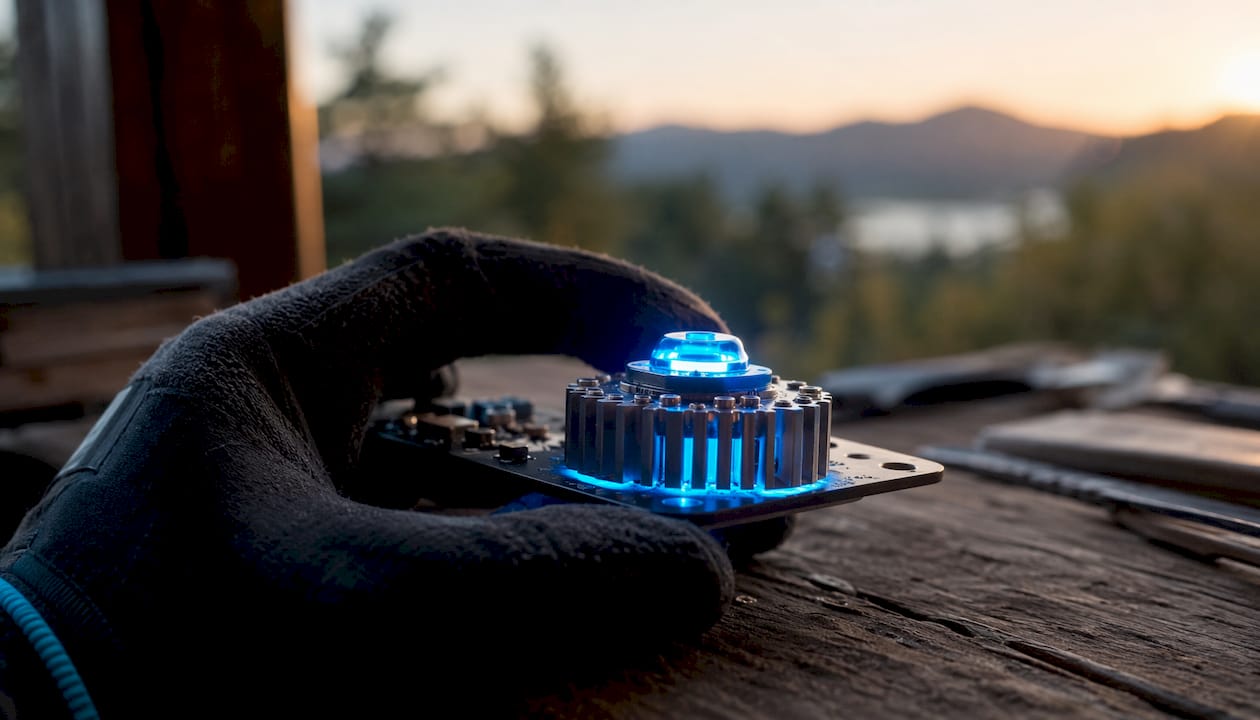
The components inside an automotive LED lamp
A complete automotive LED lamp has five functional layers working in sequence:
- Diode package — one or more LED chips mounted on a ceramic or metal substrate, rated by forward voltage (VF, typically 2.8–3.5V per chip) and forward current (IF, often 350 mA to 1 A per string).
- LED array/PCB — chips are arranged on a metal-core PCB (MCPCB) that spreads heat away from the junction. Thermal vias conduct heat into the heatsink below.
- Constant-current LED driver — regulates IF regardless of supply voltage fluctuations. Modern automotive LED drivers use a two-stage topology: a boost converter generates a stable intermediate DC rail (commonly 40–60V), then a buck stage delivers regulated current to each LED string. Integrated driver ICs add over-temperature protection and diagnostic reporting.
- Optics — a reflector or projector lens shapes the raw output into a usable beam. This is where most retrofit failures happen: halogen reflectors are shaped for a filament’s spatial light distribution, not for an LED’s point-source geometry.
- Thermal path — heatsink, thermal interface material, and airflow carry junction heat away from the chip.
Quick glossary
| Term | Definition |
|---|---|
| Forward current (IF) | Operating current through the diode; controls brightness |
| Forward voltage (VF) | Voltage drop across the diode at rated IF |
| Lumen (lm) | Total light output in all directions |
| Candela (cd) | Intensity in a specific direction; what matters for road illumination |
| Color temperature (K) | Perceived color of white light; 4,000–5,000K suits most driving |
| PWM dimming | Rapid on/off switching to vary perceived brightness; frequency above ~200 Hz avoids visible flicker |
| Beam cut-off | The sharp upper boundary of a low-beam pattern that prevents glare |
Why optics beat lumens every time: “Useful light” is defined by beam pattern and cut-off, not headline lumen numbers. Good optics place candela precisely where it is needed on the road and reduce driver fatigue. A mismatched point-source LED in a halogen reflector scatters light in every direction, including into oncoming drivers’ eyes.
Retrofit plug-and-play swaps are problematic precisely because of this spatial mismatch. A halogen filament is roughly 5 mm long and sits at the focal point of a reflector designed around that geometry. An LED chip is a fraction of a millimeter across and sits in a different position. The reflector cannot redirect that light correctly, regardless of how many lumens the chip produces.
What types of LED lighting are used in vehicles?
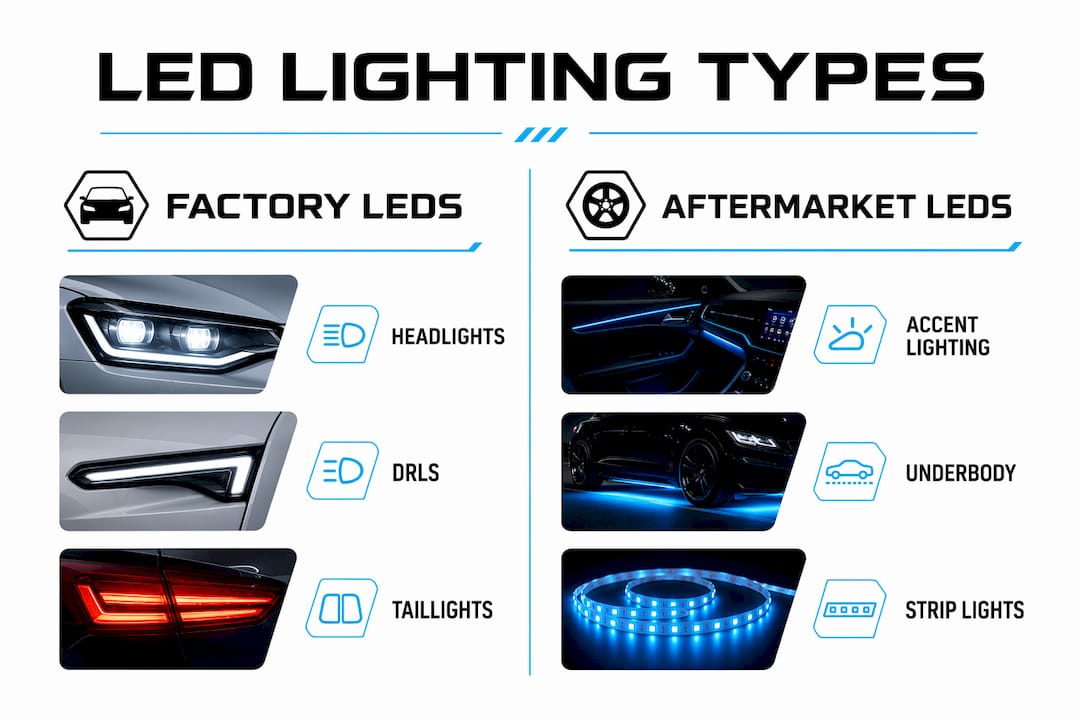
LED lighting covers nearly every light function on a modern vehicle. The types of automotive LED lighting break down into six practical categories, each with different performance expectations and legal considerations.
- Sealed headlamp assemblies — factory-style units where the LED, optics, and driver are engineered together. These are the safest headlamp upgrade because the beam pattern is designed from the start for the LED’s geometry. They must meet FMVSS 108 beam distribution requirements in the U.S.
- LED retrofit bulbs — drop-in replacements for H7, H11, 9005, and similar sockets. Convenient, but the optics mismatch problem applies here. Legal for fog lights and auxiliary positions in most states; headlamp use is a gray area federally and outright restricted in some states.
- Daytime running lights (DRLs) and light bars — high-visibility forward lighting that operates during the day. DRLs are often factory-installed on vehicles built after 2010. Aftermarket light bars, like the KC HiLiTES FLEX ERA 3, are popular for off-road use and must be covered or aimed down when driving on public roads in most states.
- Taillight, stop, and turn signal modules — sealed LED assemblies or direct-fit bulb replacements for 1157, 3157, and similar sockets. LEDs respond in roughly 200 microseconds versus 150–250 milliseconds for incandescent bulbs, a meaningful safety difference at highway speeds.
- Interior and accessory strips — dome lights, map lights, trunk lights, and ambient strips. Low-risk installs with immediate visual impact. Color temperature matters here: 4,000–5,000K reads as natural white; 6,000K+ looks cool and modern but can feel harsh in a cabin.
- Wheel lights, rock lights, and underbody accent strips — decorative and functional off-road lighting. State laws on underbody colors vary significantly: red and blue are restricted in most states because they mimic emergency vehicle signals. White and amber are generally the safest choices for street-legal builds.
Pro Tip: Before buying any accent or underbody lighting, check your state’s specific color and placement rules. What is legal in Texas may not be legal in California, and enforcement varies by county.
Factory LED installations are now common on headlights, DRLs, and taillights across most new vehicle lines. Aftermarket-friendly positions with the lowest installation risk are interior bulbs, license plate lights, and turn signals.
Why thermal management determines how long your LEDs last
Thermal path and driver protection are the leading causes of LED failure in vehicles, not the diodes themselves. Up to 85% of input energy in an LED system becomes heat that must be removed through the heatsink or active cooling. When that heat builds up at the junction, brightness drops, color shifts toward yellow, and eventually the diode fails permanently.
Junction temperature (TJ) is the key variable. Every LED has a maximum rated TJ, typically 125–150°C for automotive-grade chips. The thermal resistance from junction to ambient (RθJA) determines how quickly heat travels from the chip to the surrounding air. A poorly designed heatsink or a tight housing with no airflow raises TJ even at moderate power levels.
Common thermal approaches in automotive LEDs include passive aluminum heatsinks (standard for most retrofit bulbs and strips), MCPCB thermal vias that pull heat directly through the board, and forced-air cooling fans built into some high-power retrofit bulbs. Thermal interface materials (TIMs) like phase-change pads fill microscopic air gaps between the chip substrate and heatsink, cutting RθJA significantly. Early dimming after 30–60 minutes of operation is the clearest sign of thermal stress. Color shift toward warm yellow is a sign of junction degradation. Flickering that worsens as the lamp heats up usually points to a driver protection circuit throttling current to protect the diode.
Pro Tip: When installing LED strips near the engine bay or exhaust routing, use silicone-jacketed wire and mount strips on aluminum channels rather than directly on plastic. The channel acts as a heatsink and keeps strip temperatures well below the adhesive’s failure point.
Understanding how battery and power systems interact with high-draw auxiliary lighting is equally important, particularly for off-road builds running multiple light bars and accent systems simultaneously.
What are the real advantages and trade-offs of LED vehicle lighting?
LEDs offer higher efficiency, faster response, longer rated lifetime, and more compact design options than halogen or HID. The trade-offs are upfront cost and the need for system-level compatibility. Neither side of that equation is trivial.
LED vs. halogen vs. HID: a direct comparison
| Feature | LED | Halogen | HID (Xenon) |
|---|---|---|---|
| Typical efficiency | High (most energy to light) | Low (most energy to heat) | Moderate |
| Color temperature | 4,000–5,000K (adjustable) | warm yellow | 4,000–5,000K |
| Rated lifetime | Long (often 25,000+ hours) | Short (500–1,000 hours) | Moderate (approximately 1,500–2,500 hours) |
| Response time | ~200 microseconds | ~150–250 milliseconds | Warm-up delay (seconds) |
| Electrical complexity | Requires driver circuit | Simple resistive load | Requires ballast |
| Glare risk | High if optics mismatched | Low in correct housing | Moderate |
| Initial cost | Higher | Lowest | High |
The instant-on response of LEDs has a concrete safety benefit in brake lights. At 60 mph, a 250-millisecond faster brake light response gives the following driver roughly 22 additional feet of stopping distance. That is not a styling benefit; it is physics.
The glare risk deserves equal attention. Mis-matched point-source LEDs in halogen reflectors scatter light unpredictably, including directly into oncoming drivers’ eyes. High lumen output without correct optics creates driver fatigue and is a safety hazard, not an upgrade. When comparing lumen output across LED strips, always cross-reference beam angle and candela ratings alongside the raw lumen figure.
HID systems produce excellent output but require a warm-up period and a high-voltage ballast. They are being phased out of new vehicle designs in favor of LED assemblies that offer comparable output with faster response and lower long-term maintenance.
What does installing LED lighting actually cost and take?
Installation complexity depends on whether you replace a sealed assembly, swap individual bulbs, or add aftermarket accent lighting. Those three scenarios have very different cost profiles, time requirements, and risk levels.
Typical cost ranges by scenario
| Scenario | Parts cost (approx.) | DIY time | Professional labor |
|---|---|---|---|
| Interior/strip accent install | $20–$70 | 30–60 min | $50–$120 |
| Turn signal / taillight bulb swap | $15–$50 | 15–30 min | $50–$90 |
| Single sealed headlamp assembly | $80–$350 | 1–3 hrs | $100–$250 |
| Full headlamp assembly swap (pair) | $200–$800 | 2–5 hrs | $200–$450 |
| Advanced matrix/ADB retrofit | $500–$1,800 | Not recommended DIY | $400–$900 |
Cost ranges are general market estimates. Prices vary by vehicle make, model, and supplier.
Steps for a typical retrofit install
- Vehicle compatibility check — confirm socket type (H7, H11, 9005, etc.), housing clearance for heatsinks, and whether the vehicle uses a CAN-bus system that monitors bulb resistance.
- Power and ground routing — plan wire runs, select appropriate gauge wire, and identify a switched 12V source. For auxiliary lighting, a wire harness with a relay protects the vehicle’s factory wiring from high-draw loads.
- Driver and adapter selection — CAN-bus-compatible vehicles often require a load resistor or decoder module to prevent error codes and flickering. Modern integrated LED driver ICs include diagnostics that can communicate faults back to the vehicle’s BCM.
- Aiming and adjustment — sealed headlamp assemblies require beam aiming after installation. Most states require headlamp aim within specific vertical and horizontal tolerances. A misaimed headlamp is both a safety hazard and a traffic violation.
- Post-install diagnostics — check for error codes, verify all functions (high beam, low beam, DRL, turn signal), and confirm no flickering under load.
- Hidden costs to budget for: headlamp alignment at a shop ($20–$60), harness adapters for non-standard sockets, and ECU coding for vehicles with adaptive lighting systems.
- For full truck light kits, plan for a half-day DIY install or a full shop appointment if you want professional routing and weatherproofing.
How to choose the right LED for your vehicle and use case
Prioritize optical match and certified assemblies before raw lumen claims. That single rule eliminates most bad purchases.
Step-by-step buying checklist
- Identify the exact socket or assembly type your vehicle uses (check the owner’s manual or a fitment database).
- For headlamps, look for DOT/FMVSS 108-compliant sealed assemblies. Avoid retrofit bulbs for headlamp positions unless the housing was specifically designed for LED point-source geometry.
- Confirm driver specs: constant-current regulation, PWM frequency above 200 Hz if dimming is involved, and over-temperature protection.
- Check color temperature: 4,000–5,000K for daily driving visibility; 5,000–6,000K for a clean modern look with minimal visibility trade-off.
- Verify IP rating: IP65 minimum for exterior positions, IP67 or higher for wheel lights, rock lights, and underbody strips exposed to water immersion.
- Confirm warranty and return policy. Quality LED assemblies typically carry a 1–3 year warranty; shorter coverage often signals a lower-grade driver or thermal design.
Matching your need to the right product category
| Primary goal | Recommended product category |
|---|---|
| Nighttime driving visibility | DOT-compliant sealed headlamp assembly |
| Daytime presence / DRL | Factory-style DRL module or light bar (aimed down off-road) |
| Brake / turn signal safety | Direct-fit LED module or CAN-bus-compatible bulb |
| Wheel and accent aesthetics | IP67+ LED strip with constant-current driver |
| Off-road auxiliary lighting | Auxiliary pod lights with dedicated relay harness |
| Interior ambiance | Low-power LED strip with PWM dimmer, 4,000–5,000K |
Reading specs correctly: lumens measure total output in all directions; candela measures intensity in the direction the beam is aimed. A 3,000-lumen bulb with poor optics delivers less usable road illumination than a 1,800-lumen sealed assembly with a precision projector lens. Always ask for candela or beam pattern data when evaluating headlamp products. For best LED upgrades for trucks, sealed assemblies and purpose-built auxiliary pods consistently outperform generic retrofit kits.
Common LED myths that lead to bad purchases
The three most damaging misconceptions about LED vehicle lighting cost enthusiasts money and, in the case of headlamps, create genuine safety risks.
- Myth: More lumens means better headlights. Lumens measure total output, not road illumination. Candela and beam pattern determine how much light actually reaches the road in front of you. A high-lumen bulb in the wrong housing scatters light everywhere except where you need it.
- Myth: LED retrofits are always plug-and-play. Halogen reflectors are shaped for a filament’s spatial distribution. Swapping in an LED point-source without matched optics produces an incorrect beam pattern. Many jurisdictions effectively prohibit non-certified LED retrofits for headlamp positions for exactly this reason.
- Myth: Whiter light is always better. Color temperatures above 6,000K shift toward blue-white, which reduces contrast in rain and fog. The 4,000–5,000K range provides the best balance of visibility and color rendering for most driving conditions.
- Myth: Any LED will work in any socket. CAN-bus systems monitor bulb resistance. An LED’s low power draw registers as a burned-out bulb, triggering error codes and rapid-flash turn signals. A decoder module or load resistor solves this, but it must be factored into the install.
Pro Tip: When evaluating headlamp products, ask the supplier for a photometric test report or beam pattern image. Any reputable manufacturer of DOT-compliant assemblies can provide one. If they cannot, that tells you something important.
What advanced LED systems mean for modern vehicles
Modern LED lighting is becoming a networked vehicle function with adaptive beam control, per-pixel diagnostics, and integration into the vehicle’s electronic architecture. This shift affects both what you can buy and how complex repairs and retrofits have become.
Adaptive driving beam (ADB) systems use a camera or radar input to identify oncoming vehicles and selectively dim individual LED segments in the beam pattern, keeping the road ahead fully illuminated while avoiding glare for other drivers. The system requires a matrix of individually controlled LED zones, a pixel controller, and a camera processing unit. Onsemi’s system solution guide notes that 12 pixels is a current standard for ADB modules, with higher pixel counts increasing both resolution and cost.
The industry trajectory is clear: LED assemblies are migrating from basic on/off components to networked devices enabling adaptive matrix lighting and per-pixel diagnostics. That shift changes retrofit complexity fundamentally — a replacement assembly for an ADB-equipped vehicle may require ECU coding, not just a physical swap.
LED driver and controller communication has moved from simple PWM signals to SPI, CAN, and emerging 10BASE-T1S Ethernet protocols that allow per-zone brightness commands and real-time fault reporting back to the vehicle’s body control module. For enthusiasts, this means app-controlled LED systems are increasingly viable even for complex multi-zone builds.
Up to 38% of new vehicles may be equipped with ADB technology by 2030. For aftermarket buyers, the practical implication is straightforward: if your vehicle already has an ADB system, replacing the headlamp assembly is a job for a shop with OEM diagnostic tools, not a driveway swap.
| Advanced feature | What it requires | Aftermarket impact |
|---|---|---|
| ADB / matrix lighting | Pixel controller, camera, ECU coding | Complex retrofit; shop-level work |
| PWM zone dimming | Constant-current driver, >200 Hz PWM | Specify driver PWM frequency when buying |
| CAN-bus diagnostics | Compatible driver IC, BCM integration | Decoder modules needed for most retrofits |
| App/remote control | Wireless controller, dedicated harness | Viable for accent and auxiliary lighting |
Key Takeaways
LED vehicle lighting performs best when optics, driver specs, and thermal design are matched to the vehicle and use case — not selected by lumen count alone.
| Point | Details |
|---|---|
| Match optics first | Sealed assemblies with matched optics outperform high-lumen retrofit bulbs in halogen housings. |
| Manage heat actively | Up to 85% of LED input energy becomes heat; heatsink design and thermal interface materials determine lifespan. |
| Verify legal compliance | Headlamps must meet FMVSS 108 in the U.S.; underbody and accent colors vary by state law. |
| Understand driver specs | Constant-current drivers with PWM above 200 Hz and over-temperature protection are required for reliable automotive use. |
| Wheellightexpress for accent and wheel lighting | Wheellightexpress designs and assembles IP-rated LED strips and wire harnesses in the U.S., reducing retrofit compatibility risk for truck and off-road builds. |
The part most guides skip entirely
Most LED buying guides stop at lumen numbers and color temperature. That is the wrong frame. The question that actually determines whether a lighting upgrade works is whether the optical system was designed around the LED’s light source geometry.
A sealed headlamp assembly costs more than a retrofit bulb. That cost difference buys you a reflector or projector lens that was engineered specifically for the LED chip inside it. The beam cut-off is sharp. The candela distribution matches what the road needs. The driver is integrated and thermally managed. You are not paying for marketing; you are paying for the engineering that makes the light go where it should.
Accent lighting, wheel lights, and rock lights are a different story. Here, lumen output and IP rating matter more than beam precision, and the installation variables are more forgiving. This is where enthusiasts have the most creative freedom and the lowest legal risk, provided they stay away from red and blue in states that restrict those colors on non-emergency vehicles.
The one thing we consistently see overlooked is driver quality in budget LED strips. A strip that flickers at low brightness, produces radio interference, or dims unevenly after a few months almost always has a poorly regulated driver, not a bad diode. Spend the money on the driver and the harness. The diodes will outlast the vehicle if the electrical foundation is solid.
Wheellightexpress makes your LED upgrade straightforward
Wheellightexpress designs and assembles LED lighting kits and wire harnesses in Louisiana, giving truck and off-road enthusiasts a direct path to compatible, quality-built accent and wheel lighting without the guesswork of overseas generic kits.

The product line maps directly to the installation scenarios covered in this guide. The Wheel Light Ring and Strip handles wheel and accent applications with IP-rated construction built for outdoor exposure. The wire harness leads solve the CAN-bus and power routing challenges that trip up most DIY installs, with purpose-built connectors that protect your factory wiring. If you are replacing an existing kit, the replacement wire harness keeps your build running without starting from scratch.
Financing options are available, so you can get the full kit without waiting. Browse the full product range at Wheellightexpress or contact support directly to confirm fitment for your specific vehicle before you order.
Useful sources for further reading
- FMVSS 108 / Automotive lighting regulations (Wikipedia) — Overview of U.S. and international lighting regulations, beam distribution requirements, and stop lamp intensity standards. Best for buyers and installers who need to understand legal compliance.
- LED headlight optics explained (The Drive) — Clear explanation of why beam pattern and cut-off matter more than lumen output. Recommended reading before any headlamp purchase.
- Onsemi Advanced Front and Rear LED Lighting System Guide — Technical reference for two-stage LED driver topology, PWM dimming, ADB architecture, and market adoption projections. Best for engineers and advanced enthusiasts.
- TI Fundamentals of Automotive LED Driver Circuits — Whitepaper covering constant-current regulation, thermal runaway prevention, and integrated driver IC diagnostics. Essential reading for anyone selecting or designing a driver circuit.
- HELLA LED headlights: technique, advantages, and correct setting — Practical technical guidance on thermal management, junction temperature, and cooling strategies from a major OEM lighting supplier.
- What are LED headlights and how do they work? (Motorpoint) — Consumer-level explanation of retrofit limitations and legal considerations for headlamp upgrades.
- Wheellightexpress — LED kits, harnesses, and accessories — U.S.-designed and assembled LED strips, wire harnesses, and wheel light kits for truck and off-road applications.
A note on regulatory sources: For definitive U.S. headlamp compliance, always verify against the current FMVSS 108 text published by NHTSA at nhtsa.gov. State-level accent and underbody lighting rules change periodically; check your state DMV or motor vehicle code directly before purchasing decorative lighting.
This article is general technical information, not legal or professional installation advice. Confirm current regulations with NHTSA, your state DMV, or a qualified automotive technician for your specific vehicle and jurisdiction.